For a downloadable PDF version of this guide CLICK HERE! 


The Churchill River system runs from Alberta, across Northern Saskatchewan and into Manitoba where it dumps into Hudson’s Bay. It is over 1600km long and we have had the privilege of exploring it on two separate occasions. The Churchill River has everything from lakes and rapids, to canyons and waterfalls. Don’t forget your camera as the sunsets in North Saskatchewan are incredibly beautiful. If you’re lucky, maybe one night the northern lights will put a show on for you.

Canoe Trip #1: Devil Lake to Corner Rapids


Canoe Trip #2: Stack Lake to Missinipe


Canoe Trip #3: Devil Rapids


ADVENTURE STATISTICS

Time Required: 3 days/3 nights (depending on your itinerary)

Location: 80km North of La Ronge, SK

Distance: 20km-50km depending on your itinerary

Difficulty: 7/10 – Route finding, portages, outdoor living.

Season: June to September

Additional Requirements: Camping equipment, canoe, PFD, paddles.


DRIVING DIRECTIONS

From Prince Albert: Head north on the number 2 highway out of Prince Albert. Follow that highway 240km to La Ronge where the highway becomes the 102 and winds its way 78km to Missinipe, SK.


WHAT TO BRING

  • Comfortable Footwear: Water shoes. Bring a pair of water shoes for portages and a pair of hikers or running shoes for the nights when you’re outside camping. Your feet will be wet for most of the day so it’s really nice to put on a dry pair of shoes at night.
  • Water: Having a good water purification pump or purification tabs are a good idea.
  • Snacks/Food: The amount of people on your trip will determine the amount of food you should bring. Here’s a list of some basic foods we packed for our trip:
    • Coffee
    • Powdered milk
    • Tang powder
    • Bacon/Eggs
    • Beef Jerky
    • Salt/Pepper
    • Oatmeal/Brown Sugar
    • Pancake Mix
    • Fish Beer Batter
    • Cheese
    • Syrup
    • Jam
    • Ketchup/Mustard
    • Butter
    • Potatoes
    • Rice
    • Bread

We also had the luxury of having Bush Pie makers with us. If you have access to them or can go buy some, we recommend it! Bush Pies make for a good lunch or evening snack. For our bush pies we had bread, cheese, pizza sauce and salami or sausage and we cooked them over the campfire.

Bush Pie Maker - Saskatchewan- Epic Trip Adventures
Image 1: Bush Pie Maker
  • Weather appropriate clothing: Bring a raincoat! Learn from our mistakes. We got poured on and some of us didn’t have anything to keep us dry. A poncho will suffice. Also bring a sweater, toque, long sleeve shirt, T shirt, multiple pairs of socks, sweatpants, swim trunks, and maybe a bug net of some sort. Bring a hat, sunglasses and sunscreen.
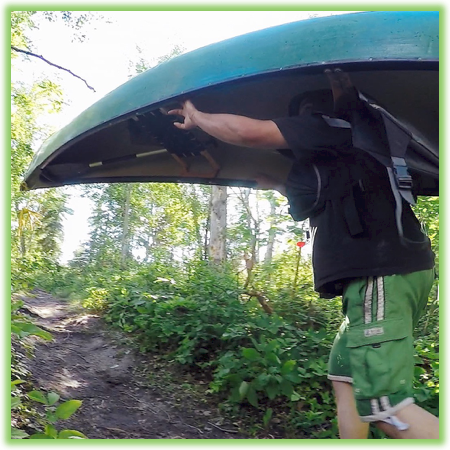
  • Camping Equipment: Knife, cutlery, plates, bowls, cups, pots, pans, grill to place over the fire, bush pie makers, camping stove, propane, gasoline, fire starter, matches, lighter, tent/hammock, sleeping bag, tarp, pillow if you have room, Ziploc bags to keep any valuables dry, lantern, compass and first aid kit. Totes and a sealed barrel are good for storing equipment and food. Pack any personal items you want to keep dry in a dry bag. Bring a fishing rod, tackle, and fileting knife. Great fishing up there.
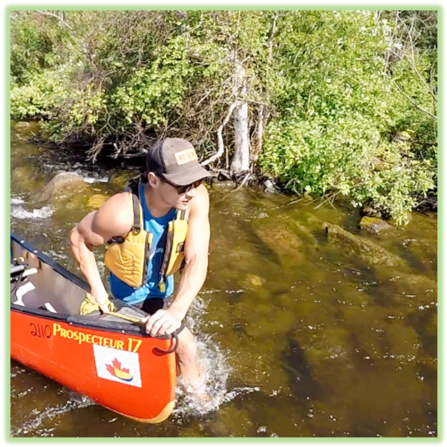
  • Canoeing Equipment: For every 2 people you need 1 canoe, 3 paddles, 2 PFD’s and 1 bailing bucket. Make sure you have an extra paddle in case you lose one. Even if you aren’t running rapids, you will get water in your boat so bring a bailing bucket. We rented all of our equipment from Churchill River Canoe Outfitters in Missinipe, SK. They were very helpful, reasonably priced, and even provided a shuttle that dropped us off with our canoes at the launching area. They also have experienced guides that will take you out and teach you the basics of whitewater canoeing and outdoor survival.

Phone number: (306) 635-4420

Address: Walker street, Missinipe, SK S0J 2P0

Website: www.churchillrivercanoe.com

  • Insect Repellent: Insect repellent can greatly improve your experience. A hat with a bug screen on it, or even a full mesh jacket is a good idea. The bugs in Northern Saskatchewan are huge and relentless. If you are not prepared for them, your trip may be very unpleasant.
  • Maps: Take some handheld laminated maps and keep them connected to your canoe You can usually find something applicable to your trip for purchase at your local outdoor recreation shop.
  • Bear Spray: You are in bear country. Always carry bear spray and keep it easily accessible.
  • Camera: There are numerous photo opportunities you won’t want to miss.
  • This Guide: Print a copy of this guide to reference throughout the trip!


OTHER CONSIDERATIONS

Wildlife: You will be camping in bear country.  It is always advisable to check in at the local Visitor Information Center to learn of any trail closures due to wildlife.  Carry bear spray in an easily accessible location. The guides at Churchill River Canoe Outfitters will have the most up to date information on the last bear sightings and where they have been most commonly making visits. Camping on islands is the best way to avoid bear interactions.


Flights: For our second trip we booked flights. We flew into Stack Lake and then paddled back to Missinipe. We booked through a company called Osprey Wings. It is located right in Missinipe and they were very easy to deal with.  Phone: (306) 635-2112 Email:  Ospreywings@sasktel.net


Leave No Trace: It is important that we enjoy the outdoors responsibly and sustainably. Some key principles to consider when hiking to “Leave No Trace” are:

  • Plan ahead and prepare: Proper planning allows adventurers to hike safely while minimizing damage to the land.
  • Travel on durable surfaces: Stick to the trail when possible. If there is no trail, or you must travel off trail, stay on durable surfaces to reduce your impact.
  • Dispose of waste properly: Pack it in, pack it out.
  • Leave what you find: Leave rocks, plants, archaeological artifacts and other objects of interest as you find them.
  • Respect wildlife: Observe wildlife from a distance. Never feed wild animals.
  • Be considerate of other visitors: Be courteous to others to allow everyone to enjoy their outdoor experience.

To learn more about “Leave No Trace” visit http://www.leavenotrace.ca


ADVENTURE DIRECTIONS: CANOE TRIP #1 (DEVIL LAKE TO CORNER RAPIDS)

Summary: This guide will contain information on what we did on our trip. The beauty of canoeing in North Saskatchewan is having the option to explore hundreds of rivers and lakes. There’s no right or wrong route to choose. Your skill level and physical condition will determine the route that is most suitable for you to take. This route we took is for the intermediate canoer. It requires lining up rapids, portaging, and ferrying across weak class rapids. There is also the option to run some higher class rapids if you want a challenge.


Canoeing The Churchill River Adventure Map - Saskatchewan- Epic Trip Adventures
Image 2: Canoeing The Churchill River Adventure Map


Step-By-Step Guide:

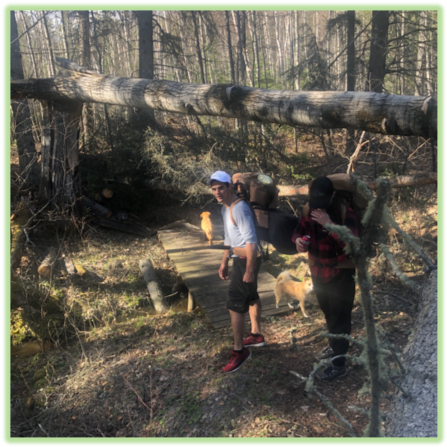
Our trip started at Churchill River Canoe Outfitters on a Friday evening. We had 6 guys, 3 canoes, and we got dropped off at Devil’s Lake boat launch (Route marker #1 on the map) at about 5pm. We paddled northwest across Devil Lake and around Manitou Island to our first portage at Mosquito Rapids. This was only about a 4km paddle and took less than an hour. The portage around the rapids is a short 100m on a well trafficked trail. We launched our boats back in the water, continued paddling passed Murray Falls (we could only hear it because we were upstream) and to the end of Muchaye Island where we found an awesome campsite (Route marker #2 on the map).

Portaging on the Churchill River - Saskatchewan- Epic Trip Adventures
Image 3: Portaging at Mosquito Rapids
Camping on the Churchill River - Saskatchewan- Epic Trip Adventures
Image 4: Camping at Muchaye Island


The next morning, we took off from our campsite and paddled across Barker Lake and around the north side of Barker Island to a point called Hank’s Hotel. There are nice campsites at Barker Island and at Hank’s Hotel. We continued up the rapids, ferrying across to the North side of the river, and then stopped at a little island before getting out and lining our canoes up the South side of that island. Once passed those rapids it was a straight shot to Surf City (Route marker #4 on the map). Lining our canoes over Surf City was a little more challenging.


Lining up the Churchill River - Saskatchewan- Epic Trip Adventures
Image 5: Lining up Surf City


After passing Surf City we headed North passed Carla’s Rapids and then West toward Scouts Island (Route marker #3 on the map). This was where we spent most of the afternoon. We shot Corner Rapids a few times to get some confidence and practice our white water skills. Then we tried a short set of rapids beside Ric’s Falls that didn’t go as well.


Canoeing The Churchill River - Saskatchewan- Epic Trip Adventures
Image 6: Corner Rapids
Canoeing The Churchill River - Saskatchewan- Epic Trip Adventures
Image 7: Ric’s Falls


After an afternoon of adrenaline and fun, we decided to head back to Surf City to camp. We found a great campsite above the rapids. After jumping in the rapids and going for a ride a few times, we grabbed our fishing rods to catch dinner. There is an eddy on the North bank of the rapids that was very generous with fish. We had beer battered fish for supper before calling it a night.


Fishing on the Churchill River - Saskatchewan- Epic Trip Adventures
Image 8: Mattson catching a fish at Surf City


When we woke up the next morning it was raining. Some of us weren’t prepared for the rain and a raincoat or poncho would have been very nice. We paddled down Surf City, across Barker Lake, then around the South side of Muchaye Island. We portaged our gear around Mosquito Rapids on the same trail we went up the day before, but left our canoes at the top. After transporting all our gear we got back in the canoes and paddles all the way around Muchaye Island to the Murray Channel on the north side of the island. The Murray Channel has four sets of rapids all in a row. The rapids are class 3, then 2, then 3, then 1 and there are little eddies after each set to stop and wait for your comrades. After the second class 3 set of rapids there is a whirlpool as a result of the waterfall and rapids meeting. If you stay left you can avoid it, but paddle hard!


Canoeing The Churchill River - Saskatchewan- Epic Trip Adventures
Image 9: Paddling to the Murray Channel in the rain


After coming out of Murray Rapids we headed right around the corner of Muchaye Island to where we had left our gear from the portage. We packed up and continued East across Devil Lake to the top of Otter Rapids. At this point we decided we needed shelter from the rain and found a perfect spot at the Otter Rapids campground (Route marker #5 on the map). There’s a portage on the East side of the river before the rapids begin that will take you up to the bridge. The campground is on the road just passed the east end of the bridge.

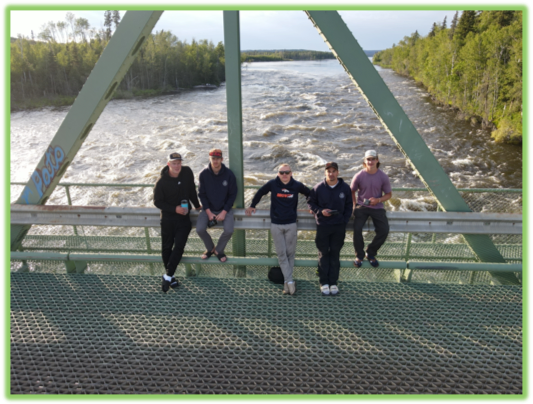
Before drying off completely we had one last thing to check off the bucket list. Jumping off of the Otter Rapids Bridge has been on our to-do list for some time, and we did it. There are signs on the bridge written in spray paint pointing out the safest place to jump.  This is a dangerous activity and we only recommend jumping if you are a strong swimmer and the water level is high.

Otter Rapids Campground - Saskatchewan- Epic Trip Adventures
Image 10: Otter Rapid’s Campground
Otter Rapids Bridge - Saskatchewan- Epic Trip Adventures
Image 11: Otter Rapid’s Bridge


The next morning, we shot the Otter Rapids before getting picked up by the Churchill River Canoe Outfitter’s shuttle. Overall the trip was a huge success and we’d highly recommend this route to anyone looking to go on a Canoe Trip in Northern Saskatchewan.


ADVENTURE DIRECTIONS: CANOE TRIP #2 (STACK LAKE TO MISSINIPE)

Summary: This guide will contain information on what we did on our second trip. The route we took is for the intermediate canoer. It requires navigating through small to medium rapids, portaging, and long lake paddles. There is also the option to run some higher-class rapids if you want a challenge.


Stack Lake to Missinipe Adventure Map - Saskatchewan - Epic Trip Adventures
Image 12: Canoeing Stack Lake to Missinipe Adventure Map


Step-By-Step Guide:

Our first day began with us hopping into two float planes, getting dropped off in Stack Lake, unloading our gear from the plane, and then loading it into the canoes. We made our way Northwest to our first campsite at the “Slick” or “Rooster Tail Rapids” (Route marker #1 on the map).  We dropped our gear off there, launched our canoes and headed Northwest to a portage that would eventually dump us into McIntosh Lake.

Missinipe Float Plane - Saskatchewan - Epic Trip Adventures
Image 13: Boarding the float plane in Missinipe
Churchill River Portage - Saskatchewan - Epic Trip Adventures
Image 14: Portaging to McIntosh Lake

We paddled all the way to the South end of McIntosh Lake, where there is a set of Class 2 rapids. These rapids dump into Trout Lake and were a good starter set to run because they were the right mix of challenging yet makeable. From there we passed Trout Falls, Little trout rapids (very easy), and then made our way back to the Slick (our first night campsite). The Slick is a fun set of rapids with minimal risk that is great for beginners to learn on.  We played on these rapids a few times before calling it a night and setting up camp.

Churchill River The Slick - Saskatchewan - Epic Trip Adventures
Image 15: The Slick
Churchill River The Slick - Saskatchewan - Epic Trip Adventures
Image 16: Camping at The Slick

Day two we set off East and South through some channels and hit Rock Trout Rapids (Route marker #2 on the map). There is a portage that takes you across the first set of rapids. We portaged our gear and then ran the rapids with empty boats. These rapids were a challenge, and we had multiple wipeouts. After Rock Trout Rapids we reached Little Rock Trout Rapids which we shot with gear in our boats. After some more paddling we popped out into Mountney Lake.


Churchill River Paddling - Saskatchewan - Epic Trip Adventures
Image 17: Paddling across Mountney Lake

We paddled our way to the South end of Mountney Lake. After leaving the lake there were a few small rapids that we shot with gear (Upper and Lower Chief Rapids), both class 1+. After these rapids we were in Nipew (Dead) Lake. Dead Lake is roughly 10km long and can be quite a challenging paddle depending on wind direction. We headed straight East to the end of the lake, keeping Boyes and Boyle Island to the North of us. Straight ahead at the East end of the lake is Devil Rapids Lodge.

Churchill River Dead Lake - Saskatchewan - Epic Trip Adventures
Image 18: Planning the route across Dead Lake
Churchill River Paddling - Saskatchewan - Epic Trip Adventures
Image 19: Paddling Dead Lake


We made our way through the channels at the Northeast end of Nipew Lake to find a campsite for the night. There are two campsites around there. One on the North side of the river on the mainland, and one on an island that we chose to stay at a little bit farther downstream (Route marker #3 on the map).

Churchill River Campsite - Saskatchewan - Epic Trip Adventures
Image 20: Night two campsite
Churchill River Campsite - Saskatchewan - Epic Trip Adventures
Image 21: Night two campfire


Day three we set off and paddled around the south side of Two lake Island with the hopes of making it to Sluice Falls for lunch. We made it through Hayman Lake and stopped at the portage trail at the top of Sluice Falls (Route marker #4 on the map). Sluice Falls, and the rapids before it, is a long set of rapids too treacherous for a canoe. Most people portage around this. You’ll find this 850m portage on the West side of the river just before the rapids start and there is a great campsite at the other end.

Churchill River Paddling - Saskatchewan - Epic Trip Adventures
Image 22: Paddling to Sluice Falls
Churchill River Portage - Saskatchewan - Epic Trip Adventures
Image 23: Portaging Sluice Falls


This is where our trip takes a turn. During our lunch break at the Sluice Falls campsite, we were approached by a man in a jet boat telling us that we had to evacuate due to the spreading forest fires and smoke rolling in.  We packed up our bags and motored back to Missinipe in the jet boat (Route marker #5 on the map). That was the end of our trip.

Churchill River Sluice Falls - Saskatchewan - Epic Trip Adventures
Image 24: Sluice Falls
Churchill River Speed Boat - Saskatchewan - Epic Trip Adventures
Image 25: Getting evacuated


If our plans didn’t get interrupted by fires, we would have continued to Corner Rapids, Surf City, through Barker Lake and finished with Otter Rapids.  During our first trip we made it to Corner Rapids and finished at Otter Rapids, which was the intended last leg of this journey. So, in other words, if you combine Canoe Trip #1 and Canoe Trip #2, we completed everything from Stack Lake to Otter Rapids. It was a little unfortunate as some of our team had never paddled Otter Rapids before, but the positive is that we didn’t get burnt down or caught in a forest fire.

Missinipe Cabin - Saskatchewan - Epic Trip Adventures
Image 26: Back in Missinipe
Missinipe Forest Fire - Saskatchewan - Epic Trip Adventures
Image 27: Missinipe forest fire smoke

ADVENTURE DIRECTIONS: CANOE TRIP #3 (DEVIL RAPIDS)

Summary: This guide contains information on where we travelled for our third canoe trip down the Churchill River system. The route is relatively easy, in the same general area as our previous trips, but hits a few different sets of rapids (Great Devil and Little Devil).  We would rate this route as beginner to intermediate as far as canoeing skill level.


Devil Rapids Adventure Map - Saskatchewan - Epic Trip Adventures
Image 28: Devil Rapids Adventure Map


Step-By-Step Guide:

We rented our canoes from Churchill River Canoe Outfitters (like every previous year) and got them to drop us off at the Devils Lake Boat Launch (Route marker #1 on the map). We loaded up the canoes, launched, and paddled to the northwest corner of Devils Lake where we entered the river system.

Churchill River Paddling - Saskatchewan - Epic Trip Adventures
Image 29: Devil Lake Boat Launch
Churchill River Paddling - Saskatchewan - Epic Trip Adventures
Image 30: Crossing Devil Lake

From Devils Lake we paddled upstream to Little Devil Rapids. Little Devil Rapids consists of three class II rapids.  There is a portage on river left at the bottom of the rapids, but the portage trail is long, about 800m, and is often muddy with a lot of mosquitoes. We recommend a quicker and easier alternative route up Little Devil Rapids. When approaching the rapids, there is a little bay on river right and a portage (100m) to the top of the last set of rapids. From there you can paddle upstream to the next set of rapids where you can line the canoe up river right again. From this spot you have two options. 1. ferry across to river left and line the canoes up the last set of rapids or 2. paddle upstream to another (not as travelled) portage trail on river right. We took the portage trail on river right, option 2, because we were worried about flipping our fully loaded canoes on the rapids.

Churchill River Portaging - Saskatchewan - Epic Trip Adventures
Image 31: Portaging up Little Devil Rapids
Churchill River Portaging - Saskatchewan - Epic Trip Adventures
Image 32: Lining the rapids

There are two islands between Great Devil and Little Devil Rapids. We found an awesome campsite on the northern one (Route marker #2 on the map) and stayed there for two nights. Great Devil Rapids is very close to that campsite.


Churchill River Camping - Saskatchewan - Epic Trip Adventures
Image 33: Our campsite
Churchill River Fishing - Saskatchewan - Epic Trip Adventures
Image 34: Fishing


The portage trail for Great Devil (Route marker #3 on the map) is on river left about 150m north of the bottom of the rapids. This portage trail is muddy, full of mosquitoes and 1150m long. It was brutal. At the bottom of the rapids there is a waterfall/Class V rapid that can be run but is very challenging in a canoe. The rest of the rapids are rated as Class III. The rapids can be run without hitting the waterfall, but you have to be sure to steer your canoe to river left before the river turns right and heads towards the falls. We ran the class III rapids but did not run the falls.

Great Devil Canoeing - Saskatchewan - Epic Trip Adventures
Image 35: Great Devil Rapids
Great Devil - Saskatchewan - Epic Trip Adventures
Image 36: Great Devil Rapids


We ran Great Devil and Little Devil Rapids (Route marker #4 on the map) multiple times before heading back towards Missinipe. On the way back we went the same way as we came, eventually crossing Devil Lake to get back to the boat launch where we had parked. From the boat launch it’s not far to Otter Rapids. Otter Rapids are a long set of class III rapids. You can gain a lot of experience running them while having a lot of fun.

Otter Rapids Canoeing - Saskatchewan - Epic Trip Adventures
Image 37: Otter Rapids
Otter Rapids Canoeing - Saskatchewan - Epic Trip Adventures
Image 38: Otter Rapids


For our last night we played around on the rapids and then camped at Otter Rapids Campground (Route marker #5 on the map). Hope this guide helps and hope you enjoy your trip!


Otter Rapids - Saskatchewan - Epic Trip Adventures
Image 39: Otter Rapids Bridge


WE WANT TO HEAR FROM YOU

Thank you for choosing Epic Trip Adventures as your guide.  We are committed to continually updating our guides to be as relevant and accurate as possible. If you have feedback to improve this guide please leave it in the comments below.

We also want to hear about your Churchill River adventures.  If you have stories, pictures or even a link to your own adventure video please share them below!


Have fun out there!

– ETA


For a downloadable PDF version of this guide CLICK HERE!


Grey Owl’s Cabin is in the northern part of Prince Albert National Park, north of Waskesiu and Kingsmere Lakes. This is a beautiful, challenging hike that starts at the south end of Kingsmere Lake. The hike follows the east shoreline for 20km to another smaller lake called Ajawaan Lake where lies Grey Owl’s Cabin.

“Far enough away to gain seclusion, yet within reach of those whose genuine interest prompts them to make the trip, Beaver Lodge extends a welcome to you if your heart is right.”

– Grey Owl


ADVENTURE STATISTICS

Time Required: 2 days minimum

Location: 3 hours north of Saskatoon

Distance: 40km round trip

Elevation Gain: minimal

Difficulty: 7/10 – Very long

Season: May to September

Additional Requirements: Camping Permit


DRIVING DIRECTIONS

From Prince Albert:  Take Hwy 2 North for 75km until you see signs for Hwy 264/Waskesiu. Turn left here and follow Hwy 264 for 46km until the road dead ends. It will be gravel for the last 18km and there will be a parking lot and boat launch at the end.


WHAT TO BRING


  • Comfortable Footwear: Hiking shoes. Make sure your shoes are broken in prior to tackling this hike to prevent unexpected blisters.
  • Water: This hike is very long so it’s important to stay hydrated. If you have a small water filter, or purification tablets, they will come in handy as you won’t have to carry as much water.
  • Meals: This hike is a minimum 2-day hike, so you’ll have to plan some meals. Smokies, sandwiches, oatmeal, veggies, and fruit are easy to pack and full of nutrients.
  • Weather appropriate clothing: You will be exposed to the elements throughout this hike. Check the weather forecast and plan accordingly. We would recommend a raincoat just in case…
  • Extra shoes and socks: Depending on the time of year, the trail can be wet and mucky. A warm pair of socks and shoes at the end of your hike will feel better than you think.
  • Sunscreen: If it is sunny and you’re like Mattson, who easily burns, bring sunscreen!
  • Insect Repellent: This area has a ton of mosquitoes. Don’t forget to bring bug spray!
  • Bear Spray: You are in bear country. Always hike with bear spray that is easily accessible.
  • Camera: There are numerous photo opportunities you won’t want to miss.
  • This Guide: Print a copy of this guide to reference throughout the hike
  • Camping Equipment: Tent, Sleeping bag, hammock, pots, pans, plates, and utensils. Anything you think you’ll need for an overnight hike.
  • Camping permit: This can be purchased at the national park Visitor Center.


OTHER CONSIDERATIONS

Wildlife: You will be hiking in bear country.  It is always advisable to check in at the local Visitor Information Center to learn of any trail closures due to wildlife.  Carry bear spray in an easily accessible location.  Travel in groups of multiple hikers and make lots of noise to avoid an unexpected encounter.

Canoe: Reaching Grey Owl’s Cabin can be done by canoe. There is a boat launch at the trailhead, a rail cart that helps you portage into Kingsmere Lake, and big signs on the shore of Kingsmere Lake to use as landmarks for trails and campsites. This guide will stick to the hike instead of the canoe route, but paddling is an option.

Leave No Trace: It is important that we enjoy the outdoors responsibly and sustainably. Some key principles to consider when hiking to “Leave No Trace” are:

  • Plan ahead and prepare: Proper planning allows adventurers to hike safely while minimizing damage to the land.
  • Travel on durable surfaces: Stick to the trail when possible. If there is no trail, or you must travel off trail, stay on durable surfaces to reduce your impact.
  • Dispose of waste properly: Pack it in, pack it out.
  • Leave what you find: Leave rocks, plants, archaeological artifacts and other objects of interest as you find them.
  • Respect wildlife: Observe wildlife from a distance. Never feed wild animals.
  • Be considerate of other visitors: Be courteous to others to allow everyone to enjoy their outdoor experience.

To learn more about “Leave No Trace” visit http://www.leavenotrace.ca


HIKING DIRECTIONS

Summary: The trail heads north from the parking lot along Kingsmere River then follows the east side of Kingsmere Lake for 20km passing different campsites along the way. From the north end of the lake, you will hike another 1.5km to Ajawaan Lake where you will find Grey Owl’s Cabin.


Grey Owl's Cabin Adventure Map - Saskatchewan - Epic Trip Adventures
Image 1: Grey Owl’s Cabin Adventure Map


Step-By-Step Guide:

In the northwest corner of the parking lot (Route marker #1 on the map) and will see a big sign marking the trailhead. Follow the trail north for a few hundred meters and you will see the Kingsmere River down below. There is a rail cart portage track for canoers.


Grey Owl's Cabin Hike - Saskatchewan - Epic Trip Adventures
Image 2: The trail to Grey Owl’s Cabin
Grey Owl's Cabin Hike - Saskatchewan - Epic Trip Adventures
Image 3: Wet sections along the trail


Grey Owl's Cabin Hike - Saskatchewan - Epic Trip Adventures
Image 4: Kingsmere River


Roughly 300 meters from the trailhead is a branch off to the left to reach the first campsite, Southend Campground. This campground is another 1.2km from the fork. To get to Grey Owl’s Cabin stick to the right and continue following the trail. 3km from that fork, you’ll arrive at Westwind Group Campground (Route marker #2 on the map).

At 6.7km there is another campsite called Chipewyan Portage Campground (Route marker #3 on the map). This is where we stopped for snacks and a break.


Grey Owl's Cabin Hike - Saskatchewan - Epic Trip Adventures
Image 5: Chipewyan Portage Campground
Grey Owl's Cabin Hike - Saskatchewan - Epic Trip Adventures
Image 6: Anderson continuing along the trail


6km past Chipewyan Portage Campground is Sandy Beach Campground (Route marker #4 on the map). This is where we spent the night. There are no campsites at Grey Owl’s Cabin. We’d recommend camping at either Sandy Beach Campground or North End Campground and doing a day hike from there to the Cabin without heavy gear.

Grey Owl's Cabin Hike - Saskatchewan - Epic Trip Adventures
Image 7: Sandy Beach Campground
Grey Owl's Cabin Hike - Saskatchewan - Epic Trip Adventures
Image 8: Sandy Beach Campground


There are a couple sections of the hike where you walk along the beach. It’s a nice change of scenery and the views of the lake are beautiful.


Kingsmere Lake - Saskatchewan - Epic Trip Adventures
Image 9: Kingsmere Lake
Kingsmere Lake - Saskatchewan - Epic Trip Adventures
Image 9: Kingsmere Lake


The last campground before Grey Owl’s Cabin is Northend Campground (Route marker #5 on the map). It is 16.8km from the trailhead. It includes two double sites and two single sites. Here you will also find a large sheltered area with picnic tables and a wood stove. I wish we would have known about this shelter when we did the hike as we could have taken shelter from the rain.

The last leg of the journey is relatively easy, and most people do it without their packs and gear. 3km north of the Northend Campground the trail will jag to the left and take you along the west shore of Ajawaan Lake to the Cabins. The lower cabin was Grey Owl’s, and the upper cabin was built for his wife, daughter, and visitors. There is a lot of history in these cabins about Grey Owl’s journeys and his message about nature conservation. There are postcards, pictures and books telling stories about Grey Owl inside his cabin. Respect the cabin, respect the site, and have fun!


Grey Owl's Cabin - Saskatchewan - Epic Trip Adventures
Image 12: Grey Owl’s Cabin


WE WANT TO HEAR FROM YOU

Thank you for choosing Epic Trip Adventures as your guide. We are committed to continually updating our guides to be as relevant and accurate as possible. If you have feedback to improve this guide please leave it in the comments below.

We also want to hear about your Grey Owl Cabin adventures. If you have stories, pictures or even a link to your own adventure video please share them below!


Have fun out there!

– ETA


For a downloadable PDF version of this guide CLICK HERE! 


Gem Lakes is a small grouping of deep, beautiful lakes in central Saskatchewan named after precious stones. A 5.5km hiking trail winds around the lakes providing spectacular views and access to fish, camp, canoe and kayak at the various lakes.


ADVENTURE STATISTICS

Location: 148km Northeast of Prince Albert

Distance: 5.5km round trip

Difficulty: 3/10 – Some steep sections along trail

Season: June to September for camping

Additional Requirements: N/A


Gem Lakes - Saskatchewan - Epic Trip Adventures
Image 1: Gem Lakes


DRIVING DIRECTIONS

From Prince Albert: Head northeast on SK-55 E for 41km to Meath Park and then take a left onto SK-120 N.  Take the 120 53 km and then turn left on SK-913. Follow the 913 for 50km and take a left to the Gem Lakes parking lot.


WHAT TO BRING

  • Comfortable Footwear: Comfortable sneakers are sufficient for this hike but if you prefer hiking shoes bring those.Bring a pair of flip flops or comfortable sneakers for the evening.
  • Water: Bring enough water for camping and hiking as there are no facilities with water at Gem Lakes.
  • Food: Bring some of your favorite snacks to enjoy during the day as well as food for dinner and breakfast.  Some of our favorite snacks are trail mix, bananas, beef jerky and licorice.
  • Camping Gear: Tent, hammock, sleeping bag, axe/hatchet and fire-starting tools.
  • Fishing Rod: The lakes are stocked and a great place to enjoy some fishing.
  • Kayak/Canoe: Gem Lakes is a perfect place for paddling.
  • Toilet paper: The only outhouse is at the parking area and there is no guarantee there will be toilet paper.
  • Weather appropriate clothing: Check the weather forecast and plan accordingly. Bring some warm clothes to change into in the evening.
  • Swimming attire: The lakes are chilly but it can be nice to take a refreshing dip.
  • Sunscreen: If it is sunny and you’re like Mattson, who easily burns, bring sunscreen!
  • Insect Repellent: Insect repellent can greatly improve your hiking/camping experience.
  • Bear Spray: You are in bear country. Always hike with bear spray that is easily accessible.
  • Camera: The lakes are beautiful and there are numerous photo opportunities you won’t want to miss.
  • This Guide: Print a copy of this guide to reference.


OTHER CONSIDERATIONS

Wildlife: You will be camping in bear country.  Carry bear spray in an easily accessible location.  Travel in groups of multiple hikers and make lots of noise to avoid an unexpected encounter.


Leave No Trace: It is important that we enjoy the outdoors responsibly and sustainably. Some key principles to consider when hiking to “Leave No Trace” are:

  • Plan ahead and prepare: Proper planning allows adventurers to hike safely while minimizing damage to the land.
  • Travel on durable surfaces: Stick to the trail when possible. If there is no trail, or you must travel off trail, stay on durable surfaces to reduce your impact.
  • Dispose of waste properly: Pack it in, pack it out.
  • Leave what you find: Leave rocks, plants, archaeological artifacts and other objects of interest as you find them.
  • Respect wildlife: Observe wildlife from a distance. Never feed wild animals.
  • Be considerate of other visitors: Be courteous to others to allow everyone to enjoy their outdoor experience.

To learn more about “Leave No Trace” visit http://www.leavenotrace.ca


CAMPING/HIKING DIRECTIONS

Summary: Gem Lakes is a fantastic place to camp but can also be enjoyed as a leisurely day hike.  The trail winding around the lakes is 5.5km with some short steep sections. There are three camping areas along the trail with a fire pits and picnic benches.


Gem Lakes Adventure Map - Saskatchewan - Epic Trip Adventures
Image 2: Gem Lakes Adventure Map


There are three official camping areas.  One at Jade Lake (Route Marker #1 on the map), one at Diamond Lake (Route Marker #2 on the map).  and one at Opal Lake (Route Marker #3 on the map). They are 150m, 1km and 1.5km from the parking area respectively. We would recommend camping at Diamond or Opal lake as they are less busy and trafficked than Jade Lake.  That being said, if you have a lot of camping stuff to carry in, Jade Lake is very close to the parking area so you won’t have far to carry your gear.


Gem Lakes - Saskatchewan - Epic Trip Adventures
Image 3: The Diamond Lake Campsite
Gem Lakes - Saskatchewan - Epic Trip Adventures
Image 4: Starting our fire


Other Tips:

  • Check if there are any fire bans. If there are you may have to adjust your meal plan.
  • The only outhouse is at the parking area. Be sure to use it before heading out to hike and camp.
  • If camping over the weekend get there early Friday so you can get a camping spot before they are taken.
  • When hiking around the lakes there are signs with interesting information and history on the area


Gem Lakes - Saskatchewan - Epic Trip Adventures
Image 5: Anderson enjoying the view
Gem Lakes - Saskatchewan - Epic Trip Adventures
Image 6: A Loon at Little Jade Lake

WE WANT TO HEAR FROM YOU

Thank you for choosing Epic Trip Adventures as your guide.  We are committed to continually updating our guides to be as relevant and accurate as possible. If you have feedback to improve this guide please leave it in the comments below.

We also want to hear about your Gem Lakes adventures.  If you have stories, pictures or even a link to your own adventure video please share them below!


Have fun out there!

– ETA


For a downloadable PDF version of this guide CLICK HERE! 


Buffalo Pound Provincial Park is a land of adventure and possibility. Whether your niche is kayaking, hiking, mountain biking or cross country skiing, Buffalo Pound has activities for all ages and personalities. Originally named for its use by First Nations hunting bison, Buffalo Pound is a pleasant place for families to enjoy the outdoors and camp in a friendly atmosphere.


ADVENTURE STATISTICS

Location: 20km north of Moose Jaw, SK

Elevation Gain: Max 200m

Difficulty: There are activities of all levels of difficulty

Season: June to September for camping

Additional Requirements: There is a $10 fee per person per day to enter the park.


Buffalo Pound - Epic Trip Adventures
Image 1: Buffalo Pound


DRIVING DIRECTIONS

From Moose Jaw:  Head north on Highway 2 for 16km, Turn right onto SK-202-E and then take a quick left to stay on SK-202-E. Follow SK-202-E for another 12.5km. Take a right into the park when you see signs.


WHAT TO BRING

  • Comfortable Footwear:Hiking shoes.There are some great hikes in the park, don’t forget some hiking shoes.
  • Mountain Bike: Buffalo Pound is known for is biking trails. Although it is still flat Saskatchewan, there are some fun trails around the area.
  • Water:Water is important for any camping trip
  • Sunscreen:If it is sunny and you’re like Mattson, who easily burns, bring sunscreen!
  • Insect Repellent:Insect repellent can greatly improve your hiking experience.
  • Camera:There are numerous photo opportunities you won’t want to miss.
  • This Guide:Print a copy of this guide to reference throughout the hike


OTHER CONSIDERATIONS

Wood Ticks:In May and June Wood Ticks can be quite prevalent in Buffalo Pound.  Wear long pants when walking through long grass and thoroughly check yourself for ticks after outdoor activities.  Check any pets you brought along as well!


Leave No Trace: It is important that we enjoy the outdoors responsibly and sustainably. Some key principles to consider when hiking to “Leave No Trace” are:

  • Plan ahead and prepare: Proper planning allows adventurers to hike safely while minimizing damage to the land.
  • Travel on durable surfaces: Stick to the trail when possible. If there is no trail, or you must travel off trail, stay on durable surfaces to reduce your impact.
  • Dispose of waste properly: Pack it in, pack it out.
  • Leave what you find: Leave rocks, plants, archaeological artifacts and other objects of interest as you find them.
  • Respect wildlife: Observe wildlife from a distance. Never feed wild animals.
  • Be considerate of other visitors: Be courteous to others to allow everyone to enjoy their outdoor experience.

To learn more about “Leave No Trace” visit http://www.leavenotrace.ca


CAMPING TIPS

  • Check if there is a fire ban. If you can’t have an open fire you may need to adjust your meal plan.
  • Reserve your camping site early as the park can book up. Especially on long weekends.
  • There is firewood available and are washrooms and shower facilities. Although this generally isn’t our style of camping it makes life a lot easier!
  • When checking in ask for a site with some shade. The midday sun can be hot and some of the sites are pretty barren.


Camping - Buffalo Pound - Epic Trip Adventures
Image 2: Setting up our hammocks
Buffalo - Buffalo Pound - Epic Trip Adventures
Image 3: The buffalo of Buffalo Pound


MOUNTAIN BIKING

  • Choose trails that are appropriate for your skill level. It is no fun getting stuck on a trail that is too difficult
  • Download the app “Trail Forks”, it has great trail maps that link with your GPS so you can easily navigate the park.
  • Bring a backpack with some snacks and water so you don’t have to bike back to your campsite if you get hungry.
  • We biked the majority of the trails in the park and found the trails South East of the park entrance were our favorites. There was a variety of difficulties and the trails were short enough that you could repeat your favorites.
  • All of the trails except for Jackpot can be ridden in either direction. Always be on the lookout for riders approaching head on.


Mountain Biking - Buffalo Pound - Epic Trip Adventures
Image 4: Mountain Biking
Mountain Biking - Buffalo Pound - Epic Trip Adventures
Image 5: Mountain Biking

WE WANT TO HEAR FROM YOU

Thank you for choosing Epic Trip Adventures as your guide.  We are committed to continually updating our guides to be as relevant and accurate as possible. If you have feedback to improve this guide please leave it in the comments below.

We also want to hear about your Buffalo Pound adventures.  If you have stories, pictures or even a link to your own adventure video please share them below!


Have fun out there!

– ETA