For a downloadable PDF version of this guide CLICK HERE!


Today we’re hiking Turbine Canyon starting from Upper Kananaskis Lake. This is a great overnight hike with multiple options to stay two nights or even three with plenty of day hikes around the area to keep you busy. Beautiful country with beautiful mountain views.


ADVENTURE STATISTICS

Time Required: 8-10 Hours or overnight

Location: 136km west of Calgary in Peter Lougheed Provincial Park

Distance: 15.1km one way

Highest Elevation: 2245m

Elevation Gain: 525m

Difficulty: 7/10 – Steep sections

Season: June to mid-October

Additional Requirements: Camping permit


DRIVING DIRECTIONS

From Calgary:  Take the Trans-Canada (Hwy 1) west approximately 70 km to Kananaskis Trail (Hwy 40) and then follow that 50 km to Kananaskis Lakes Trail.  Turn right onto Kananaskis Lakes Trail and follow it for 13 km.  Park at the North Interlakes Day Use Area on Upper Kananaskis Lake.

From Canmore: Take the Trans-Canada (Hwy 1) east approximately 30 km to Kananaskis Trail (Hwy 40) and then follow that 50 km to Kananaskis Lakes Trail.  Turn right onto Kananaskis Lakes Trail and follow it for 13 km.  Park at the North Interlakes Day Use Area on Upper Kananaskis Lake.


WHAT TO BRING

  • Comfortable Footwear: Hiking shoes. Make sure your shoes are broken in prior to tackling this hike to prevent unexpected blisters. You could get away with running shoes but having extra grip on the rock surfaces will definitely come in handy!
  • Water: This hike is long with lots of elevation gain to reach the campsite. Be sure to bring enough water for 5 hours of physical exertion. There are streams to fill your water bottles along the way so bring purification tabs or a filter.
  • Snacks: Bring some of your favorite snacks to enjoy along the hike as well as meals for at the campsite.  Some of our favorite snacks are trail mix, bananas, beef jerky and licorice.
  • Weather appropriate clothing: You will be exposed to the elements throughout this hike. Check the weather forecast and plan accordingly.
  • Sunscreen: If it is sunny and you’re like Mattson, who easily burns, bring sunscreen!
  • Insect Repellent: Insect repellent can greatly improve your hiking experience.
  • Bear Spray: You are in bear country. Always hike with bear spray that is easily accessible.
  • Camera: There are numerous photo opportunities you won’t want to miss.
  • Camping Gear: If you are staying the night… bring appropriate camping gear
  • Camping Permit: A backcountry permit is required to stay at Turbine Canyon
  • This Guide: Print a copy of this guide to reference throughout the hike


OTHER CONSIDERATIONS

Wildlife: You will be hiking in bear country.  It is always advisable to check in at the local Visitor Information Center to learn of any trail closures due to wildlife.  Carry bear spray in an easily accessible location.  Travel in groups of multiple hikers and make lots of noise to avoid an unexpected encounter.

Leave No Trace: It is important that we enjoy the outdoors responsibly and sustainably. Some key principles to consider when hiking to “Leave No Trace” are:

  • Plan ahead and prepare: Proper planning allows adventurers to hike safely while minimizing damage to the land.
  • Travel on durable surfaces: Stick to the trail when possible. If there is no trail, or you must travel off trail, stay on durable surfaces to reduce your impact.
  • Dispose of waste properly: Pack it in, pack it out.
  • Leave what you find: Leave rocks, plants, archaeological artifacts and other objects of interest as you find them.
  • Respect wildlife: Observe wildlife from a distance. Never feed wild animals.
  • Be considerate of other visitors: Be courteous to others to allow everyone to enjoy their outdoor experience.

To learn more about “Leave No Trace” visit http://www.leavenotrace.ca


HIKING DIRECTIONS

Summary: This hike is relatively flat until just past the Forks Campground, where almost all of the elevation is done in about 3km. After that the trail levels off again and it is a beautiful walk through meadows and mountains to Turbine Canyon campground.


Turbine Canyon Adventure Map - Kananaskis - Epic Trip Adventures
Image 1: Turbine Canyon Adventure Map


Step-By-Step Guide:

The hike begins at Upper Kananaskis Lake Parking Lot (Route marker #1 on the map) and follows a very well maintained, easy to follow trail around the North side of Upper Kananaskis Lake. After hiking this trail for 7.3km you will reach Forks Campground (Route marker #2 on the map) where you will take a trail fork to the right to get to Turbine Canyon. Forks Campground has 15 tenting campsites, a pit toilet, creek to fill water and designated fire pits for campfires.

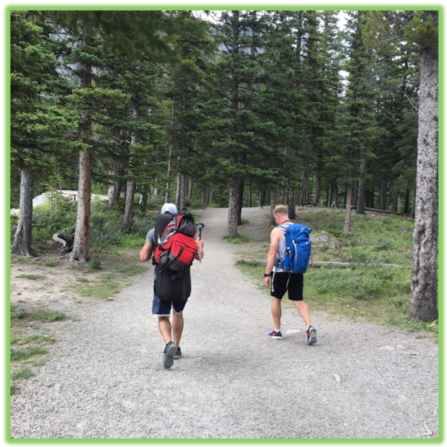
 

Upper Kananaskis Lake - Kananaskis - Epic Trip Adventures
Image 2: Upper Kananaskis Lake
Hiking to Turbine Canyon - Kananaskis - Epic Trip Adventures
Image 3: Hiking to Forks Campground


After going right at the Forks Campground the trail will continue north and elevation gain will begin for about 3km along switchbacks. This is the hard part of the hike, after the switchbacks the rest is quite easy. Follow the trail through meadows and forests for another 5km. The trail passes Lawson Lake on the east side and Turbine Canyon Campground (Route marker #3 on the map) is a hop skip and a jump away. There is a small creek that runs into Turbine Canyon called Maude Brook, and the campground is just North of that creek.
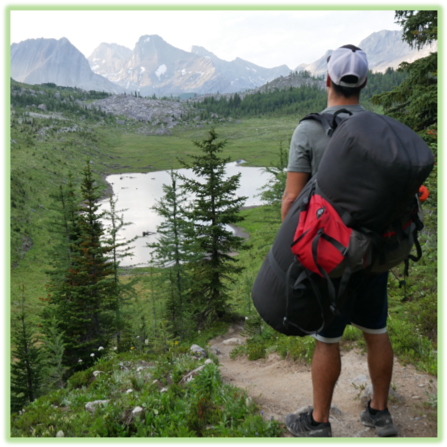
 

Hiking to Turbine Canyon - Kananaskis - Epic Trip Adventures
Image 4: Alpine Lakes and Meadows
Hiking to Turbine Canyon - Kananaskis - Epic Trip Adventures
Image 5: The approach to Turbine Canyon


This Campground has 12 tenting campsites, a creek for water, food storage lockers and a pit toilet. Fires are prohibited. From the Campground, there are multiple day hikes that are worth checking out.

  1. Obviously the Turbine Canyon itself, which is just downstream of Maude Brook.
  2. Maude Lake is 2km to the Northwest which is stocked with fish if you are into that.
  3. Haig Glacier is 3km North of Turbine and houses winter skiing athletes in the summer months for their training.


Turbine Canyon - Kananaskis - Epic Trip Adventures
Image 6: Turbine Canyon
Turbine Canyon - Kananaskis - Epic Trip Adventures
Image 7: Turbine Canyon


Turbine Canyon - Kananaskis - Epic Trip Adventures
Image 8: Turbine Canyon
Turbine Canyon - Kananaskis - Epic Trip Adventures
Image 9: Turbine Canyon

After enjoying your stay at Turbine Canyon make your way back down the same way you came up.  Hope you have FUN!


WE WANT TO HEAR FROM YOU

Thank you for choosing Epic Trip Adventures as your guide. We are committed to continually updating our guides to be as relevant and accurate as possible. If you have feedback to improve this guide please leave it in the comments below.

We also want to hear about your Turbine Canyon adventures. If you have stories, pictures or even a link to your own adventure video please share them below!


Have fun out there!

– ETA


For a downloadable PDF version of this guide CLICK HERE!


West Wind Pass is a 4.7km hike off the Smith Dorrien Trail near Canmore. It’s a well trafficked hike with beautiful views of the Spray Lakes reservoir behind you, Rimwall Mountain to your left and Windtower to your right. If you can pick a nice calm day to do this hike that is ideal. It tends to be windy in the pass… as the name would indicate.


ADVENTURE STATISTICS

Time Required: 2-3 Hours

Location: 25km drive South of Canmore

Distance: 4.7km round trip

Highest Elevation: 2083m

Elevation Gain: 350m

Difficulty: 5/10 – Family friendly, dog friendly

Season: June to mid-October for summer conditions

Additional Requirements: Crampons/spikes or snowshoes if hiking in the winter


DRIVING DIRECTIONS

From Canmore:  Turn right off Three Sisters Dr onto Spray Lakes Rd/Three Sisters Pkwy and follow that road for roughly 20km.  Park on the side of the road. Google Maps has West Wind Pass Trailhead marked.


WHAT TO BRING

  • Comfortable Footwear: Hiking shoes. Make sure your shoes are broken in prior to tackling this hike to prevent unexpected blisters. You could get away with running shoes but having extra grip on the rock surfaces will come in handy!
  • Water: This hike has some elevation gain to reach the pass. Be sure to bring enough water for 2-3 hours of physical exertion.
  • Snacks: Bring some of your favorite snacks to enjoy along the hike. Some of our favorite snacks are trail mix, bananas, beef jerky and licorice.
  • Snowshoes/Spikes: If you are attempting this hike in the fall/winter months, bring spikes as it can be icy. There can be snow waist deep if you wander off the trail, so if that’s something you want to do pack snowshoes as well.
  • Weather appropriate clothing: You will be exposed to the elements throughout this hike. The pass is usually very windy, hence the name. Wear a wind breaker and have a chin strap so your hat doesn’t blow away.  Check the weather forecast and plan accordingly.
  • Sunscreen: If it is sunny and you’re like Mattson, who easily burns, bring sunscreen!
  • Insect Repellent: Insect repellent can greatly improve your hiking experience.
  • Bear Spray: You are in bear country. Always hike with bear spray that is easily accessible.
  • Camera: There are numerous photo opportunities you won’t want to miss.
  • This Guide: Print a copy of this guide to reference throughout the hike


OTHER CONSIDERATIONS

Wildlife: You will be hiking in bear country.  It is always advisable to check in at the local Visitor Information Center to learn of any trail closures due to wildlife.  Carry bear spray in an easily accessible location.  Travel in groups of multiple hikers and make lots of noise to avoid an unexpected encounter.

Leave No Trace: It is important that we enjoy the outdoors responsibly and sustainably. Some key principles to consider when hiking to “Leave No Trace” are:

  • Plan ahead and prepare: Proper planning allows adventurers to hike safely while minimizing damage to the land.
  • Travel on durable surfaces: Stick to the trail when possible. If there is no trail, or you must travel off trail, stay on durable surfaces to reduce your impact.
  • Dispose of waste properly: Pack it in, pack it out.
  • Leave what you find: Leave rocks, plants, archaeological artifacts and other objects of interest as you find them.
  • Respect wildlife: Observe wildlife from a distance. Never feed wild animals.
  • Be considerate of other visitors: Be courteous to others to allow everyone to enjoy their outdoor experience.

To learn more about “Leave No Trace” visit http://www.leavenotrace.ca


HIKING DIRECTIONS

Summary: West Wind Pass is between Windtower and Rimwall Peak. The out and back hike is well trafficked and straight forward. There is only about 350m elevation gain which makes this a great trail for families, dogs, and beginner hikers.


West Wind Pass Adventure Map - Kananaskis - Epic Trip Adventures
Image 1: West Wind Pass Adventure Map


Step-By-Step Guide:

The trailhead is just off the road. Set your odometer at the turn off onto Spray Lakes Rd/Three Sisters Pkwy for 20km (Or use Google Maps). On a weekend or busy day, it will be obvious where to park as there will be other cars. The trailhead is on the north side of the road (Route marker #1 on the map).


West Wind Pass Trailhead - Kananaskis - Epic Trip Adventures
Image 2: Parking on the side of the road
West Wind Pass Trailhead - Kananaskis - Epic Trip Adventures
Image 3: West Wind Pass Trailhead


The beginning of the trail is well trafficked and easy to follow with some elevation gain. There is pink and orange flagging tied to trees to mark the trail. Along the way there are a couple signs to reassure you that you are on the West Wind Pass Trail.


West Wind Pass Trail - Kananaskis - Epic Trip Adventures
Image 4: A small sign marks the trail
West Wind Pass Trail - Kananaskis - Epic Trip Adventures
Image 5: Following the trail as it gains elevation


There are some rocky slab sections with cliffs to your right. If uncomfortable with that terrain, stay right wherever possible and the trail will be a little more friendly. The different trails join up to become one trail again later.


West Wind Pass Trail - Kananaskis - Epic Trip Adventures
Image 7: Descending slippery snow-covered rocks
West Wind Pass Trail - Kananaskis - Epic Trip Adventures
Image 8: Hiking along the gully ledge


Once you reach the top of the pass (Route marker #2 on the map) there is a beautiful meadow with a trail that’s easy to see and follow. There are stunning views of the Spray Lake Reservoir and surrounding peaks. The Windtower can be summited from West Wind Pass. To summit Rimwall, you start on the same trail be veer off left before reaching the pass. Neither should be summited in the winter if you are not an experienced winter climber. After taking in the views from the pass return to your vehicle the way you came.

West Wind Pass - Kananaskis - Epic Trip Adventures
Image 8: Hiking through the meadow
West Wind Pass - Kananaskis - Epic Trip Adventures
Image 9: Taking the view from the pass


West Wind Pass - Kananaskis - Epic Trip Adventures
Image 10: West Wind Pass


WE WANT TO HEAR FROM YOU

Thank you for choosing Epic Trip Adventures as your guide. We are committed to continually updating our guides to be as relevant and accurate as possible. If you have feedback to improve this guide please leave it in the comments below.

We also want to hear about your West Wind Pass adventures. If you have stories, pictures or even a link to your own adventure video please share them below!


Have fun out there!

– ETA


The Kananskis River cuts through the heart of Kananaskis Country in the Rocky Mountains.  The river’s class II and III rapids draw local paddlers and have been on our list to check out for a while.  After a brief warm up at Harvie Passage in Calgary we headed to Kananaskis to give the river a go.


Our Tips

  • If you need gear, rent from Aquabatics in Calgary https://aqoutdoors.com
  • Warm up and hone your skills at Harvey’s passage in Calgary
  • Check the flow rate and schedule (Kananskis river is controlled by a TransAlta dam) https://transalta.com/hydro/river-flows/
  • Our route was from the Widow Maker to Canoe Meadows


WE WANT TO HEAR FROM YOU

Thank you for choosing Epic Trip Adventures as your guide. We are committed to continually updating our guides to be as relevant and accurate as possible. If you have feedback to improve this guide please leave it in the comments below.

We also want to hear about your Kananaskis River adventures. If you have stories, pictures or even a link to your own adventure video please share them below!


Have fun out there!

– ETA


Mclean Creek is considered a “Public Land Use Zone” (PLUZ) in Kananaskis Country just West of Calgary. It is a great spot for anyone wanting to get out of town and ride trails on dirt bikes/quads/side-by-sides.  McLean Creek is nice and close to Calgary and has a big parking lot/staging area to unload quads and bikes. There is a campground there that has 96 powered campsites, roughly 70 more unserviced campsites, plus random camping is allowed in the PLUZ. This PLUZ is 202 square km’s so there is a lot of area to explore!


ADVENTURE STATISTICS

Time Required: As much as you want!

Location: 60km west of Calgary past Bragg Creek

Season: May to mid-October

Additional Requirements: Dirt bike/quad/side-by-side


DRIVING DIRECTIONS

From Calgary:  Take AB-8 W for 25km, take your 3rd exit at the round-about, pass Bragg Creek and keep on AB-22 until you reach a T intersection. Take a right at the T onto AB-66 W and follow for 11.7km until you reach the McLean Creek Staging area.


WHAT TO BRING

  • Comfortable Footwear: High ankle boots.
  • Water: Always important
  • Snacks: Bring some of your favorite snacks to enjoy as a light lunch.  Some of our favorite snacks are trail mix, bananas, beef jerky and licorice.
  • Camping Gear: If you choose to camp, bring your hammock or tent! Also check the links below for booking a campsite.
  • Proper Riding Gear: Helmet, gloves, goggles.
  • Sunscreen: If it is sunny and you’re like Mattson, who easily burns, bring sunscreen!
  • Insect Repellent: Insect repellent can greatly improve your hiking experience.
  • Bear Spray: You are in bear country. Always hike with bear spray that is easily accessible.
  • Camera: There are numerous photo opportunities you won’t want to miss.
  • This Guide: Print a copy of this guide to reference throughout the hike
  • Map: Use the link below to download the map from alberta.ca or, better yet, download the “Maclean Creek Map” from Azenza Maps. More details below.


OTHER CONSIDERATIONS

Wildlife: You will be in bear country.  It is always advisable to check in at the local Visitor Information Center to learn of any trail closures due to wildlife.  Carry bear spray in an easily accessible location.  Travel in groups and make lots of noise to avoid an unexpected encounter.


Leave No Trace: It is important that we enjoy the outdoors responsibly and sustainably. Some key principles to consider when hiking to “Leave No Trace” are:

  • Plan ahead and prepare: Proper planning allows adventurers to hike safely while minimizing damage to the land.
  • Travel on durable surfaces: Stick to the trail when possible. If there is no trail, or you must travel off trail, stay on durable surfaces to reduce your impact.
  • Dispose of waste properly: Pack it in, pack it out.
  • Leave what you find: Leave rocks, plants, archaeological artifacts and other objects of interest as you find them.
  • Respect wildlife: Observe wildlife from a distance. Never feed wild animals.
  • Be considerate of other visitors: Be courteous to others to allow everyone to enjoy their outdoor experience.

To learn more about “Leave No Trace” visit http://www.leavenotrace.ca


BIKING/CAMPING DIRECTIONS

Below are a few links:

For camping reservations:

https://www.albertaparks.ca/parks/kananaskis/mclean-creek-pra/information-facilities/camping/mclean-creek/

Random Camping is allowed in the PLUZ (Note** As of 2021 a Public Lands Camping Pass is required). Download a map of the area and learn more about what you can and cannot do on the website below:

https://www.alberta.ca/mclean-creek-off-highway-vehicle.aspx

McLean Creek Camping - Kananaskis - Epic Trip Adventures
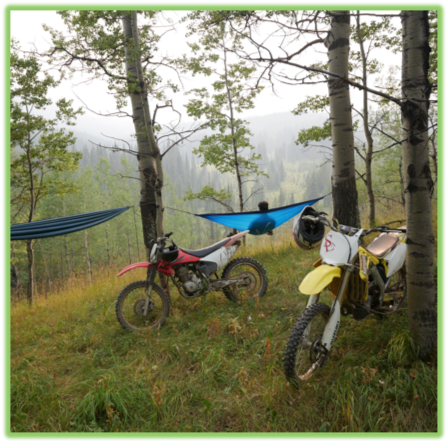
Image 1: Hammocking at McLean Creek
McLean Creek Camping - Kananaskis - Epic Trip Adventures
Image 2: Mattson camping at McLean Creek


Pro Tip – Get the Avenza Maps app on your phone and download “MacLean Creek Map” before you get out there. This will allow you use your phones GPS to know where you are even when you don’t have cell service.


McLean Creek Dirt Biking - Kananaskis - Epic Trip Adventures
Image 3: Dirt Biking at McLean Creek
McLean Creek Dirt Biking - Kananaskis - Epic Trip Adventures
Image 4: Dirt Biking at McLean Creek


WE WANT TO HEAR FROM YOU

Thank you for choosing Epic Trip Adventures as your guide. We are committed to continually updating our guides to be as relevant and accurate as possible. If you have feedback to improve this guide please leave it in the comments below.

We also want to hear about your McLean Creek adventures. If you have stories, pictures or even a link to your own adventure video please share them below!


Have fun out there!

– ETA


Fortress Mountain is located in Kananaskis Country and has the highest base elevation of any ski resort in Canada. This means it gets a ton of POW! We have no other Cat Ski experience to compare to, but KPOW treated us really well, provided us with morning snacks, lunch, cold beer, avalanche safety training and epic snow! We would absolutely go Cat Skiing with KPOW again!


DRIVING DIRECTIONS

From Calgary: Take Hwy 1 West until you reach the Stoney Nakoda Casino and Hwy 40. Head South on Hwy 40 for 45km (18km past the Nakiska exit). At the Centrex Gas Station turn right and drive about 400m and park on the right side of the road. KPOW will meet you here in the morning.


WHAT TO BRING

  • Gear: Snowboard boots and board (move bindings to the back of board) or if you are skiing; skis, poles and boots (KPOW recommends a minimum of 100mm underfoot for skis.
  • Snacks: KPOW will provide some snacks and a lunch but if you want specific things you’ll have to bring them.
  • Weather appropriate clothing: Wind/water proof outer layers. Jacket, pants, gloves, neck warmer, warm socks, toque.
  • Sunscreen: You can get a sunburn in the winter time. Ask Mattson
  • Helmet: Helmets are not required but very much recommended.
  • Hand and foot warmers: Having cold feet is the worst.
  • Camera: It is fun to be able to watch some footage after or at least review some pics.
Book at:   www.kpow.ca
Their website is easy to navigate and has more information on how to book a day of riding than this guide. So check it out.
Pricing is:

Single seats in the low season are $425.00 per person. (Dec. 1st to Feb 13th)

Single seats in the high season are $525.00 per person (Feb. 17th to April 17th)


KPOW Cat Skiing - Kananaskis - Epic Trip Adventures
Image 1: KPOW Cat Skiing


WE WANT TO HEAR FROM YOU

Thank you for choosing Epic Trip Adventures as your guide. We are committed to continually updating our guides to be as relevant and accurate as possible. If you have feedback to improve this guide please leave it in the comments below.

We also want to hear about your KPOW Cat Skiing adventures. If you have stories, pictures or even a link to your own adventure video please share them below!


Have fun out there!

– ETA


For a downloadable PDF version of this guide CLICK HERE!


Grizzly peak is one of our favorite hikes in the Kananaskis area. Wildlife, breathtaking views the whole way up, moderate scrambling, and a lush grassy field before the summit are a few of the reasons Grizzly Peak rates so high on our list of favorites. This hike is short but steep. Fortunately, there are lots of scenic spots to stop for a breather on the way up.


ADVENTURE STATISTICS

Time Required: 4-6 Hours

Location: 78km east of Canmore in Kananaskis Country

Distance: 6.5km round trip

Highest Elevation: 2520m

Elevation Gain: 825m

Difficulty: 6/10 – Route finding, rapid elevation gain

Season: June to mid-October

Additional Requirements: N/A


DRIVING DIRECTIONS

From Calgary:  Take the Trans-Canada (Hwy 1) west approximately 70 km to Kananaskis Trail (Hwy 40) and then follow that approx. 46km.  The hike begins off Hwy 40 on the east side of the road. Between Km 45 and Km 46 you will pass unsigned “Ripple Creek” on your left. Pull over to the shoulder, this is where the hike begins. NOTE: There is no sign saying Ripple Creek, but Ripple Creek is located between a sign saying “Grizzly Creek” that you will pass first, and “Hood Creek”. If you see the sign saying Hood Creek, you’ve gone too far.

From Canmore: Take the Trans-Canada (Hwy 1) east approximately 30 km to Kananaskis Trail (Hwy 40) and then follow that approx. 46km. The hike begins off Hwy 40 on the east side of the road. Between Km 45 and Km 46 you will pass unsigned “Ripple Creek” on your left. Pull over to the shoulder, this is where the hike begins. NOTE: There is no sign saying Ripple Creek, but Ripple Creek is located between a sign saying “Grizzly Creek” that you will pass first, and “Hood Creek”. If you see the sign saying Hood Creek, you’ve gone too far.


WHAT TO BRING


  • Comfortable Footwear: Hiking shoes. Make sure your shoes are broken in prior to tackling this hike to prevent unexpected blisters. You could get away with running shoes but having extra grip on the rock surfaces will definitely come in handy!
  • Water: This hike has lots of elevation gain. Be sure to bring enough water for at least 6 hours of physical exertion.
  • Snacks: Bring some of your favorite snacks to enjoy along the hike as well as a light lunch for the summit.  Some of our favorite snacks are trail mix, bananas, beef jerky and licorice.
  • Weather appropriate clothing: You will be exposed to the elements throughout this hike. Check the weather forecast and plan accordingly.
  • Sunscreen: If it is sunny and you’re like Mattson, who easily burns, bring sunscreen!
  • Insect Repellent: Insect repellent can greatly improve your hiking experience.
  • Bear Spray: You are in bear country. Always hike with bear spray that is easily accessible.
  • Camera: There are numerous photo opportunities you won’t want to miss.
  • This Guide: Print a copy of this guide to reference throughout the hike


OTHER CONSIDERATIONS

Wildlife: You will be hiking in bear country.  It is always advisable to check in at the local Visitor Information Center to learn of any trail closures due to wildlife.  Carry bear spray in an easily accessible location.  Travel in groups of multiple hikers and make lots of noise to avoid an unexpected encounter.

Leave No Trace: It is important that we enjoy the outdoors responsibly and sustainably. Some key principles to consider when hiking to “Leave No Trace” are:

  • Plan ahead and prepare: Proper planning allows adventurers to hike safely while minimizing damage to the land.
  • Travel on durable surfaces: Stick to the trail when possible. If there is no trail, or you must travel off trail, stay on durable surfaces to reduce your impact.
  • Dispose of waste properly: Pack it in, pack it out.
  • Leave what you find: Leave rocks, plants, archaeological artifacts and other objects of interest as you find them.
  • Respect wildlife: Observe wildlife from a distance. Never feed wild animals.
  • Be considerate of other visitors: Be courteous to others to allow everyone to enjoy their outdoor experience.

To learn more about “Leave No Trace” visit http://www.leavenotrace.ca


HIKING DIRECTIONS

Summary: This hike, for the most part, is fairly straight forward. The path begins on the north side of ripple creek, and wraps around to the back side of Grizzly Peak on a well-travelled trail. BUT, there are more than a few stories of hikers straying from the trail and finding themselves stuck in a gully or on a difficult scramble. If this happens, try to retrace your steps and find the trail again. In our experience, you will lose the trail more often when descending. On the way down stay high whenever possible so you don’t end up bushwhacking through the gully!


Grizzly Peak Adventure Map - Kananaskis - Epic Trip Adventures
Image 1: Hiking Grizzly Peak Adventure Map


Step-By-Step Guide:

The trail begins heading up from the left (north) side of Ripple Creek (Route marker #1 on the map) with a quick ascent and a bit of a wakeup call for the legs. The first km or two are quite aggressive in elevation but about halfway up the trail levels out and travels counterclockwise around the mountain.


Grizzly Peak - Kananaskis - Epic Trip Adventures
Image 2: Grizzly Peak
Grizzly Peak Trail - Kananaskis - Epic Trip Adventures
Image 3: Mattson ascending the trail


It can be a little difficult to follow the trail through this section. If in doubt keep sidehilling it around the mountain and stay high so that you don’t end up in the gully.


Grizzly Peak Trail - Kananaskis - Epic Trip Adventures
Image 4: Working our way around the mountain
Grizzly Peak - Kananaskis - Epic Trip Adventures
Image 5: Rocky scenery along the way


After you round the corner from this rocky area, you’ll be able to spot the saddle (Route marker #2 on the map) between the Grizzly Peak and Mount Evan-Thomas peak. Getting up to the saddle may be the most difficult part of the hike. There is a mini gully that is mostly scree that will take you to the grassy opening between the two peaks. It is a tiresome climb but that makes it even more rewarding once you get there. Some people stay way right of the scree gully and say it is a much easier ascent than going straight up the scree. Whichever way you choose, you will have to grind your way up to the saddle.


Grizzly Peak - Kananaskis - Epic Trip Adventures
Image 6: Scenic view along the way
Grizzly Peak - Kananaskis - Epic Trip Adventures
Image 7: The Saddle


After you make it to the saddle, the summit isn’t far. Take a left so that you’re facing west, and walk up the nice gradual grassy slope. The grassy slope will quickly turn into the rocky ridge that leads to the summit of Grizzly Peak (Route marker #3 on the map)!

Remember on the way down to stay high and don’t head down into the gully. We ended up in the gully and had to bushwhack our way along Ripple Creek to the highway.


Grizzly Peak - Kananaskis - Epic Trip Adventures
Image 8: Enjoying some snacks at the summit
Grizzly Peak - Kananaskis - Epic Trip Adventures
Image 9: Grizzly Peak Summit


WE WANT TO HEAR FROM YOU

Thank you for choosing Epic Trip Adventures as your guide. We are committed to continually updating our guides to be as relevant and accurate as possible. If you have feedback to improve this guide please leave it in the comments below.

We also want to hear about your Grizzly Peak adventures. If you have stories, pictures or even a link to your own adventure video please share them below!


Have fun out there!

– ETA


For a downloadable PDF version of this guide CLICK HERE! 


Hiking to Ribbon Lake and Ribbon Falls is a moderately difficult trek in the backcountry of Kananaskis. The hike follows Ribbon Creek Trail (an old logging road from the 1940s) and is surrounded by mountains and beautiful forest. Ribbon Falls is enormous and a great location for beautiful photos. Passed the falls another 2km is Ribbon Lake. That final 2km stretch includes steep elevation, exposure, and climbing up chains tacked into the mountain side. Once you get to the top you get an incredible view looking back into the valley you just conquered.


ADVENTURE STATISTICS

Time Required: 8 hours round trip or overnight.

Location: 98km west of Calgary in Spray Valley Provincial Park

Distance: 24km round trip

Highest Elevation: 2125m

Elevation Gain: 800m

Difficulty: 7/10 – Long distance and steep chain assisted climb up to Ribbon Lake

Season: June to mid-October

Additional Requirements: Camping permit

DRIVING DIRECTIONS

From Calgary: Take the Trans-Canada (Hwy 1) west approximately 70 km to Kananaskis Trail (Hwy 40) and then follow that for 27 km and turn right (west) onto Mt. Allan Drive (Same turn as Nakiska Ski Resort).  Take your first left onto Centennial Drive and then your next right onto Ribbon Creek Road. Follow Ribbon Creek Road until you reach the Ribbon Creek Day Use Area parking lot.

WHAT TO BRING

  • Comfortable Footwear: Hiking shoes.Make sure your shoes are broken in prior to tackling this hike to prevent unexpected blisters. You could get away with running shoes but having extra grip on the rock surfaces will definitely come in handy!
  • Water: This hike is long and the final section of the hike to Ribbon Lake is steep. Be sure to bring lots of water. Purification tablets aren’t a bad idea to pack as well. Water is fairly clean in the Rockies, but purify it just to be safe.
  • Snacks: Bring some of your favorite snacks to enjoy along the hike as well as a light lunch for when you arrive at the falls.  Some of our favorite snacks are trail mix, bananas, beef jerky and licorice. If you are planning on camping overnight you will need to bring food for dinner and breakfast as well.
  • Camping Equipment: This can be done as a day hike but we recommend camping overnight at Ribbon Lake. This is one of our favorite camping spots and we highly recommend it. If camping, be sure to bring the appropriate camping equipment and food.
  • Weather appropriate clothing: You will be exposed to the elements throughout this hike. If you are camping overnight, we recommend a toque, hoodie, gloves and warm pants. Check the weather forecast and plan accordingly.
  • Lighter/matches: The mountains get chilly at night so make sure you can start a fire.
  • Sunscreen: If it is sunny and you’re like Mattson, who easily burns, bring sunscreen!
  • Insect Repellent: Insect repellent can greatly improve your hiking experience.
  • Bear Spray: You are in bear country. Always hike with bear spray that is easily accessible.
  • Camera: There are numerous photo opportunities you won’t want to miss.
  • Backcountry Permit: If you are planning on camping overnight, either at the falls or the lake, you will need a backcountry permit as there are limited campsites. Don’t forget to bring it.
  • This Guide: Print a copy of this guide to reference throughout the hike

OTHER CONSIDERATIONS

Wildlife: You will be hiking in bear country.  It is always advisable to check in at the local Visitor Information Center to learn of any trail closures due to wildlife.  Carry bear spray in an easily accessible location.  Travel in groups of multiple hikers and make lots of noise to avoid an unexpected encounter.

Permits: Permits are necessary for overnight campers. Visit this website to purchase one.  http://www.albertaparks.ca/spray-valley/information-facilities/camping/ribbon-lake-backcountry/

Overnight Campers: Hammock/tent, WARM sleeping bag, pillow, lighter/fire starter, warm clothes, food for supper and breakfast, flashlight and toilet paper.

Leave No Trace: It is important that we enjoy the outdoors responsibly and sustainably. Some key principles to consider when hiking to “Leave No Trace” are:

  • Plan ahead and prepare: Proper planning allows adventurers to hike safely while minimizing damage to the land.
  • Travel on durable surfaces: Stick to the trail when possible. If there is no trail, or you must travel off trail, stay on durable surfaces to reduce your impact.
  • Dispose of waste properly: Pack it in, pack it out.
  • Leave what you find: Leave rocks, plants, archaeological artifacts and other objects of interest as you find them.
  • Respect wildlife: Observe wildlife from a distance. Never feed wild animals.
  • Be considerate of other visitors: Be courteous to others to allow everyone to enjoy their outdoor experience.

To learn more about “Leave No Trace” visit http://www.leavenotrace.ca

HIKING DIRECTIONS

Summary:Starting at the parking lot (Route marker #1 on the map), you will head down a well-travelled trail to the west. This trail that use to be an old logging road. The trail is relatively flat and will follow the creek to Ribbon Falls (Route marker #2 on the map). After ascending the cliffside of Ribbon Falls you will arrive at the Ribbon Lake Campsite (Route marker #3 on the map).

Ribbon Lake Adventure Map - Kananaskis - Epic Trip Adventures
Image 1: Ribbon Lake Adventure Map


Step-By-Step Guide:

From the Ribbon Creek Parking Lot (Route marker #1 on the map), head west through a tall grass meadow. There are signs labelling the trail, it’s tough to miss. Not long into the hike, you’ll cross a couple of bridges over Ribbon Creek. Continue up the north side of the creek following the trail.


There a lots of trail signs along the way. Basically, keep straight at any intersection. You want to stay on the logging road as long as you can. It will curve left, heading southwest. The logging road ends at about the 4km mark. If you want to save time you can bike to this point and lock your bike up at the end of the road. From this point on, the trail narrows and is more winding.


Ribbon Lake Trail Map - Kananaskis - Epic Trip Adventures
Image 2: The trail map from Ribbon Creek Parking Lot
Ribbon Lake Trail - Kananaskis - Epic Trip Adventures
Image 3: The logging road from Ribbon Creek Parking Lot

Keep trucking along the right side of the creek over a rolling single track trail. There are some smaller waterfalls along the creek as you make your way up to Ribbon Falls. Follow the trail until you see the Ribbon Falls campground. Just passed the campground is the waterfall (Route marker #2 on the map).


Ribbon Falls - Kananaskis - Epic Trip Adventures
Image 4: Ribbon Falls


The trail continues past the falls and then backtracks away from the cliff before it switchbacks towards the falls again. The trail then heads up the cliff face with chains to assist you. Use caution on these chains as there is extreme exposure while climbing up.


Climbing Ribbon Falls - Kananaskis - Epic Trip Adventures
Image 5: Climbing up Ribbon Falls
The top of Ribbon Falls - Kananaskis - Epic Trip Adventures
Image 6: The top of Ribbon Falls

At the top of the chains there is a rocky overlook of the valley. The stream that feeds Ribbon Falls is right there too. Get your camera out as this is one of the best spots for photos on this hike!


Ribbon Lake - Kananaskis - Epic Trip Adventures
Image 7: Ribbon Lake
Ribbon Lake - Kananaskis - Epic Trip Adventures
Image 8: Ribbon Lake


Keep following the trail until you reach the lake. Walk around the right side of the lake until you reach the campground on the other side (Route marker #3 on the map). If you’re staying overnight, unpack and relax. There is a site map that illustrates which campsites are located where. There is also a convenient mound of firewood there to help keep your fire going. Don’t start any fires outside of the fire pits and make sure the fire is put out before leaving your campsite.


Kiholo Bay - Hawaii Big Island - Epic Trip Adventures
Image 6: Kiholo Bay

WE WANT TO HEAR FROM YOU

Thank you for choosing Epic Trip Adventures as your guide.  We are committed to continually updating our guides to be as relevant and accurate as possible. If you have feedback to improve this guide please leave it in the comments below.

We also want to hear about your Ribbon Lake adventures.  If you have stories, pictures or even a link to your own adventure video please share them below!

Have fun out there!

– ETA


For a downloadable PDF version of this guide CLICK HERE! 


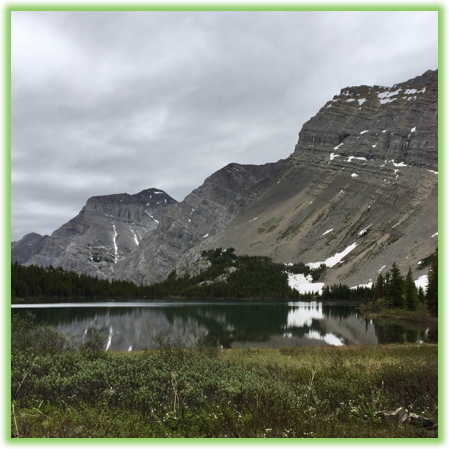
Rawson Lake is a beautiful, green, alpine lake with Mount Sarrail as the incredibly stunning backdrop. This is one of the most beautiful hikes in Kananaskis and reaching the lake is well worth the moderate climb. The trail to Rawson Lake begins at Upper Kananaskis Lake and offers great views of the surrounding mountains, Sarrail Falls and the lush forest.


ADVENTURE STATISTICS

Time Required: 2-3 Hours

Location: 136km west of Calgary in Peter Lougheed Provincial Park

Distance: 8km round trip

Highest Elevation: 2100m

Elevation Gain: 400m

Difficulty: 5/10 – Well marked trail with moderate elevation gain.

Season: June to mid-October

Additional Requirements: N/A


DRIVING DIRECTIONS

From Calgary: Take the Trans-Canada (Hwy 1) west approximately 70 km to Kananaskis Trail (Hwy 40) and then follow that 50 km to Kananaskis Lakes Trail.  Turn right onto Kananaskis Lakes Trail and follow it for 13 km. Take a left on Upper Lake Drive and park at the south end of the Upper Kananaskis Lake Day Use Area.

From Canmore: Take the Trans-Canada(Hwy 1) east approximately 30 km to Kananaskis Trail (Hwy 40) and then follow that 50 km to Kananaskis Lakes Trail. Turn right onto Kananaskis Lakes Trail and follow it for 13 km.  Take a left on Upper Lake Drive and park at the south end of the Upper Kananaskis Lake Day Use Area.


WHAT TO BRING

  • Comfortable Footwear: Hiking shoes.Make sure your shoes are broken in prior to tackling this hike to prevent unexpected blisters. You could get away with running shoes but having extra grip on the rock surfaces will definitely come in handy!
  • Water: Two bottles of water per hiker should suffice as this hike isn’t too strenuous.
  • Snacks: Bring some of your favorite snacks to enjoy along the hike as well as a light lunch for when you arrive at the lake. Some of our favorites snacks are trail mix, bananas, beef jerky and licorice.
  • Weather appropriate clothing: You will be exposed to the elements throughout this hike. Check the weather forecast and plan accordingly.
  • Sunscreen: If it is sunny and you’re like Mattson, who easily burns, bring sunscreen!
  • Insect Repellent: Insect repellent can greatly improve your hiking experience.
  • Bear Spray: You are in bear country. Always hike with bear spray that is easily accessible.
  • Camera: There are numerous photo opportunities you won’t want to miss along the way.
  • This Guide: Print a copy of this guide to reference throughout the hike


OTHER CONSIDERATIONS

Wildlife: You will be hiking in bear country.  It is always advisable to check in at the local Visitor Information Center to learn of any trail closures due to wildlife.  Carry bear spray in an easily accessible location.  Travel in groups of multiple hikers and make lots of noise to avoid an unexpected encounter.


Leave No Trace: It is important that we enjoy the outdoors responsibly and sustainably. Some key principles to consider when hiking to “Leave No Trace” are:

  • Plan ahead and prepare: Proper planning allows adventurers to hike safely while minimizing damage to the land.
  • Travel on durable surfaces: Stick to the trail when possible. If there is no trail, or you must travel off trail, stay on durable surfaces to reduce your impact.
  • Dispose of waste properly: Pack it in, pack it out.
  • Leave what you find: Leave rocks, plants, archaeological artifacts and other objects of interest as you find them.
  • Respect wildlife: Observe wildlife from a distance. Never feed wild animals.
  • Be considerate of other visitors: Be courteous to others to allow everyone to enjoy their outdoor experience.

To learn more about “Leave No Trace” visit http://www.leavenotrace.ca


HIKING DIRECTIONS

Summary: Rawson Lake is a scenic trail walk starting from the Upper Kananaskis Lake Day Use Area.  The trail follows Upper Kananaskis Lake Trail clockwise until it branches off to the south and begins gaining elevation to Rawson Lake.  The official trail ends at the North East side of Rawson Lake.  There is a less maintained rocky trail that can be followed around the lake to the far west side for a different view of the lake.


Rawson Lake Adventure Map - Kananaskis - Epic Trip Adventures
Image 1: Rawson Lake Adventure Map


Step-By-Step Guide:

From the Upper Lake Parking lot (Route marker #1 on the map), follow the trail from the south side of the lot heading clockwise around Upper Kananaskis Lake.


Rawson Lake - Kananaskis - Epic Trip Adventures
Image 2: The trailhead to Rawson Lake


As you follow the trail, you will cross Sarrail Creek at Sarrail Falls (Route marker #2 on the map).


Sarrail Falls - Kananaskis - Epic Trip Adventures
Image 3: Sarrail Falls


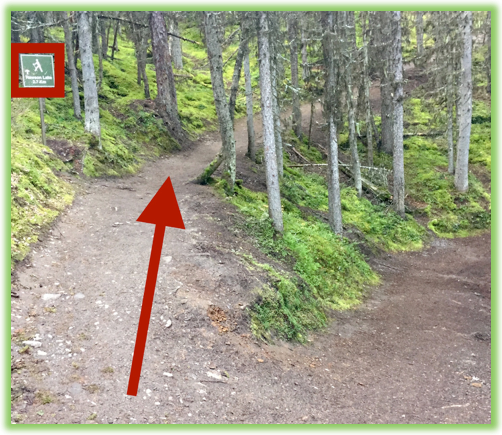
1.2 km into the hike (approx. 100m after crossing Sarrail Creek) you will come to a T-junction (Route marker #3 on the map).  Take the left trail with the sign indicating the route to Rawson Lake.


Rawson Lake - Kananaskis - Epic Trip Adventures
Image 4: The trail fork to Rawson Lake


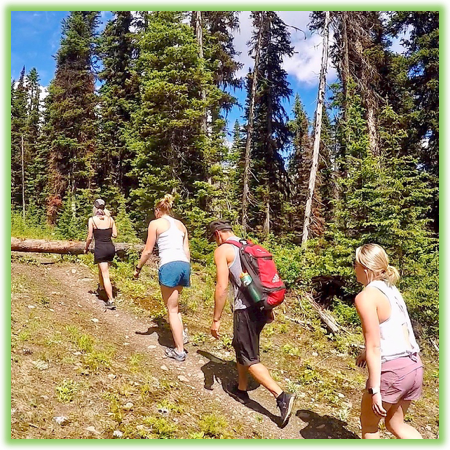
Follow the trail as it begins climbing upward through the moderately steep switch backs.  The trail will level off and after kilometer 3, you will arrive at Rawson Lake (Route marker #4 on the map).


Rawson Lake - Kananaskis - Epic Trip Adventures
Image 5: Mattson following the trail to Rawson Lake


This is the most scenic view of the Rawson Lake with Mount Sarrail as a backdrop.  You can continue around the south side of the lake to the west end (Approx. 1km to the far side).  The official trail ends part of the way around the lake, but there is a rocky trail that can be followed all the way to the west end.


Rawson Lake - Kananaskis - Epic Trip Adventures
Image 7: Rawson Lake and Mount Sarrail


Enjoy the beautiful scenery at Rawson Lake before returning to the Upper Lake Parking lot following the same trail in reverse.


WE WANT TO HEAR FROM YOU

Thank you for choosing Epic Trip Adventures as your guide.  We are committed to continually updating our guides to be as relevant and accurate as possible. If you have feedback to improve this guide please leave it in the comments below.

We also want to hear about your Rawson Lake adventures.  If you have stories, pictures or even a link to your own adventure video please share them below!


Have fun out there!

– ETA


For a downloadable PDF version of this guide CLICK HERE! 


Fossil Falls is one of the largest and most beautiful waterfalls in Kananaskis and the hike to reach them is one of our favorites in the area.  Although most of this hike follows a well-marked trail, the final 2 km to the falls are steep, difficult and involve some bushwhacking.  To some this may sound like a deterrent, but we think it adds to the experience and increases the feeling of satisfaction once you arrive at the falls.  We hope you enjoy your adventure!


ADVENTURE STATISTICS

Time Required: 8 Hours

Location: 136km west of Calgary in Peter Lougheed Provincial Park

Distance: 20km round trip

Highest Elevation: 1980m

Elevation Gain: 811m

Difficulty: 7/10 – Route finding, rapid elevation gain, and bushwhacking.

Season: June to mid-October

Additional Requirements: N/A


DRIVING DIRECTIONS

From Calgary: Take the Trans-Canada (Hwy 1) west approximately 70 km to Kananaskis Trail (Hwy 40) and then follow that 50 km to Kananaskis Lakes Trail.  Turn right onto Kananaskis Lakes Trail and follow it for 13 km.  Park at the North Interlakes Day Use Area on Upper Kananaskis Lake.

From Canmore: Take the Trans-Canada (Hwy 1) east approximately 30 km to Kananaskis Trail (Hwy 40) and then follow that 50 km to Kananaskis Lakes Trail.  Turn right onto Kananaskis Lakes Trail and follow it for 13 km.  Park at the North Interlakes Day Use Area on Upper Kananaskis Lake.


WHAT TO BRING

  • Comfortable Footwear: Hiking shoes.Make sure your shoes are broken in prior to tackling this hike to prevent unexpected blisters. You could get away with running shoes but having extra grip on the rock surfaces will definitely come in handy!
  • Water: This hike is long with lots of elevation gain to reach the waterfall. Be sure to bring enough water for 8-10 hours of physical exertion.
  • Snacks: Bring some of your favorite snacks to enjoy along the hike as well as a light lunch for when you arrive at the falls.  Some of our favorite snacks are trail mix, bananas, beef jerky and licorice.
  • Weather appropriate clothing: You will be exposed to the elements throughout this hike. Check the weather forecast and plan accordingly.
  • Long pants/high socks: The final two km of this hike are through dense brush. Having long pants or high socks for this portion of the hike will save the skin on your legs.
  • Sunscreen: If it is sunny and you’re like Mattson, who easily burns, bring sunscreen!
  • Insect Repellent: Insect repellent can greatly improve your hiking experience.
  • Bear Spray: You are in bear country. Always hike with bear spray that is easily accessible.
  • Camera: There are numerous photo opportunities you won’t want to miss.
  • This Guide: Print a copy of this guide to reference throughout the hike


OTHER CONSIDERATIONS

Wildlife: You will be hiking in bear country.  It is always advisable to check in at the local Visitor Information Center to learn of any trail closures due to wildlife.  Carry bear spray in an easily accessible location.  Travel in groups of multiple hikers and make lots of noise to avoid an unexpected encounter.


Leave No Trace: It is important that we enjoy the outdoors responsibly and sustainably. Some key principles to consider when hiking to “Leave No Trace” are:

  • Plan ahead and prepare: Proper planning allows adventurers to hike safely while minimizing damage to the land.
  • Travel on durable surfaces: Stick to the trail when possible. If there is no trail, or you must travel off trail, stay on durable surfaces to reduce your impact.
  • Dispose of waste properly: Pack it in, pack it out.
  • Leave what you find: Leave rocks, plants, archaeological artifacts and other objects of interest as you find them.
  • Respect wildlife: Observe wildlife from a distance. Never feed wild animals.
  • Be considerate of other visitors: Be courteous to others to allow everyone to enjoy their outdoor experience.

To learn more about “Leave No Trace” visit http://www.leavenotrace.ca


HIKING DIRECTIONS

Summary: The starting point for this hike is at the North Interlakes parking lot.  From there you will travel around Upper Kananaskis Lake to the “Secret Trail” that leads to Hidden Lake.  The falls are about 2 km from the south point of Hidden Lake.  This final stretch to the falls is the most challenging part of the hike as there is not much of a trail and it is very steep!


Fossil Falls Adventure Map - Kananaskis - Epic Trip Adventures
Image 1: Fossil Falls Adventure Map


Step-By-Step Guide:

From the North Interlakes parking lot you will see Upper Kananaskis Lake directly in front of you to the west.  Make sure you are looking at Upper Lake as Lower Lake is nearby on the east side of the parking lot.  You don’t want to start off walking around the wrong lake! Start by heading northwest from the parking lot and crossing the dam (Route marker #1 on the map).  Follow the clearly marked trail counterclockwise around the lake.


Fossil Falls - Kananaskis - Epic Trip Adventures
Image 2: The Interlakes Dam
Fossil Falls - Kananaskis - Epic Trip Adventures
Image 3: Upper Kananaskis Trail


Follow the path around Upper Kananaskis Lake approximately 3.35km to Point Campground (Route marker #2 on the map).  You will reach a fork in the path.  Do not go left as that will take you to the campground.  Instead take the right (west) fork and continue following the trail.


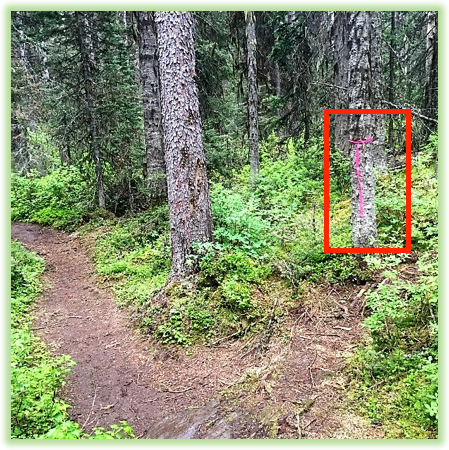
1.6 km further down the Upper Lakes trail there is a small path leading off to your right (southwest), it is marked with a pink tape around a tree (Route marker #3 on the map).  This is approximately 30m after the third wooden bridge you will have crossed. This is the “Secret Trail” to hidden lake!


Fossil Falls - Kananaskis - Epic Trip Adventures
Image 4: Pink tape marks the “Secret trail” to Hidden Lake
Fossil Falls - Kananaskis - Epic Trip Adventures
Image 5: The third wooden bridge


Follow this path for 400m staying left at the one fork you will come across.  If all has gone well you should emerge at Hidden Lake. TAKE NOTE OF THE TRAIL YOU EMERGED FROM SO THAT YOU CAN FIND IT FOR THE RETURN TRIP!


Hidden Lake - Kananaskis - Epic Trip Adventures
Image 6: Anderson at Hidden Lake


The path to Fossil Falls is on the far southeast side of Hidden Lake approximately marked by the arrow on the below photo.  We recommend travelling around this lake clockwise (about 1.5km). We went counter clockwise on the way to the falls and there is a difficult stream crossing you would have to make.  We do not recommend this.  The entrance to the trail up to the falls is marked by two large trees creating a doorway (Route marker #4 on the map).


Hidden Lake - Kananaskis - Epic Trip Adventures
Image 7: The trail to Fossil Falls across Hidden Lake
Fossil Falls - Kananaskis - Epic Trip Adventures
Image 8: The trail from Hidden Lake to Fossil Falls


At this point you are about 2 km from Fossil Falls but the route gets substantially harder. If you are wearing shorts, it is recommended to put on long pants or high socks for the final section of this hike.

Follow the path upwards towards the falls. After gaining around 800m of elevation, you will exit the dense trees and get your first look at the falls. You have the option of staying above the tree line to the left and scaling the shale rocks, or bushwhacking through the trees.  We chose the shale to save some of the skin on our legs but from this point forward there is no trail so you choose your own route.  Although the final stretch of this hike is difficult the close up view of the waterfall is well worth it!


Fossil Falls - Kananaskis - Epic Trip Adventures
Image 9: Approaching Fossil Falls


Have lunch here and spend some time enjoying the falls before beginning the trek back.  Follow the same route in reverse to get back to the North Interlakes parking lot where you left your car.


Fossil Falls - Kananaskis - Epic Trip Adventures
Image 10: The base of Fossil Falls


WE WANT TO HEAR FROM YOU

Thank you for choosing Epic Trip Adventures as your guide.  We are committed to continually updating our guides to be as relevant and accurate as possible. If you have feedback to improve this guide please leave it in the comments below.

We also want to hear about your Fossil Falls adventures.  If you have stories, pictures or even a link to your own adventure video please share them below!


Have fun out there!

– ETA


For a downloadable PDF version of this guide CLICK HERE! 


Tent Ridge is one of our favorite hikes in the Kananaskis area! It’s an 11km loop trail that is both challenging for beginner hikers and difficult enough for those with more experience. This hike has it all, from ridge walks and forest trails to scrambling up rocks and sliding down snow. To top it all off, the views from the summit are absolutely breathtaking.


ADVENTURE STATISTICS

Time Required: 4-5 Hours

Location: 100km west of Calgary

Distance: 11km round trip

Highest Elevation: 2540m

Elevation Gain: 615m

Difficulty: 7/10 – Scrambling in areas, snow most of the year.

Season: June to October

Additional Requirements: Snowshoes potentially


Tent Ridge - Kananaskis - Epic Trip Adventures
Image 1: Tent Ridge

DRIVING DIRECTIONS

From Canmore: Take Smith-Dorrien (Hwy742) south from Canmore for 35.5km. There will be a turn off to your right for Mt Engadine Lodge. Turn right and follow this road for 1.8km. Follow the road past the Lodge and at 1.8km you will see a parking lot on your right.


WHAT TO BRING

  • Comfortable Footwear:Hiking shoes.Make sure your shoes are broken in prior to tackling this hike to prevent unexpected blisters. You could get away with running shoes but having extra grip on the rock surfaces will definitely come in handy!
  • Water:This hike requires some effort to reach the summit.Be sure to bring enough water to stay hydrated. A couple liters per person minimum.
  • Snacks: Bring some of your favorite snacks to enjoy along the hike as well as a light lunch for when you arrive at the summit.  Some of our favorite snacks are trail mix, bananas, beef jerky and licorice.
  • Weather appropriate clothing:This hike is very exposed as most of the ridge is above the tree line. Check the weather forecast and dress appropriately.
  • Sunscreen:If it is sunny and you’re like Mattson, who easily burns, bring sunscreen!
  • Insect Repellent:Insect repellent can greatly improve your hiking experience.
  • Bear Spray:You are in bear country. Always hike with bear spray that is easily accessible.
  • Camera:There are numerous photo opportunities you won’t want to miss.
  • This Guide:Print a copy of this guide to reference throughout the hike


OTHER CONSIDERATIONS

Wildlife:You will be hiking in bear country.  It is always advisable to check in at the local Visitor Information Center to learn of any trail closures due to wildlife.  Carry bear spray in an easily accessible location.  Travel in groups of multiple hikers and make lots of noise to avoid an unexpected encounter.


Leave No Trace: It is important that we enjoy the outdoors responsibly and sustainably. Some key principles to consider when hiking to “Leave No Trace” are:

  • Plan ahead and prepare: Proper planning allows adventurers to hike safely while minimizing damage to the land.
  • Travel on durable surfaces: Stick to the trail when possible. If there is no trail, or you must travel off trail, stay on durable surfaces to reduce your impact.
  • Dispose of waste properly: Pack it in, pack it out.
  • Leave what you find: Leave rocks, plants, archaeological artifacts and other objects of interest as you find them.
  • Respect wildlife: Observe wildlife from a distance. Never feed wild animals.
  • Be considerate of other visitors: Be courteous to others to allow everyone to enjoy their outdoor experience.

To learn more about “Leave No Trace” visit http://www.leavenotrace.ca


HIKING DIRECTIONS

Summary: Tent Ridge is a loop that can be completed in either direction. Our recommendation is to begin at the more southern trailhead and complete the loop in a clockwise direction.  We believe this direction provides the easiest route and best views!


Tent Ridge Adventure Map - Kananaskis - Epic Trip Adventures
Image 2: Tent Ridge Adventure Map


Step-By-Step Guide:

There are two trailheads for this hike that are both accessible from the parking area (Route marker #1 on the map). The trailhead farthest to the south is our recommended route as you get the best views of Spray Lakes when traveling the ridge clockwise. The beginning of the well beaten trail from the south trailhead is quiet and easy to follow. You’ll remain in the thick forest for about 45 minutes before you cross a creek and the trees open up into a big meadow. From here you will see the entire horseshoe of Tent Ridge.


Tent Ridge - Kananaskis - Epic Trip Adventures
Image 3: Following the well beaten trail
Tent Ridge - Kananaskis - Epic Trip Adventures
Image 4: Enterting the meadow surrounded by Tent Ridge

After you cross the creek and get a nice panorama view of Tent Ridge, the trail veers off to the left (east) and through a little bit more forest. Once you cross the tree line, you will ascend up some scree and have to scramble up a few ledges. This part is challenging as the elevation seems to keep going and going. Be cautious in the early and late summer months as ice can build up on rocks and it can be dangerous. If it’s unsafe, do not proceed.


Tent Ridge - Kananaskis - Epic Trip Adventures
Image 5: Scrambling towards the top of the ridge


Once you reach the top of the ridge, follow it south to the weather station (Route marker #2 on the map). Be cautious as there are some narrow portions of the ridge with exposure on either side.  Take your time on this section while enjoying the stunning views to the East. The weather station is a great spot to stop for a snack break and shelter yourselves from the wind if needed. From here, you can see the route you’ll follow, along the ridge, for the rest of the hike.


Tent Ridge - Kananaskis - Epic Trip Adventures
Image 6: Following the ridge to the weather station
Tent Ridge - Kananaskis - Epic Trip Adventures
Image 7: The weather station


From the weather station, continue along the path to the west that heads downward and then up to the highest point on Tent Ridge (Route marker #3 on the map). At the Summit, you’re treated to 360 degree views of the surrounding mountains, valleys, and lakes. From the summit, follow the ridge North towards Spray Lakes. The view of the lakes as you traverse the ridge is an absolute highlight!


Tent Ridge - Kananaskis - Epic Trip Adventures
Image 8: Mattson at the summit


At the end of the ridge (Route marker #4 on the map), you’ll turn right and head down into a path through the forest cleared by a large avalanche. When we hiked this trail in June there was lots of snow so it was difficult to identify the trail. If you cannot find the trail, follow the avalanche’s path where the trees have been cleared until you reach the lower forest. Once you reach the lower forest you should be able to pick up the trail that will take you northeast back to the parking lot.

Tent Ridge - Kananaskis - Epic Trip Adventures
Image 1: The route down the avalanche slope
Tent Ridge - Kananaskis - Epic Trip Adventures
Image 10: Having some fun descending down the snow

WE WANT TO HEAR FROM YOU

Thank you for choosing Epic Trip Adventures as your guide.  We are committed to continually updating our guides to be as relevant and accurate as possible. If you have feedback to improve this guide please leave it in the comments below.

We also want to hear about your Tent Ridge adventures.  If you have stories, pictures or even a link to your own adventure video please share them below!


Have fun out there!

– ETA