One thing worth checking out on the Big Island for the adrenaline junkies out there… is jumping out of a plane!!! Big Island Gravity was such an awesome company to book a jump with. The customer service was fantastic and booking online was straightforward. Included in the price is GoPro footage of your jump, a scenic plane ride up and the rush of a lifetime! DRIVING DIRECTIONS From Kona: Get onto HI-19 and head north for 30 miles, turn left at the stop sign onto HI-270. After 1.5 miles at Kawaihae turn right to stay on HI-270. Keep heading north for 16.6 miles and you will see signs for Upolu Airport (turn left). Follow that road about 2 miles until it ends and park in the lot. From Hilo: Head north on HI-19/Hawaii Belt/Kamehameha Ave for 54 miles into the town of Waimea. In town, turn right onto Lindsay Rd which curves into Kawaihae Rd. Follow for 2 miles then turn left to stay on Kawaihae Rd/Hwy-19. Continue on this road until you reach Kawaihae. Turn right to stay on HI-270. Keep heading north for 16.6 miles and you will see signs for Upolu Airport (turn left). Follow that road about 2 miles until it ends and park in the lot. Book at: https://skydivebig.com/ or call 808-937-9258 WE WANT TO HEAR FROM YOU Thank you for choosing Epic Trip Adventures as your guide. We are committed to continually updating our guides to be as relevant and accurate as possible. If you have feedback to improve this guide please leave it in the comments below. We also want to hear about your Big Island Gravity Skydiving adventures. If you have stories, pictures or even a link to your own adventure video please share them below!
One thing worth checking out on the Big Island for the adrenaline junkies out there… is jumping out of a plane!!! Big Island Gravity was such an awesome company to book a jump with. The customer service was fantastic and booking online was straightforward. Included in the price is GoPro footage of your jump, a scenic plane ride up and the rush of a lifetime!
DRIVING DIRECTIONS
From Kona: Get onto HI-19 and head north for 30 miles, turn left at the stop sign onto HI-270. After 1.5 miles at Kawaihae turn right to stay on HI-270. Keep heading north for 16.6 miles and you will see signs for Upolu Airport (turn left). Follow that road about 2 miles until it ends and park in the lot.
From Hilo: Head north on HI-19/Hawaii Belt/Kamehameha Ave for 54 miles into the town of Waimea. In town, turn right onto Lindsay Rd which curves into Kawaihae Rd. Follow for 2 miles then turn left to stay on Kawaihae Rd/Hwy-19. Continue on this road until you reach Kawaihae. Turn right to stay on HI-270. Keep heading north for 16.6 miles and you will see signs for Upolu Airport (turn left). Follow that road about 2 miles until it ends and park in the lot.
Thank you for choosing Epic Trip Adventures as your guide. We are committed to continually updating our guides to be as relevant and accurate as possible. If you have feedback to improve this guide please leave it in the comments below.
We also want to hear about your Big Island Gravity Skydiving adventures. If you have stories, pictures or even a link to your own adventure video please share them below!
For a downloadable PDF version of this guide White Road hike is one of the most adventurous hikes we’ve done. The hike is located on the north side of the Big Island at the back end of the Waipio Valley. The hike takes you through irrigation tunnels, includes spectacular views of the valley below and finishes off with a natural waterslide at the end. NOTE: THIS HIKE INVOLVES TRESPASSING ON PRIVATE LAND. IN RECENT YEARS DNLR OFFICERS HAVE STOPPED AND CITED HIKERS ADVENTURE STATISTICS Time Required: 3 Hours Trailhead: 3.5 miles east of Waimea Distance: 8km round trip Highest Elevation: 800m Elevation Gain: Minimal Difficulty: 7/10 – Route finding/slippery trail with exposure Season: Year round. Additional Requirements: Headlamps, inflatable tubes, swimsuit DRIVING DIRECTIONS From Waimea: Head East on Hawaii Belt Road (Hwy 19) for 3.5 miles, turn left onto White Road and go north for a half mile where you’ll come to a gate. This is the start of the hike. WHAT TO BRING Comfortable Footwear: Hiking shoes. Make sure your shoes are broken in prior to tackling this hike to prevent unexpected blisters. A pair of water shoes might come in handy as your feet will get very wet when walking through the tunnels. Water: Always bring water. Snacks: Bring some of your favorite snacks to enjoy along the hike. Some of our favorite snacks are trail mix, bananas, beef jerky and licorice. Weather appropriate clothing: You will be exposed to the elements throughout this hike. Be sure to bring a swimsuit! Check the weather forecast and plan accordingly. Inflatable tube: If you want to try the slide bring an inflatable tube to sit on. Headlamp: The irrigation tunnels are dark. A headlamp will make them easier to navigate. Sunscreen: If it is sunny
For a downloadable PDF version of this guide CLICK HERE!
White Road hike is one of the most adventurous hikes we’ve done. The hike is located on the north side of the Big Island at the back end of the Waipio Valley. The hike takes you through irrigation tunnels, includes spectacular views of the valley below and finishes off with a natural waterslide at the end.
NOTE: THIS HIKE INVOLVES TRESPASSING ON PRIVATE LAND. IN RECENT YEARS DNLR OFFICERS HAVE STOPPED AND CITED HIKERS
ADVENTURE STATISTICS
Time Required: 3 Hours
Trailhead: 3.5 miles east of Waimea
Distance: 8km round trip
Highest Elevation: 800m
Elevation Gain:Minimal
Difficulty:7/10 – Route finding/slippery trail with exposure
From Waimea: Head East on Hawaii Belt Road (Hwy 19) for 3.5 miles, turn left onto White Road and go north for a half mile where you’ll come to a gate. This is the start of the hike.
WHAT TO BRING
Comfortable Footwear: Hiking shoes. Make sure your shoes are broken in prior to tackling this hike to prevent unexpected blisters. A pair of water shoes might come in handy as your feet will get very wet when walking through the tunnels.
Water: Always bring water.
Snacks: Bring some of your favorite snacks to enjoy along the hike. Some of our favorite snacks are trail mix, bananas, beef jerky and licorice.
Weather appropriate clothing: You will be exposed to the elements throughout this hike. Be sure to bring a swimsuit! Check the weather forecast and plan accordingly.
Inflatable tube: If you want to try the slide bring an inflatable tube to sit on.
Headlamp: The irrigation tunnels are dark. A headlamp will make them easier to navigate.
Sunscreen: If it is sunny and you’re like Mattson, who easily burns, bring sunscreen!
Insect Repellent: Insect repellent can greatly improve your hiking experience.
Camera: There are numerous photo opportunities you won’t want to miss.
This Guide: Print a copy of this guide to reference throughout the hike
OTHER CONSIDERATIONS
Trespassing: This hike is illegal. The route passes through private property. Hikers have been fined by DNLR officers!
Leave No Trace: It is important that we enjoy the outdoors responsibly and sustainably. Some key principles to consider when hiking to “Leave No Trace” are:
Plan ahead and prepare: Proper planning allows adventurers to hike safely while minimizing damage to the land.
Travel on durable surfaces: Stick to the trail when possible. If there is no trail, or you must travel off trail, stay on durable surfaces to reduce your impact.
Dispose of waste properly: Pack it in, pack it out.
Leave what you find: Leave rocks, plants, archaeological artifacts and other objects of interest as you find them.
Respect wildlife: Observe wildlife from a distance. Never feed wild animals.
Be considerate of other visitors: Be courteous to others to allow everyone to enjoy their outdoor experience.
Summary: The starting point is at the end of White Road. The trail continues through a gate and along some irrigation water channels to Waipio Valley. From there the trail follows the edge of the valley to a mile-long irrigation tunnel. This tunnel will lead you to the slide.
Image 1: White Road Adventure Map
Step-By-Step Guide:
There is a gate at the end of White Road (Route marker #1 on the map) that you will have to hop over to start the hike. The road still continues along the same path, it just changes from paved to dirt. The path will zig zag around a large circular pond and then into the forest. The trail is well tracked and pretty easy to follow. You will come to a gate, go through the gate, and close it behind you.
Image 2: The dirt road to the gate
From there the trail follows along an irrigation ditch. Water may or may not be flowing through it depending on the rainfall in the last few days. The trail is full of lush, dense jungle but is pretty easy to follow. It will stray from the irrigation ditch to a lookout point of Waipio Valley (Route marker #2 on the map). The views from the lookout are stunning!
Image 3: The irrigation ditch
Image 4: Waipio Valley Lookout
Turn left and take the trail along the edge of the drop off to the valley below. Be careful on this trail, it follows the edge of the valley and one wrong step and you could fall off a cliff. Keep walking on the trail until you reach a black irrigation tube (these act as bridges for the water to run over the valley). You will have to either cross over the tube or go through it. Water levels through the irrigation tube vary. Both climbing through and climbing on top of the tube present risks. If the water flow is too high it may be dangerous to enter the tunnel but falling from on top of the tube could be fatal. Use your judgement on what the best option to get across is at the time you are there.
Image 5: Anderson crossing the tube
Image 6: Mattson crossing the tube
From here the most straight forward route to the slide is through the irrigation tunnel. There is also a trail to the slide that continues to the right and goes back along the valley to the waterfall. If the waterflow is high it may be easier to follow the trail along the valley instead of goiing through the tunnel.
Image 7: Anderson entering the irrigation tunnel
Image 8: Mattson following the trail along the valley
If you choose the irrigation tunnel hopefully you have a headlamp with you! The tunnel is dark and has fast flowing water in places. The tunnel is about a mile long and will open up a couple times before you make it to the waterslide. If you follow the tunnel you will eventually reach the waterslide (Route marker #3 on the map)! The alternative route is along the valley and can be slippery with a steep drop into the valley. Be careful of your footing if you take this route.
Image 9: The Waterslide
After enjoying the slide head back to White Road by heading back on the route you came.
WE WANT TO HEAR FROM YOU
Thank you for choosing Epic Trip Adventures as your guide. We are committed to continually updating our guides to be as relevant and accurate as possible. If you have feedback to improve this guide please leave it in the comments below.
We also want to hear about your White Road adventures. If you have stories, pictures or even a link to your own adventure video please share them below!
For a downloadable PDF version of this guide Swimming with manta rays is a once in a lifetime experience that can be had right offshore on the big island of Hawaii. Diving with manta rays can also be experienced in other parts of the world, but Hawaii is one of the best spots! Every trip out usually delivers at LEAST a few mantas and having the dive site right in Kona makes it extra convenient. ADVENTURE STATISTICS Time Required: 2-4Hours Location: Kaeuhou Bay Difficulty: 4/10 – Must be comfortable in the water at night Season: Year round Additional Requirements: Kayak, underwater flashlight, snorkel gear, or a booking on one of the many snorkel/dive tours. DRIVING DIRECTIONS From Kona: From Ali Hwy, head south onto Kaleiopapa Street until you reach the end. There is a boat launch there and some spots for parking. WHAT TO BRING If doing a self-guided tour: Kayak/paddles: You will need to paddle out to the Mantas Lifejacket: A lifejacket will keep you safe and is nice to float with when viewing the mantas. SUV/Truck: You will need to transport the kayak to the boat launch. Lights/Glow sticks: It is important to strap lights to your boat and yourself so other boats can see you. Waterproof headlamp: It is nice to have a headlamp so you can paddle out without having to hold a light. Underwater flashlight: Lights attract the plankton that the mantas eat. Bring a flashlight so that you can see underwater. Swimsuit: You will be jumping in the water Warm Clothes: It will be chilly when you get out of the water. Towel: You will want to dry off after swimming. Snorkel Gear: Fins, mask and goggles. Gopro/underwater camera: This is an amazing experience and you will want pictures and videos from your adventure. This Guide: Print
For a downloadable PDF version of this guide CLICK HERE!
Swimming with manta rays is a once in a lifetime experience that can be had right offshore on the big island of Hawaii. Diving with manta rays can also be experienced in other parts of the world, but Hawaii is one of the best spots! Every trip out usually delivers at LEAST a few mantas and having the dive site right in Kona makes it extra convenient.
ADVENTURE STATISTICS
Time Required: 2-4Hours
Location: Kaeuhou Bay
Difficulty:4/10 – Must be comfortable in the water at night
Season: Year round
Additional Requirements: Kayak, underwater flashlight, snorkel gear, or a booking on one of the many snorkel/dive tours.
DRIVING DIRECTIONS
From Kona: From Ali Hwy, head south onto Kaleiopapa Street until you reach the end. There is a boat launch there and some spots for parking.
WHAT TO BRING
If doing a self-guided tour:
Kayak/paddles: You will need to paddle out to the Mantas
Lifejacket: A lifejacket will keep you safe and is nice to float with when viewing the mantas.
SUV/Truck: You will need to transport the kayak to the boat launch.
Lights/Glow sticks: It is important to strap lights to your boat and yourself so other boats can see you.
Waterproof headlamp: It is nice to have a headlamp so you can paddle out without having to hold a light.
Underwater flashlight: Lights attract the plankton that the mantas eat. Bring a flashlight so that you can see underwater.
Swimsuit: You will be jumping in the water
Warm Clothes: It will be chilly when you get out of the water.
Towel: You will want to dry off after swimming.
Snorkel Gear: Fins, mask and goggles.
Gopro/underwater camera: This is an amazing experience and you will want pictures and videos from your adventure.
This Guide: Print a copy of this guide to reference throughout the hike
If going on a guided tour:
Swimsuit: You will be jumping in the water
Warm Clothes: It will be chilly when you get out of the water.
Towel: You will want to dry off after swimming.
Seasickness medication: The water can be choppy and you will be on the boat for a while. If you get seasickness we recommend bringing seasickness medication.
Gopro/underwater camera: This is an amazing experience and you will want pictures and videos from your adventure.
Other: Anything else your tour guide company recommends.
OTHER CONSIDERATIONS
Safety: It is a popular tour and there are many boats in the area. Make sure you and your boat is well lit so other boat drivers can see you. Always be aware of your surroundings and where the shore and other boats are. You will need to have someone in the kayak at all times to make sure it doesn’t drift away.
Mantas: Don’t touch the mantas! Mantas are not dangerous and may swim very close to you but be careful not to touch them. They have a protective mucus that protects them and if you touch them you may harm the manta.
** If you are unfamiliar with the area we highly recommend booking a tour. All the tour companies in Kona are great and they will take care of the entire excursion. They are pros at this are will make sure you stay safe.
ADVENTURE DIRECTIONS
Summary: This is one of the best tours on the Big Island. We highly recommend booking a tour as professional dive/snorkel companies will give you the best and safest Manta Ray experience. We’ve done this tour with Jack’s Diving Locker and had a great time. If you want to have this experience without a tour company read our tips below.
Step-By-Step Guide:
Note: We did our snorkel in Keauhou Bay but there is a smaller site at Mauna Kea Beach where you can sometimes see mantas. They turn on a small light on the North side of the bay that attracts the mantas. This is an easier excursion as it is possible to snorkel right from the beach.
One of the main places to see mantas is right in front of the Sheraton Kona Resort. The Boat launch is just north east of the hotel. There is parking nearby but you will need to drop off your kayak at the boat launch and then park. It is about a 500m paddle to the site. At dusk, there will be a bunch of tour boats in front of the Sheraton. Once you have paddled out, there will be clusters of snorkelers with glow sticks and lights. This is where you want to be to see the mantas!
Image 1: Anderson getting his gear ready
Image 2: Paddling to the mantas
Once you reach the boats, jump in! Have someone stay with the boats so they don’t float away too far. Once in the water, you should be able to see the main spotlight at the bottom of the ocean with some divers down there waiting as well. Try not to get in the way of the bigger boats and don’t touch the mantas.
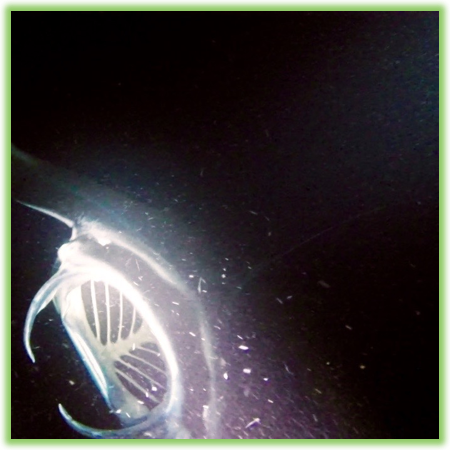
Image 3: Two manta rays
Image 4: Snorkeling with the mantas
WE WANT TO HEAR FROM YOU
Thank you for choosing Epic Trip Adventures as your guide. We are committed to continually updating our guides to be as relevant and accurate as possible. If you have feedback to improve this guide please leave it in the comments below.
We also want to hear about your Manta Ray adventures. If you have stories, pictures or even a link to your own adventure video please share them below!
For a downloadable PDF version of this guide This is less of a hike and more of a cliff jumping activity. To be more realistic, it is 100% about the cliff jumping! The hike itself is only about 0.3 miles from where you park. At the end of the trail is a 30-40ft cliff that stands above the big blue water of the pacific. The conditions here can be dicey, but if the ocean is calm End Of The World is a great place to cliff jump. ADVENTURE STATISTICS Time Required: 1 Hours Location: 8 miles south of Kona Distance: 0.6 miles round trip Highest Elevation: 30-40ft Difficulty: 2/10 for the hike to the cliff, 8/10 for the cliff jumping (depending on conditions) Season: Year round Additional Requirements: N/A DRIVING DIRECTIONS From Kona: Head South on Hawaii Belt Rd until you reach Kamehameha III Rd and take a right. Follow Kamehameha III Rd to Alii Hwy and take a left and continue for exactly 1.2 miles. Turn right onto Keauhou Kainaliu Beach Rd and continue for 0.7 miles until you reach the end of the road. Park your car and continue by foot. WHAT TO BRING Water:Even though the hike is very short, Hawaii is hot. Bring a bottle of water to stay hydrated. Swimsuit:If you are going to cliff jump, bring your trunks. Towel:Always nice to have a towel when you get out of the water. Water Shoes:to get out of the water you have to climb up lava rock. Water Shoes will protect your feet from sharp rocks. Sunscreen:If it is sunny and you’re like Mattson, who easily burns, bring sunscreen! Camera:The waves crashing upon the black lava rock make for some great photo opportunities. This Guide:Print a copy of this guide to reference throughout the hike OTHER
For a downloadable PDF version of this guide CLICK HERE!
This is less of a hike and more of a cliff jumping activity. To be more realistic, it is 100% about the cliff jumping! The hike itself is only about 0.3 miles from where you park. At the end of the trail is a 30-40ft cliff that stands above the big blue water of the pacific. The conditions here can be dicey, but if the ocean is calm End Of The World is a great place to cliff jump.
ADVENTURE STATISTICS
Time Required: 1 Hours
Location: 8 miles south of Kona
Distance: 0.6 miles round trip
Highest Elevation:30-40ft
Difficulty:2/10 for the hike to the cliff, 8/10 for the cliff jumping (depending on conditions)
Season: Year round
Additional Requirements: N/A
DRIVING DIRECTIONS
From Kona: Head South on Hawaii Belt Rd until you reach Kamehameha III Rd and take a right. Follow Kamehameha III Rd to Alii Hwy and take a left and continue for exactly 1.2 miles. Turn right onto Keauhou Kainaliu Beach Rd and continue for 0.7 miles until you reach the end of the road. Park your car and continue by foot.
WHAT TO BRING
Water:Even though the hike is very short, Hawaii is hot. Bring a bottle of water to stay hydrated.
Swimsuit:If you are going to cliff jump, bring your trunks.
Towel:Always nice to have a towel when you get out of the water.
Water Shoes:to get out of the water you have to climb up lava rock. Water Shoes will protect your feet from sharp rocks.
Sunscreen:If it is sunny and you’re like Mattson, who easily burns, bring sunscreen!
Camera:The waves crashing upon the black lava rock make for some great photo opportunities.
This Guide:Print a copy of this guide to reference throughout the hike
OTHER CONSIDERATIONS
Ocean Conditions: This area is not for beginner or even intermediate swimmers. Depending on the time of year (December – March being especially dangerous) the swells coming into the End Of The World are extremely dangerous. When climbing up onto the rocks, be very careful, and be honest with your swimming skills. If you have any doubts, DO NOT JUMP!
Leave No Trace: It is important that we enjoy the outdoors responsibly and sustainably. Some key principles to consider when hiking to “Leave No Trace” are:
Plan ahead and prepare: Proper planning allows adventurers to hike safely while minimizing damage to the land.
Travel on durable surfaces: Stick to the trail when possible. If there is no trail, or you must travel off trail, stay on durable surfaces to reduce your impact.
Dispose of waste properly: Pack it in, pack it out.
Leave what you find: Leave rocks, plants, archaeological artifacts and other objects of interest as you find them.
Respect wildlife: Observe wildlife from a distance. Never feed wild animals.
Be considerate of other visitors: Be courteous to others to allow everyone to enjoy their outdoor experience.
Summary: The hike to End Of The World is very straight forward. If the swells are too large to jump it is a great place to visit to see the waves crash against the lava rock cliffs.
Step-By-Step Guide:
This hike starts at the end of Keauhou Kainaliu Beach Rd. It is such a short hike you can basically see the cliff from where you park. Follow the trail along the coast to the south. This trail is well defined and easy to follow. When the rocky path ends you must traverse some lava rock to get to the jump site.
Image 1: The trail to End Of The World
Image 2: Looking out over End Of The World
There are a couple ledges to jump from. One is roughly 30ft, the other is roughly 40ft. It’s always a good idea to check the water level for yourself at any cliff jumping site. Watch the ocean before jumping to get a sense of the timing of the swells coming in and how large they are.
Image 3: Anderson jumping off End Of The World
Image 4: Jumping off End Of The World
WE WANT TO HEAR FROM YOU
Thank you for choosing Epic Trip Adventures as your guide. We are committed to continually updating our guides to be as relevant and accurate as possible. If you have feedback to improve this guide please leave it in the comments below.
We also want to hear about your End Of The World adventures. If you have stories, pictures or even a link to your own adventure video please share them below!
For a downloadable PDF version of this guide Hiking to Kiholo Bay is a nice short walk along the Kohala Coast. Kiholo Bay is a tide pool known for having uniquely turquoise water. The turquoise water is a result of ocean saltwater meeting and mixing with fresh water. The hike follows the beach over black lava rock, passing a flooded lava tube known as the Queen’s Bath. ADVENTURE STATISTICS Time Required: 1-2 hours Location: 17 miles north of Kona Distance: 5km round trip Elevation Gain: Minimal Difficulty: 4/10 – Traversing sharp lava rock and enduring the hot Hawaiian sun with minimal shade. Season: Year round… it’s Hawaii Additional Requirements: N/A DRIVING DIRECTIONS From Kona: Head North on the HI 19 for roughly 17 miles and then turn left onto the unmarked road adjacent to mile marker 82. If you hit the scenic overlook you’ve gone too far. Follow the unmarked road towards the ocean to the Kiholo Bay parking area. WHAT TO BRING Comfortable Footwear: Running shoes or hikers. If you wear flip flops and they get wet it can be very slippery on the sharp lava rock. Water: This side of the island gets lots of sun! Be sure to bring lots of water. Snacks: Bring some of your favorite snacks to enjoy along the hike as well as a light lunch for when you arrive at the bay. Some of our favorite snacks are trail mix, bananas, beef jerky and licorice. Swimsuit: You will want to swim in the lava tube and probably take a dip when you get to the bay so bring your trunks. Sunscreen: If it is sunny and you’re like Mattson, who easily burns, bring sunscreen! Camera: There are numerous photo opportunities you won’t want to miss. This Guide: Print a copy of this guide to reference throughout the hike
For a downloadable PDF version of this guide CLICK HERE!
Hiking to Kiholo Bay is a nice short walk along the Kohala Coast. Kiholo Bay is a tide pool known for having uniquely turquoise water. The turquoise water is a result of ocean saltwater meeting and mixing with fresh water. The hike follows the beach over black lava rock, passing a flooded lava tube known as the Queen’s Bath.
ADVENTURE STATISTICS
Time Required: 1-2 hours
Location: 17 miles north of Kona
Distance: 5km round trip
Elevation Gain:Minimal
Difficulty:4/10 – Traversing sharp lava rock and enduring the hot Hawaiian sun with minimal shade.
Season: Year round… it’s Hawaii
Additional Requirements: N/A
DRIVING DIRECTIONS
From Kona: Head North on the HI 19 for roughly 17 miles and then turn left onto the unmarked road adjacent to mile marker 82. If you hit the scenic overlook you’ve gone too far. Follow the unmarked road towards the ocean to the Kiholo Bay parking area.
WHAT TO BRING
Comfortable Footwear: Running shoes or hikers. If you wear flip flops and they get wet it can be very slippery on the sharp lava rock.
Water: This side of the island gets lots of sun! Be sure to bring lots of water.
Snacks: Bring some of your favorite snacks to enjoy along the hike as well as a light lunch for when you arrive at the bay. Some of our favorite snacks are trail mix, bananas, beef jerky and licorice.
Swimsuit: You will want to swim in the lava tube and probably take a dip when you get to the bay so bring your trunks.
Sunscreen: If it is sunny and you’re like Mattson, who easily burns, bring sunscreen!
Camera: There are numerous photo opportunities you won’t want to miss.
This Guide: Print a copy of this guide to reference throughout the hike
OTHER CONSIDERATIONS
Sea Turtles: Kiholo Bay is a great place to spot Sea Turtles. Keep in mind that Sea Turtles in Hawaii are protected by law and should not be touched.
Leave No Trace: It is important that we enjoy the outdoors responsibly and sustainably. Some key principles to consider when hiking to “Leave No Trace” are:
Plan ahead and prepare: Proper planning allows adventurers to hike safely while minimizing damage to the land.
Travel on durable surfaces: Stick to the trail when possible. If there is no trail, or you must travel off trail, stay on durable surfaces to reduce your impact.
Dispose of waste properly: Pack it in, pack it out.
Leave what you find: Leave rocks, plants, archaeological artifacts and other objects of interest as you find them.
Respect wildlife: Observe wildlife from a distance. Never feed wild animals.
Be considerate of other visitors: Be courteous to others to allow everyone to enjoy their outdoor experience.
Summary: This hike will start at the Kiholo Bay parking lot and follow the coast northeast to the bay. It’s a very simple hike as far as directions go. Keep the water in sight and you’ll make it to the bay.
Image 1: Kiholo Bay Adventure Map
Step-By-Step Guide:
The hike starts from the parking lot (Route marker #1 on the map) and heads west into the trees. Before too long you’ll reach the ocean. From there it’s a straightforward hike along the coast to the northeast. About half a kilometer into the hike you’ll come across a flooded lava tube known as the Queen’s Bath (Route marker #2 on the map). The lava tube is usually full of fresh water so it’s a great place for a refreshing swim.
Image 2: Anderson following the coastal trail
Image 3: Mattson swimming in the flooded lava tube
After cooling off in the lava tube, continue on your way along the coast. You will cross over black lava rock and soon enough the bright blue water of Kiholo Bay will be in your sights (Route marker #3 on the map). Walk over and around the black sand beach, cross a small bridge, and find a nice spot to swim in the Bay. Hope you enjoy! Take lots of pictures!
Image 4: The trail to Kiholo Bay
Image 5: Traversing sharp lava rock (flip flops not recommended)
Image 6: Kiholo Bay
WE WANT TO HEAR FROM YOU
Thank you for choosing Epic Trip Adventures as your guide. We are committed to continually updating our guides to be as relevant and accurate as possible. If you have feedback to improve this guide please leave it in the comments below.
We also want to hear about your Kiholo Bay adventures. If you have stories, pictures or even a link to your own adventure video please share them below!
For a downloadable PDF version of this guide The “Jello Mold” is an ancient cinder cone between Mauna Kea and Mauna Loa with a stunning view of the Kona Coast. It is known as the Jello Mold due to its resemblance to an upside-down mold. The hike to the summit requires a relatively high level of fitness as the elevation gain is constant. A bike makes the first half of the hike much faster and the way down a lot easier. ADVENTURE STATISTICS Time Required: 3-4 hours Location: 29 miles northeast of Kona Distance: 12km round trip Elevation Gain: 620m Difficulty: 7/10 – Constant elevation gain Season: Year round Additional Requirements: A bike is nice to have but not required. DRIVING DIRECTIONS From Kona: Take Hwy 190 North East and take the turnoff between mile markers 21 and 22. Stay left and pass through a metal gate to the parking area at the check in station. You won’t be able to drive further up the road as there is a metal cable blocking vehicle access. WHAT TO BRING Comfortable Footwear: Hiking shoes.Make sure your shoes are broken in prior to tackling this hike to prevent unexpected Water: This hike hike has lots of elevation gain and there is no shade along the way. Bring lots of water to prevent dehydration. Snacks: Bring some of your favorite snacks to enjoy along the hike as well as a light lunch for when you arrive at the summit. Some of our favorite snacks are trail mix, bananas, beef jerky and licorice. Weather appropriate clothing: You will be exposed to the elements throughout this hike. Check the weather forecast and plan accordingly. Sunscreen: If it is sunny and you’re like Mattson, who easily burns, bring sunscreen! Insect Repellent: Insect repellent can greatly improve your hiking experience. Camera: There are numerous
For a downloadable PDF version of this guide CLICK HERE!
The “Jello Mold” is an ancient cinder cone between Mauna Kea and Mauna Loa with a stunning view of the Kona Coast. It is known as the Jello Mold due to its resemblance to an upside-down mold. The hike to the summit requires a relatively high level of fitness as the elevation gain is constant. A bike makes the first half of the hike much faster and the way down a lot easier.
ADVENTURE STATISTICS
Time Required: 3-4 hours
Location: 29 miles northeast of Kona
Distance: 12km round trip
Elevation Gain:620m
Difficulty:7/10 – Constant elevation gain
Season: Year round
Additional Requirements: A bike is nice to have but not required.
DRIVING DIRECTIONS
From Kona: Take Hwy 190 North East and take the turnoff between mile markers 21 and 22. Stay left and pass through a metal gate to the parking area at the check in station. You won’t be able to drive further up the road as there is a metal cable blocking vehicle access.
WHAT TO BRING
Comfortable Footwear: Hiking shoes.Make sure your shoes are broken in prior to tackling this hike to prevent unexpected
Water: This hike hike has lots of elevation gain and there is no shade along the way. Bring lots of water to prevent dehydration.
Snacks: Bring some of your favorite snacks to enjoy along the hike as well as a light lunch for when you arrive at the summit. Some of our favorite snacks are trail mix, bananas, beef jerky and licorice.
Weather appropriate clothing: You will be exposed to the elements throughout this hike. Check the weather forecast and plan accordingly.
Sunscreen: If it is sunny and you’re like Mattson, who easily burns, bring sunscreen!
Insect Repellent: Insect repellent can greatly improve your hiking experience.
Camera: There are numerous photo opportunities you won’t want to miss.
This Guide: Print a copy of this guide to reference throughout the hike
OTHER CONSIDERATIONS
Weather: The highlight of this hike is the view from the top. We recommend saving this hike for a clear day and getting an early start to avoid getting stuck in the clouds.
Bikes: The first half of this hike is up a road with steady elevation gain. This is an out and back hike so if you bike up this section you will thank yourself as biking down is much easier than hiking all the way out.
Leave No Trace: It is important that we enjoy the outdoors responsibly and sustainably. Some key principles to consider when hiking to “Leave No Trace” are:
Plan ahead and prepare: Proper planning allows adventurers to hike safely while minimizing damage to the land.
Travel on durable surfaces: Stick to the trail when possible. If there is no trail, or you must travel off trail, stay on durable surfaces to reduce your impact.
Dispose of waste properly: Pack it in, pack it out.
Leave what you find: Leave rocks, plants, archaeological artifacts and other objects of interest as you find them.
Respect wildlife: Observe wildlife from a distance. Never feed wild animals.
Be considerate of other visitors: Be courteous to others to allow everyone to enjoy their outdoor experience.
Summary: From the parking area you will follow the road to its end and then head left along a trail to a gate where you can lock your bike up. From here the grassy trail winds to the east side of the Jello Mold and then climbs to the summit. The directions for this hike are relatively simple but the constant elevation gain will challenge any hiker.
Image 1: The Jello Mold Adventure Map
Step-By-Step Guide:
From the parking area (Route marker #1 on the map) grab your bike (or walk if you don’t have one) and follow the road about 2.5 km uphill until the road ends at an old house.
Image 2: Mattson biking up the road
From here the trail heads left and follows the side of the mold up to an old gate (Route marker #2 on the map). We recommend locking your bikes up at the gate and then continuing on foot from this point. Be sure to close the gate behind you asranchers use this land and there was plenty of cattle roaming around when we did this hike.
Image 3: Mattson locking up his bike at the gate
Image 4: The grassy trail
From here the trail is grassy and easy to follow. You will circle around to the west side of the Jello Mold and then hike the final elevation to the summit (Route marker #3 on the map).
Once you reach the summit there’s a bench to relax and enjoy the beautiful view of the West Coast of the Big Island! The great thing about this hike is its all downhill to return to your vehicle and if you brought a bike the last half should be an easy cruise downhill.
Image 5: The Summit of the Jello Mold
WE WANT TO HEAR FROM YOU
Thank you for choosing Epic Trip Adventures as your guide. We are committed to continually updating our guides to be as relevant and accurate as possible. If you have feedback to improve this guide please leave it in the comments below.
We also want to hear about your Jello Mold adventures. If you have stories, pictures or even a link to your own adventure video please share them below!
For a downloadable PDF version of this guide Homonalino Beach is very quiet, secluded and not well known to tourists. Unlike many of the Big Island’s Public Beaches, Honomalino isn’t accessible by road. This makes it a nice peaceful and quiet place to relax. The hike to the beach from the parking lot is just under a mile, requires little effort, and when you reach the beach, you’ll be rewarded with picturesque scenery and a beautiful black sand beach. ADVENTURE STATISTICS Time Required: 20 minute walk each way Location: 40 miles south of Kona Distance: 1.5 miles (2.5km) round trip Elevation Gain: none Difficulty: 3/10 – Walking over lava rock Season: Year Round Additional Requirements: N/A DRIVING DIRECTIONS From Kailua-Kona: Head south on Highway 11 (Alii Hwy) out of the city for roughly 34 miles until you reach Milolii Rd (just south of the 89-mile marker). Take a right on Milolii Rd and follow the long, progressively narrowing road for 4.5 miles through the fishing village of Milolii until it ends at Milolii Beach Park. The trailhead is off the Milolii Beach Parking Area. From Hilo: Just like from Kona, head south from Hilo on the Highway 11 for about 85 miles until you reach Milolii Rd (between the 88 and 89-mile marker). Take a left on Milolii Rd and follow the long, progressively narrowing road for 4.5 miles through the fishing village of Milolii until it ends at Milolii Beach Park. The trailhead is off the Milolii Beach Parking Area. WHAT TO BRING Comfortable Footwear: The trail crosses sharp sections of lava rock so footwear is important. The hike can be done in flip flops but closed toed shoes will protect you from stubbing a toe on the sharp rock. There is also a brief section of the trail
For a downloadable PDF version of this guide CLICK HERE!
Homonalino Beach is very quiet, secluded and not well known to tourists. Unlike many of the Big Island’s Public Beaches, Honomalino isn’t accessible by road. This makes it a nice peaceful and quiet place to relax. The hike to the beach from the parking lot is just under a mile, requires little effort, and when you reach the beach, you’ll be rewarded with picturesque scenery and a beautiful black sand beach.
ADVENTURE STATISTICS
Time Required: 20 minute walk each way
Location: 40 miles south of Kona
Distance: 1.5 miles (2.5km) round trip
Elevation Gain:none
Difficulty:3/10 – Walking over lava rock
Season: Year Round
Additional Requirements: N/A
DRIVING DIRECTIONS
From Kailua-Kona: Head south on Highway 11 (Alii Hwy) out of the city for roughly 34 miles until you reach Milolii Rd (just south of the 89-mile marker). Take a right on Milolii Rd and follow the long, progressively narrowing road for 4.5 miles through the fishing village of Milolii until it ends at Milolii Beach Park. The trailhead is off the Milolii Beach Parking Area.
From Hilo: Just like from Kona, head south from Hilo on the Highway 11 for about 85 miles until you reach Milolii Rd (between the 88 and 89-mile marker). Take a left on Milolii Rd and follow the long, progressively narrowing road for 4.5 miles through the fishing village of Milolii until it ends at Milolii Beach Park. The trailhead is off the Milolii Beach Parking Area.
WHAT TO BRING
Comfortable Footwear: The trail crosses sharp sections of lava rock so footwear is important. The hike can be done in flip flops but closed toed shoes will protect you from stubbing a toe on the sharp rock. There is also a brief section of the trail where you’ll have to walk through water so bring shoes you don’t mind getting wet.
Water: This hike isn’t very long but it’s always important to be prepared and stay hydrated.
Snacks: Bring some of your favorite snacks to enjoy at the beach. Some of our favorite snacks are trail mix, bananas, beef jerky and licorice.
Snorkeling Gear: Bring your snorkeling gear, there are a lot of fish, caves, and lava rock formations to look at under the water.
Games: Bring a beach towel and some beach games. Football, Frisbee, spike ball, paddle ball, water bouncers.
Sunscreen: If it is sunny and you’re like Mattson, who easily burns, bring sunscreen!
Camera: There are numerous photo opportunities you won’t want to miss.
This Guide: Print a copy of this guide to reference throughout the hike
OTHER CONSIDERATIONS
Campfires: No campfires or overnight camping allowed on this beach.
No Facilities:There are no facilities on this beach of any kind so be sure to plan ahead.
Leave No Trace: It is important that we enjoy the outdoors responsibly and sustainably. Some key principles to consider when hiking to “Leave No Trace” are:
Plan ahead and prepare: Proper planning allows adventurers to hike safely while minimizing damage to the land.
Travel on durable surfaces: Stick to the trail when possible. If there is no trail, or you must travel off trail, stay on durable surfaces to reduce your impact.
Dispose of waste properly: Pack it in, pack it out.
Leave what you find: Leave rocks, plants, archaeological artifacts and other objects of interest as you find them.
Respect wildlife: Observe wildlife from a distance. Never feed wild animals.
Be considerate of other visitors: Be courteous to others to allow everyone to enjoy their outdoor experience.
Summary: The hike to Honomalino Bay is straightforward and takes around 20 minutes. From the Miloli’i Beach Park there is a marked trail that will take you to Honomalino Bay.
Image 1: Honomalino Bay Adventure Map
Step-By-Step Guide:
On the South side of the Milolii Beach parking lot (Route marker #1 on the map) a sign marks the beginning of the trail to Honomalino Beach. Follow the marked trail south!
Image 2: Honomalino Beach Trailhead
Make sure you’re on the public trail and off people’s private property. You will see yellow arrows painted on the black lava rock indicating that you are on the right track. Initially the trail follows a lava rock retaining wall right next to the ocean. Stay to the right of this wall. At one point you will have to get your feet wet as the trail cuts through a shallow section of ocean.
Image 3: The trail to Honomalino Beach
After the short water hop, the trail should be quite clear. Follow the trail as it weaves through dense vegetation and over barren lava flows. Just before the beach, you’ll pass some more private property, remain on the trail and you’ll be at Homonolino in no time!
Image 4: Vegetation along the trail
Image 5: A tree overhanging the trail
Honomalino Beach (Route marker #2 on the map) is a beautiful black sand beach and a great place to spend a relaxing day. When you have got your fill of the beach return to your vehicle the same way you came.
Image 6: Honomalino Beach
WE WANT TO HEAR FROM YOU
Thank you for choosing Epic Trip Adventures as your guide. We are committed to continually updating our guides to be as relevant and accurate as possible. If you have feedback to improve this guide please leave it in the comments below.
We also want to hear about your Honomalino Bay adventures. If you have stories, pictures or even a link to your own adventure video please share them below!
Kilauea is the youngest and most southeastern volcano on the island of Hawai’i. It is also one of the most active volcanoes in the world. The conditions of the eruption are ever changing but under the right circumstances, up close viewing of lava is a once in a lifetime opportunity. Due to the ever changing nature of Kilauea it is not possible to visit a surface flow all the time. To find out about the current conditions contact Hawaii Volcanoes National Park visitor information at (808) 985-6101 WE WANT TO HEAR FROM YOU Thank you for choosing Epic Trip Adventures as your guide. We are committed to continually updating our guides to be as relevant and accurate as possible. If you have feedback to improve this guide please leave it in the comments below. We also want to hear about your Lava Flow adventures. If you have stories, pictures or even a link to your own adventure video please share them below! Have fun out there! - ETA
Kilauea is the youngest and most southeastern volcano on the island of Hawai’i. It is also one of the most active volcanoes in the world. The conditions of the eruption are ever changing but under the right circumstances, up close viewing of lava is a once in a lifetime opportunity.
Due to the ever changing nature of Kilauea it is not possible to visit a surface flow all the time. To find out about the current conditions contact Hawaii Volcanoes National Park visitor information at (808) 985-6101
WE WANT TO HEAR FROM YOU
Thank you for choosing Epic Trip Adventures as your guide. We are committed to continually updating our guides to be as relevant and accurate as possible. If you have feedback to improve this guide please leave it in the comments below.
We also want to hear about your Lava Flow adventures. If you have stories, pictures or even a link to your own adventure video please share them below!
For a downloadable PDF version of this guide The Puna Coast Trail to Apua Point is a long and beautiful scenic trail over many different kinds of lava rock. Along the trail, there are ruins from ancient Hawaii, coastal cliffs and hardened lava flows from different eruptions over hundreds of years! ADVENTURE STATISTICS Time Required: 10 hours or an overnight trip Location: Southern Coast of Volcano National Park Distance: 10 mile (16km) round trip Highest Elevation: 150ft Elevation Gain: 150ft Difficulty: 7/10 – Black lava rock with uneven footing under the Hawaiian sun with no shade Season: Year round Additional Requirements: N/A DRIVING DIRECTIONS From Kailua-Kona: Head south on Highway 11 (Alii Hwy) out of the city for roughly 95 miles until you reach Crater Rim Drive in Hawaii Volcanoes National Park. Take a right onto Crater Rim Drive and follow it south through Hawaii Volcanoes National Park to Chain Of Craters Rd. Follow Chain Of Crater Rd roughly 16 miles to the Apua Point Trailhead. The Trailhead is not very well marked. There is a bit of a shoulder on the road to pull over at and a sign marking the start of the Puna Coast Trail. From Hilo: Just like from Kona, head south from Hilo on the Highway 11 for about 25 miles until you reach Crater Rim Drive in Hawaii Volcanoes National Park. Take a right onto Crater Rim Drive and follow it south through Hawaii Volcanoes National Park to Chain Of Craters Rd. Follow Chain Of Crater Rd roughly 16 miles to the Apua Point Trailhead. The Trailhead is not very well marked. There is a bit of a shoulder on the road to pull over at and a sign marking the start of the Puna Coast Trail. WHAT TO
For a downloadable PDF version of this guide CLICK HERE!
The Puna Coast Trail to Apua Point is a long and beautiful scenic trail over many different kinds of lava rock. Along the trail, there are ruins from ancient Hawaii, coastal cliffs and hardened lava flows from different eruptions over hundreds of years!
ADVENTURE STATISTICS
Time Required: 10 hours or an overnight trip
Location: Southern Coast of Volcano National Park
Distance: 10 mile (16km) round trip
Highest Elevation:150ft
Elevation Gain:150ft
Difficulty:7/10 – Black lava rock with uneven footing under the Hawaiian sun with no shade
Season: Year round
Additional Requirements: N/A
DRIVING DIRECTIONS
From Kailua-Kona: Head south on Highway 11 (Alii Hwy) out of the city for roughly 95 miles until you reach Crater Rim Drive in Hawaii Volcanoes National Park. Take a right onto Crater Rim Drive and follow it south through Hawaii Volcanoes National Park to Chain Of Craters Rd. Follow Chain Of Crater Rd roughly 16 miles to the Apua Point Trailhead. The Trailhead is not very well marked. There is a bit of a shoulder on the road to pull over at and a sign marking the start of the Puna Coast Trail.
From Hilo: Just like from Kona, head south from Hilo on the Highway 11 for about 25 miles until you reach Crater Rim Drive in Hawaii Volcanoes National Park. Take a right onto Crater Rim Drive and follow it south through Hawaii Volcanoes National Park to Chain Of Craters Rd. Follow Chain Of Crater Rd roughly 16 miles to the Apua Point Trailhead. The Trailhead is not very well marked. There is a bit of a shoulder on the road to pull over at and a sign marking the start of the Puna Coast Trail.
WHAT TO BRING
Comfortable Footwear: Hiking shoes.Make sure your shoes are broken in prior to tackling this hike to prevent unexpected blisters. You could get away with running shoes but having extra grip on the lava rock surfaces will definitely come in handy!
Water: This hike may not involve a lot of elevation gain, but it is long and hot! Be sure to bring enough water for 8-10 hours of physical exertion. 4 quarts/liters recommended.
Snacks: Bring some of your favorite snacks to enjoy along the hike as well. Try to avoid very salty snacks because they just make you thirstier. Some of our favorite snacks are trail mix, bananas, beef jerky and licorice. If you’re camping overnight, you will need to pack more than just snacks.
Weather appropriate clothing: Keep yourself shaded from the sun. Wear a hat, shirt, and shorts. If you plan on staying overnight at the bay, a hoody, windbreaker or a pair of sweats. It doesn’t rain often, but it’s nice to be prepared for these situations.
Sunscreen: It will most likely be sunny so if you’re like Mattson, who easily burns, bring sunscreen!
Insect Repellent: Insect repellent can greatly improve your hiking experience.
Camera: There are numerous photo opportunities you won’t want to miss.
First Aid Kit: Lava rock is incredibly sharp and will cause cuts if you stumble and fall. Be safe and stay on your feet!
Sleeping Gear: For the overnight hikers, sleeping bag, hammock, or tent.
Headlamp/flashlight: If you are camping you will want a light for when it gets dark.
This Guide: Print a copy of this guide to reference throughout the hike
OTHER CONSIDERATIONS
Wildlife: Scorpions, back widows and centipedes can be found in shaded cracks and under rocks. They don’t bite often, but give your clothes and shoes a shake before putting them on in the morning.
Turtles: Endangered Hawksbill sea turtles nest at Apua Point. This is also a resting place for Green sea turtles. DO NOT camp in areas posted as turtle nesting areas.
Permit: All overnight backcountry camping requires a permit. Permits are 10 dollars and must be obtained from the backcountry office no more than 24 hours in advance (They can be reserved up to a week in advance). The backcountry office is located just off of Crater Rim Drive and is open from 8am-4pm daily.
Facilities: There is an outhouse at Apua Point as well as a water catchment tank. Check with a ranger at the permit house for information on the level of water in the catchment tanks.
Volcanic Area: The volcano is active and conditions are always changing. Stop into the Visitor’s Center to check for any trail closures or hazards.
Leave No Trace: It is important that we enjoy the outdoors responsibly and sustainably. Some key principles to consider when hiking to “Leave No Trace” are:
Plan ahead and prepare: Proper planning allows adventurers to hike safely while minimizing damage to the land.
Travel on durable surfaces: Stick to the trail when possible. If there is no trail, or you must travel off trail, stay on durable surfaces to reduce your impact.
Dispose of waste properly: Pack it in, pack it out.
Leave what you find: Leave rocks, plants, archaeological artifacts and other objects of interest as you find them.
Respect wildlife: Observe wildlife from a distance. Never feed wild animals.
Be considerate of other visitors: Be courteous to others to allow everyone to enjoy their outdoor experience.
Summary: The hike to Apua point is a hot, exposed trek over ancient lava flows. The trail can be difficult to follow at times, but as long as you keep the coast to your left, you will eventually reach Apua Point.
Image 1: Hiking To Apua Point Adventure Map
Step-By-Step Guide:
The hike to Apua point starts on the side of Chain Of Crater Rd (Route marker #1 on the map). A sign marks the beginning of the Puna Coast Trail which will take you to Apua Point. Follow the trail over the lava rock west with the coast on your left.
Image 2: Anderson at the Trailhead
The Puna Coast Trail is not very well defined! The only way to be sure that you are still on the trail is to keep following the rock cairns. Rock cairns are basically just big piles of black lava rock, and they’re spaced out every few hundred feet. As long as you keep passing them, you’re on the trial.
Image 3: Cairns Mark the Trail
Image 4: Following the Lava Rock Trail
After a few miles, far off in the distance, you will see about a dozen palm trees swaying in the wind. These palm trees mark Apua Point! If you keep following the rock cairns, they will eventually take you right to the coast.
Image 5: Anderson Checking Out The Coast
Image 6: Waves Crashing Against The Coastal Cliff
Not too long after walking beside the coast, you’ll come to an ancient goat corral. These rock walls are the remains of an ancient fishing village destroyed by a tsunami after the 1868 Hawaiian earthquake. These rock walls might be your only chance for a little shade for the day.
Image 7: The Lava Goat Corral
Image 8: Lava Rock Wall Rubble
From the fishing village remains the hike to Apua point is about 2 miles. The green palm trees should be fully in view so follow the trail as best you can to the point. When you make it, take some time to explore or relax on the beach and enjoy the sunset.
Image 9: Hammocking at Apua Point
WE WANT TO HEAR FROM YOU
Thank you for choosing Epic Trip Adventures as your guide. We are committed to continually updating our guides to be as relevant and accurate as possible. If you have feedback to improve this guide please leave it in the comments below.
We also want to hear about your Apua Point adventures. If you have stories, pictures or even a link to your own adventure video please share them below!
For a downloadable PDF version of this guide The hike to Nanue Falls is very short and only 18 miles north of Hilo. Although this hike is short and doesn’t require much time, it is challenging as there is no trail and you must rock hop along slippery boulders up the creek. The waterfall is beautiful and worth the trek, but even the most sure-footed hikers are likely to take a slip and end up getting wet at some point. ADVENTURE STATISTICS Time Required: 1 Hour Location: 18 miles north of Hilo Distance: Less than a mile Highest Elevation: 300 ft Elevation Gain: Minimal Difficulty: 4/10 – Slippery boulder hopping necessary Season: Year round Additional Requirements: N/A DRIVING DIRECTIONS From Hilo: Take Hwy 19 north of Hilo for 18 miles and take your first left passed mile marker 18. (If you’re coming from the north, after mile marker 19, you will cross two bridges, after crossing the second bridge, take your first right) follow this road for 2.5 miles past the World Botanical Garden registration area. 75ft after crossing a small bridge there is an area on the right just passed a guard rail to pull over and park your car. WHAT TO BRING Comfortable Footwear you can get wet: Your shoes will very likely get wet. Water shoes would be a good option. Water: This hike is short but it is always smart to bring a little bit of water. Snacks: A snack might be necessary if you plan to stay at the falls for any length of time. Weather appropriate clothing: Check the weather forecast and plan accordingly. Sunscreen:If it is sunny and you’re like Mattson, who easily burns, bring sunscreen! Insect Repellent: Insect repellent can greatly improve your hiking experience. There were a lot of mosquitoes on this hike so definitely pack
For a downloadable PDF version of this guide CLICK HERE!
The hike to Nanue Falls is very short and only 18 miles north of Hilo. Although this hike is short and doesn’t require much time, it is challenging as there is no trail and you must rock hop along slippery boulders up the creek. The waterfall is beautiful and worth the trek, but even the most sure-footed hikers are likely to take a slip and end up getting wet at some point.
From Hilo: Take Hwy 19 north of Hilo for 18 miles and take your first left passed mile marker 18. (If you’re coming from the north, after mile marker 19, you will cross two bridges, after crossing the second bridge, take your first right) follow this road for 2.5 miles past the World Botanical Garden registration area. 75ft after crossing a small bridge there is an area on the right just passed a guard rail to pull over and park your car.
WHAT TO BRING
Comfortable Footwear you can get wet: Your shoes will very likely get wet. Water shoes would be a good option.
Water: This hike is short but it is always smart to bring a little bit of water.
Snacks: A snack might be necessary if you plan to stay at the falls for any length of time.
Weather appropriate clothing: Check the weather forecast and plan accordingly.
Sunscreen:If it is sunny and you’re like Mattson, who easily burns, bring sunscreen!
Insect Repellent: Insect repellent can greatly improve your hiking experience. There were a lot of mosquitoes on this hike so definitely pack some bug spray.
Camera: There are numerous photo opportunities you won’t want to miss.
This Guide: Print a copy of this guide to reference throughout the hike.
OTHER CONSIDERATIONS
Cliff Jumping: Always be cautious when jumping off cliffs into water. Know your limits and check the water below you thoroughly before jumping to make sure it is deep enough.
Flash Floods: This area of the Big Island receives over 100 inches of rain annually. Heavy rains can cause flash floods in streams and rivers. If there is flooding and fast moving water, attempting to cross streams and rivers can be very dangerous and potentially fatal.
Leave No Trace: It is important that we enjoy the outdoors responsibly and sustainably. Some key principles to consider when hiking to “Leave No Trace” are:
Plan ahead and prepare: Proper planning allows adventurers to hike safely while minimizing damage to the land.
Travel on durable surfaces: Stick to the trail when possible. If there is no trail, or you must travel off trail, stay on durable surfaces to reduce your impact.
Dispose of waste properly: Pack it in, pack it out.
Leave what you find: Leave rocks, plants, archaeological artifacts and other objects of interest as you find them.
Respect wildlife: Observe wildlife from a distance. Never feed wild animals.
Be considerate of other visitors: Be courteous to others to allow everyone to enjoy their outdoor experience.
Summary: The hike to Nanue Falls is short and straightforward. From the Nanue Bridge the hike follows the Nanue stream upstream to Nanue Falls.
Image 1: Nanue Falls Adventure Map
Step-By-Step Guide:
When you’ve passed the bridge, and found your spot to park beyond the guard rail (Route marker #1 on the map), take a walk back onto the bridge. This isn’t part of the hike, but the bridge is pretty neat. It was built in 1930 and has the word “Nanue” etched into the concrete. Running underneath this bridge is Nanue stream. Take a look upstream as that’s where you’ll be going.
Image 2: The Nanue Bridge
Over the guard rail you parked beside on the norht side of the road is a path through some thick overgrowth down to Nanue stream. Once you hit the stream, take a right and walk under the bridge. Be careful walking under the bridge as the ledges don’t have a lot of area to walk on. If you want to enbrace getting your shoes wet, jump in and just walk up the stream through the water. You’re bound to slip on a rock and get your shoes wet at some point, might as well embrace it early.
From the bridge, this hike is pretty straight forward, just head upstream until you reach the waterfall. Hop along the rocks whichever way you think is easiest or if you have already got your shoes wet, head straight up the creek. The rocks can be slippery so be a little extra wary as to where you plant your feet. Beware of spider webs, there are a lot of them.
Image 3: Mattson descending to the stream
Image 4: Anderson heading upstream
From the bridge to the falls is no more than 800 yards. After rounding a bend, you’ll be able to see the falls and a nice pool to swim in at the bottom (Route marker #2 on the map). Enjoy your time at the falls but be very careful if you choose to jump! We thoroughly checked the depth of the pool prior to cliff jumping but the depth of the water can change and newly fallen rocks can create unseen cliff jumping hazards.
Image 5: Nanue Falls
WE WANT TO HEAR FROM YOU
Thank you for choosing Epic Trip Adventures as your guide. We are committed to continually updating our guides to be as relevant and accurate as possible. If you have feedback to improve this guide please leave it in the comments below.
We also want to hear about your Nanue Falls adventures. If you have stories, pictures or even a link to your own adventure video please share them below!