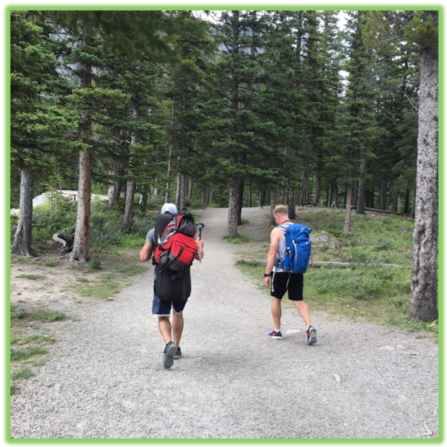
Kings Peak is a 20km round trip hike in Strathcona Park on Vancouver Island. It is one of the tallest peaks in the park with 1800m elevation gain and the hike to reach the summit is grueling. The hiking trail begins in lush forest and ends with a scramble to breathtaking views at the summit! Guide Coming Soon... WE WANT TO HEAR FROM YOU Thank you for choosing Epic Trip Adventures as your guide. We are committed to continually updating our guides to be as relevant and accurate as possible. If you have feedback to improve this guide please leave it in the comments below. We also want to hear about your Kings Peak adventures. If you have stories, pictures or even a link to your own adventure video please share them below! Have fun out there! - ETA
Kings Peak is a 20km round trip hike in Strathcona Park on Vancouver Island. It is one of the tallest peaks in the park with 1800m elevation gain and the hike to reach the summit is grueling. The hiking trail begins in lush forest and ends with a scramble to breathtaking views at the summit!
Guide Coming Soon…
WE WANT TO HEAR FROM YOU
Thank you for choosing Epic Trip Adventures as your guide. We are committed to continually updating our guides to be as relevant and accurate as possible. If you have feedback to improve this guide please leave it in the comments below.
We also want to hear about your Kings Peak adventures. If you have stories, pictures or even a link to your own adventure video please share them below!
Located just 2km from downtown Campbell River, Elk Falls is a quick and easy must do hike. The 25-meter-high waterfall can be viewed from various points including a suspension bridge that crosses above the falls. We recommend doing the full loop past Moose Falls, Deer Falls, and Elk Falls. Guide Coming Soon... WE WANT TO HEAR FROM YOU Thank you for choosing Epic Trip Adventures as your guide. We are committed to continually updating our guides to be as relevant and accurate as possible. If you have feedback to improve this guide please leave it in the comments below. We also want to hear about your Elk Falls adventures. If you have stories, pictures or even a link to your own adventure video please share them below! Have fun out there! - ETA
Located just 2km from downtown Campbell River, Elk Falls is a quick and easy must do hike. The 25-meter-high waterfall can be viewed from various points including a suspension bridge that crosses above the falls. We recommend doing the full loop past Moose Falls, Deer Falls, and Elk Falls.
Guide Coming Soon…
WE WANT TO HEAR FROM YOU
Thank you for choosing Epic Trip Adventures as your guide. We are committed to continually updating our guides to be as relevant and accurate as possible. If you have feedback to improve this guide please leave it in the comments below.
We also want to hear about your Elk Falls adventures. If you have stories, pictures or even a link to your own adventure video please share them below!
The Little Huson Caves on Vancouver Island are a hidden, off the beaten path, gem! There’s a super easy trail to reach the caves and from there it’s a self-guided adventure through multiple series of caves. Don’t forget your headlamps! Guide Coming Soon... WE WANT TO HEAR FROM YOU Thank you for choosing Epic Trip Adventures as your guide. We are committed to continually updating our guides to be as relevant and accurate as possible. If you have feedback to improve this guide please leave it in the comments below. We also want to hear about your Huson Cave adventures. If you have stories, pictures or even a link to your own adventure video please share them below! Have fun out there! - ETA
The Little Huson Caves on Vancouver Island are a hidden, off the beaten path, gem! There’s a super easy trail to reach the caves and from there it’s a self-guided adventure through multiple series of caves. Don’t forget your headlamps!
Guide Coming Soon…
WE WANT TO HEAR FROM YOU
Thank you for choosing Epic Trip Adventures as your guide. We are committed to continually updating our guides to be as relevant and accurate as possible. If you have feedback to improve this guide please leave it in the comments below.
We also want to hear about your Huson Cave adventures. If you have stories, pictures or even a link to your own adventure video please share them below!
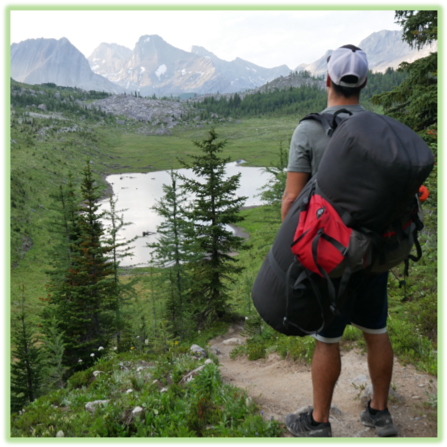
North Coast Trail is a great way to experience the beauty of Vancouver Island’s off the beaten path northern coast. Most hikers take a water taxi in and spend 4-7 days hiking the 58km coast one way. Unfortunately, due to the Covid travel complications, we had to do an out and back hike. Although we didn’t see the whole North Coast we definitely got a taste of what it has to offer! Guide Coming Soon... WE WANT TO HEAR FROM YOU Thank you for choosing Epic Trip Adventures as your guide. We are committed to continually updating our guides to be as relevant and accurate as possible. If you have feedback to improve this guide please leave it in the comments below. We also want to hear about your North Coast Trail adventures. If you have stories, pictures or even a link to your own adventure video please share them below! Have fun out there! - ETA
North Coast Trail is a great way to experience the beauty of Vancouver Island’s off the beaten path northern coast. Most hikers take a water taxi in and spend 4-7 days hiking the 58km coast one way. Unfortunately, due to the Covid travel complications, we had to do an out and back hike. Although we didn’t see the whole North Coast we definitely got a taste of what it has to offer!
Guide Coming Soon…
WE WANT TO HEAR FROM YOU
Thank you for choosing Epic Trip Adventures as your guide. We are committed to continually updating our guides to be as relevant and accurate as possible. If you have feedback to improve this guide please leave it in the comments below.
We also want to hear about your North Coast Trail adventures. If you have stories, pictures or even a link to your own adventure video please share them below!
For a downloadable PDF version of this guide Star Creek Falls is an easy 1.8km loop in Crowsnest Pass that has beautiful views of the surrounding mountains and various scenic views of the waterfall. The best time to check out the trail with summer conditions is June to October but it can be a nice snowshoe trail in the winter. ADVENTURE STATISTICS Time Required: 30-40 Minutes Location: Crowsnest Pass Distance: 1.8km loop Highest Elevation: 1400m Elevation Gain: 90m Difficulty: 3/10 – Minimal elevation gain Season: Year-round. Summer conditions from June to mid-October Additional Requirements: N/A DRIVING DIRECTIONS From HWY 3 West: Turn left (South) off HWY 3 onto 77th St into Coleman, AB, then take a right onto 18th Ave heading West. Take 18 Ave, 17 Ave and 16th Ave West for 3.9km then take a left on 54 St. Follow 54 St for 450m to the trailhead. WHAT TO BRING Comfortable Footwear: Hiking shoes. Snowshoes in the winter time. Water: Always take water when heading out on any hike, long or short. Snacks: Bring some of your favorite snacks to enjoy along the hike as well as a light lunch if you want to have a picnic at the falls. Some of our favorite snacks are trail mix, bananas, beef jerky and licorice. Weather appropriate clothing: You will be exposed to the elements throughout this hike. Check the weather forecast and plan accordingly. Sunscreen: If it is sunny and you’re like Mattson, who easily burns, bring sunscreen! Insect Repellent: Insect repellent can greatly improve your hiking experience. Bear Spray: You are in bear country. Always hike with bear spray that is easily accessible. Camera: There are numerous photo opportunities you won’t want to miss. This Guide: Print a copy of this guide to reference
For a downloadable PDF version of this guide CLICK HERE!
Star Creek Falls is an easy 1.8km loop in Crowsnest Pass that has beautiful views of the surrounding mountains and various scenic views of the waterfall. The best time to check out the trail with summer conditions is June to October but it can be a nice snowshoe trail in the winter.
ADVENTURE STATISTICS
Time Required: 30-40 Minutes
Location: Crowsnest Pass
Distance: 1.8km loop
Highest Elevation:1400m
Elevation Gain:90m
Difficulty:3/10 – Minimal elevation gain
Season: Year-round. Summer conditions from June to mid-October
Additional Requirements: N/A
DRIVING DIRECTIONS
From HWY 3 West: Turn left (South) off HWY 3 onto 77th St into Coleman, AB, then take a right onto 18th Ave heading West. Take 18 Ave, 17 Ave and 16th Ave West for 3.9km then take a left on 54 St. Follow 54 St for 450m to the trailhead.
WHAT TO BRING
Comfortable Footwear: Hiking shoes. Snowshoes in the winter time.
Water: Always take water when heading out on any hike, long or short.
Snacks: Bring some of your favorite snacks to enjoy along the hike as well as a light lunch if you want to have a picnic at the falls. Some of our favorite snacks are trail mix, bananas, beef jerky and licorice.
Weather appropriate clothing: You will be exposed to the elements throughout this hike. Check the weather forecast and plan accordingly.
Sunscreen: If it is sunny and you’re like Mattson, who easily burns, bring sunscreen!
Insect Repellent: Insect repellent can greatly improve your hiking experience.
Bear Spray: You are in bear country. Always hike with bear spray that is easily accessible.
Camera: There are numerous photo opportunities you won’t want to miss.
This Guide: Print a copy of this guide to reference throughout the hike
OTHER CONSIDERATIONS
Wildlife: You will be hiking in bear country. It is always advisable to check in at the local Visitor Information Center to learn of any trail closures due to wildlife. Carry bear spray in an easily accessible location. Travel in groups of multiple hikers and make lots of noise to avoid an unexpected encounter.
Leave No Trace: It is important that we enjoy the outdoors responsibly and sustainably. Some key principles to consider when hiking to “Leave No Trace” are:
Plan ahead and prepare: Proper planning allows adventurers to hike safely while minimizing damage to the land.
Travel on durable surfaces: Stick to the trail when possible. If there is no trail, or you must travel off trail, stay on durable surfaces to reduce your impact.
Dispose of waste properly: Pack it in, pack it out.
Leave what you find: Leave rocks, plants, archaeological artifacts and other objects of interest as you find them.
Respect wildlife: Observe wildlife from a distance. Never feed wild animals.
Be considerate of other visitors: Be courteous to others to allow everyone to enjoy their outdoor experience.
Summary: This hike is a “relatively” easy to follow loop. With minimal elevation, two bridges to cross the creek and two different views of the waterfall it is well worth the short 1.8km total hike.
Image 1: Star Creek Falls Adventure Map
Step-By-Step Guide:
This hike is great for kids and hikers of all skill levels. It begins at the end of 54th St. There is a clearing on the side of the road with room for some parking before the gravel road begins to ascend (Route marker #1 on the map). This parking should be utilized by anyone that doesn’t have high clearance or a 4×4 vehicle. After that short ascent up the road, you will come to a clearing where the trail forks left or right into the trees. The right fork will take you up to a nice high viewpoint of the falls and then around the back of them. Left will take you down to the creek, where you also get a very good view of the waterfall from down lower. We took the right fork and did the loop counterclockwise.
Image 2: The gravel road
Image 3: The right fork into the trees
A short ascent through the trees will take you to a small rocky lookout of Star Creek Falls plummeting into the gorge eroded into the landscape (Route marker #2 on the map). Be careful near the edge of the lookout, it has a cliff like drop off and a very rocky base at the bottom. Back track from the lookout a bit to continue along the trail counterclockwise.
Image 4: Star Creek Falls Lookout
Image 5: Star Creek Falls
From there the trail continues behind the waterfall and crosses the creek at an upper bridge. You then wrap around to the other side of the gorge where you can look back for a different view of Star Creek Falls (Route marker #3 on the map). Keep following the trail and it will descend to the creek where there is another bridge to cross.
Image 6: Crossing the creek
Image 7: A distant view of Star Creek Falls
Depending on the water level of the creek, some people will walk upstream to get as close to Star Creek Falls as possible. If you choose to do this, take caution on the rocks as they are very slippery and jagged.
From the bridge, the trail continues back to the initial fork in the trail and it’s a quick walk back to your vehicle. Hope this guide helps and you get a little less lost than we did 🙂
WE WANT TO HEAR FROM YOU
Thank you for choosing Epic Trip Adventures as your guide. We are committed to continually updating our guides to be as relevant and accurate as possible. If you have feedback to improve this guide please leave it in the comments below.
We also want to hear about your Star Creek Falls adventures. If you have stories, pictures or even a link to your own adventure video please share them below!
For a downloadable PDF version of this guide Today we're hiking Turbine Canyon starting from Upper Kananaskis Lake. This is a great overnight hike with multiple options to stay two nights or even three with plenty of day hikes around the area to keep you busy. Beautiful country with beautiful mountain views. ADVENTURE STATISTICS Time Required: 8-10 Hours or overnight Location: 136km west of Calgary in Peter Lougheed Provincial Park Distance: 15.1km one way Highest Elevation: 2245m Elevation Gain: 525m Difficulty: 7/10 – Steep sections Season: June to mid-October Additional Requirements: Camping permit DRIVING DIRECTIONS From Calgary: Take the Trans-Canada (Hwy 1) west approximately 70 km to Kananaskis Trail (Hwy 40) and then follow that 50 km to Kananaskis Lakes Trail. Turn right onto Kananaskis Lakes Trail and follow it for 13 km. Park at the North Interlakes Day Use Area on Upper Kananaskis Lake. From Canmore: Take the Trans-Canada (Hwy 1) east approximately 30 km to Kananaskis Trail (Hwy 40) and then follow that 50 km to Kananaskis Lakes Trail. Turn right onto Kananaskis Lakes Trail and follow it for 13 km. Park at the North Interlakes Day Use Area on Upper Kananaskis Lake. WHAT TO BRING Comfortable Footwear: Hiking shoes. Make sure your shoes are broken in prior to tackling this hike to prevent unexpected blisters. You could get away with running shoes but having extra grip on the rock surfaces will definitely come in handy! Water: This hike is long with lots of elevation gain to reach the campsite. Be sure to bring enough water for 5 hours of physical exertion. There are streams to fill your water bottles along the way so bring purification tabs or a filter. Snacks: Bring some of your favorite snacks to enjoy along the hike as well
For a downloadable PDF version of this guide CLICK HERE!
Today we’re hiking Turbine Canyon starting from Upper Kananaskis Lake. This is a great overnight hike with multiple options to stay two nights or even three with plenty of day hikes around the area to keep you busy. Beautiful country with beautiful mountain views.
ADVENTURE STATISTICS
Time Required: 8-10 Hours or overnight
Location: 136km west of Calgary in Peter Lougheed Provincial Park
Distance: 15.1km one way
Highest Elevation:2245m
Elevation Gain:525m
Difficulty:7/10 – Steep sections
Season: June to mid-October
Additional Requirements: Camping permit
DRIVING DIRECTIONS
From Calgary: Take the Trans-Canada (Hwy 1) west approximately 70 km to Kananaskis Trail (Hwy 40) and then follow that 50 km to Kananaskis Lakes Trail. Turn right onto Kananaskis Lakes Trail and follow it for 13 km. Park at the North Interlakes Day Use Area on Upper Kananaskis Lake.
From Canmore: Take the Trans-Canada (Hwy 1) east approximately 30 km to Kananaskis Trail (Hwy 40) and then follow that 50 km to Kananaskis Lakes Trail. Turn right onto Kananaskis Lakes Trail and follow it for 13 km. Park at the North Interlakes Day Use Area on Upper Kananaskis Lake.
WHAT TO BRING
Comfortable Footwear: Hiking shoes. Make sure your shoes are broken in prior to tackling this hike to prevent unexpected blisters. You could get away with running shoes but having extra grip on the rock surfaces will definitely come in handy!
Water: This hike is long with lots of elevation gain to reach the campsite. Be sure to bring enough water for 5 hours of physical exertion. There are streams to fill your water bottles along the way so bring purification tabs or a filter.
Snacks: Bring some of your favorite snacks to enjoy along the hike as well as meals for at the campsite. Some of our favorite snacks are trail mix, bananas, beef jerky and licorice.
Weather appropriate clothing: You will be exposed to the elements throughout this hike. Check the weather forecast and plan accordingly.
Sunscreen: If it is sunny and you’re like Mattson, who easily burns, bring sunscreen!
Insect Repellent: Insect repellent can greatly improve your hiking experience.
Bear Spray: You are in bear country. Always hike with bear spray that is easily accessible.
Camera: There are numerous photo opportunities you won’t want to miss.
Camping Gear: If you are staying the night… bring appropriate camping gear
Camping Permit: A backcountry permit is required to stay at Turbine Canyon
This Guide: Print a copy of this guide to reference throughout the hike
OTHER CONSIDERATIONS
Wildlife: You will be hiking in bear country. It is always advisable to check in at the local Visitor Information Center to learn of any trail closures due to wildlife. Carry bear spray in an easily accessible location. Travel in groups of multiple hikers and make lots of noise to avoid an unexpected encounter.
Leave No Trace: It is important that we enjoy the outdoors responsibly and sustainably. Some key principles to consider when hiking to “Leave No Trace” are:
Plan ahead and prepare: Proper planning allows adventurers to hike safely while minimizing damage to the land.
Travel on durable surfaces: Stick to the trail when possible. If there is no trail, or you must travel off trail, stay on durable surfaces to reduce your impact.
Dispose of waste properly: Pack it in, pack it out.
Leave what you find: Leave rocks, plants, archaeological artifacts and other objects of interest as you find them.
Respect wildlife: Observe wildlife from a distance. Never feed wild animals.
Be considerate of other visitors: Be courteous to others to allow everyone to enjoy their outdoor experience.
Summary: This hike is relatively flat until just past the Forks Campground, where almost all of the elevation is done in about 3km. After that the trail levels off again and it is a beautiful walk through meadows and mountains to Turbine Canyon campground.
Image 1: Turbine Canyon Adventure Map
Step-By-Step Guide:
The hike begins at Upper Kananaskis Lake Parking Lot (Route marker #1 on the map) and follows a very well maintained, easy to follow trail around the North side of Upper Kananaskis Lake. After hiking this trail for 7.3km you will reach Forks Campground (Route marker #2 on the map) where you will take a trail fork to the right to get to Turbine Canyon. Forks Campground has 15 tenting campsites, a pit toilet, creek to fill water and designated fire pits for campfires.
Image 2: Upper Kananaskis Lake
Image 3: Hiking to Forks Campground
After going right at the Forks Campground the trail will continue north and elevation gain will begin for about 3km along switchbacks. This is the hard part of the hike, after the switchbacks the rest is quite easy. Follow the trail through meadows and forests for another 5km. The trail passes Lawson Lake on the east side and Turbine Canyon Campground (Route marker #3 on the map) is a hop skip and a jump away. There is a small creek that runs into Turbine Canyon called Maude Brook, and the campground is just North of that creek.
Image 4: Alpine Lakes and Meadows
Image 5: The approach to Turbine Canyon
This Campground has 12 tenting campsites, a creek for water, food storage lockers and a pit toilet. Fires are prohibited. From the Campground, there are multiple day hikes that are worth checking out.
Obviously the Turbine Canyon itself, which is just downstream of Maude Brook.
Maude Lake is 2km to the Northwest which is stocked with fish if you are into that.
Haig Glacier is 3km North of Turbine and houses winter skiing athletes in the summer months for their training.
Image 6: Turbine Canyon
Image 7: Turbine Canyon
Image 8: Turbine Canyon
Image 9: Turbine Canyon
After enjoying your stay at Turbine Canyon make your way back down the same way you came up. Hope you have FUN!
WE WANT TO HEAR FROM YOU
Thank you for choosing Epic Trip Adventures as your guide. We are committed to continually updating our guides to be as relevant and accurate as possible. If you have feedback to improve this guide please leave it in the comments below.
We also want to hear about your Turbine Canyon adventures. If you have stories, pictures or even a link to your own adventure video please share them below!
For a downloadable PDF version of this guide Today we're hiking Turtle Mountain in Crowsnest Pass. Turtle Mountain is an awesome and challenging hike right near the town of Frank. In 1903 there was a massive rockslide of roughly 110 million tonnes that buried the mining town of Frank and killed just under 100 people. The hike up Turtle Mountain follows the ridgeline and provides stunning views of the town, the aftermath of the disaster, and the foothills of the Rocky Mountains. ADVENTURE STATISTICS Time Required: 4-5 Hours Location: 215km south of Calgary Distance: 7.4km round trip Highest Elevation: 2194m Elevation Gain: 936m Difficulty: 8/10 – Route finding, rapid elevation gain, and scrambling. Season: June to mid-October Additional Requirements: N/A DRIVING DIRECTIONS From Calgary: Head South on AB-2 until you reach the town of Nanton, then take a right onto Hwy 533 for 8km, turn left to stay on Hwy 533 and follow it until you reach AB-22 where you will turn right and head south. Follow AB-22 for 71km then turn right onto AB-3 W. In 20km take the first left turn into the town of Blairmore, then another left on 133st. Left turn onto 16th Ave, then right on 134st, then left again onto 15th Ave. The road will bend to the left and you want to take a right hand turn down a dirt/rocky road to the back of the houses. Drive a few hundred meters and you should see some cars parked on the righthand side. This is the trailhead. WHAT TO BRING Comfortable Footwear: Hiking shoes. Make sure your shoes are broken in prior to tackling this hike to prevent unexpected blisters. You could get away with running shoes but having extra grip on the rock surfaces will definitely come in
For a downloadable PDF version of this guide CLICK HERE!
Today we’re hiking Turtle Mountain in Crowsnest Pass. Turtle Mountain is an awesome and challenging hike right near the town of Frank. In 1903 there was a massive rockslide of roughly 110 million tonnes that buried the mining town of Frank and killed just under 100 people. The hike up Turtle Mountain follows the ridgeline and provides stunning views of the town, the aftermath of the disaster, and the foothills of the Rocky Mountains.
ADVENTURE STATISTICS
Time Required: 4-5 Hours
Location: 215km south of Calgary
Distance: 7.4km round trip
Highest Elevation:2194m
Elevation Gain:936m
Difficulty:8/10 – Route finding, rapid elevation gain, and scrambling.
Season: June to mid-October
Additional Requirements: N/A
DRIVING DIRECTIONS
From Calgary: Head South on AB-2 until you reach the town of Nanton, then take a right onto Hwy 533 for 8km, turn left to stay on Hwy 533 and follow it until you reach AB-22 where you will turn right and head south. Follow AB-22 for 71km then turn right onto AB-3 W. In 20km take the first left turn into the town of Blairmore, then another left on 133st. Left turn onto 16th Ave, then right on 134st, then left again onto 15th Ave. The road will bend to the left and you want to take a right hand turn down a dirt/rocky road to the back of the houses. Drive a few hundred meters and you should see some cars parked on the righthand side. This is the trailhead.
WHAT TO BRING
Comfortable Footwear: Hiking shoes. Make sure your shoes are broken in prior to tackling this hike to prevent unexpected blisters. You could get away with running shoes but having extra grip on the rock surfaces will definitely come in handy!
Water: This hike is long with lots of elevation gain to reach the summit. Be sure to bring enough water for 5 hours of physical exertion.
Snacks: Bring some of your favorite snacks to enjoy along the hike as well as a light lunch for when you arrive at the top. Some of our favorite snacks are trail mix, bananas, beef jerky and licorice.
Weather appropriate clothing: You will be exposed to the elements throughout this hike. Check the weather forecast and plan accordingly.
Sunscreen: If it is sunny and you’re like Mattson, who easily burns, bring sunscreen!
Insect Repellent: Insect repellent can greatly improve your hiking experience.
Bear Spray: You are in bear country. Always hike with bear spray that is easily accessible.
Hiking Poles: The descent is quite steep. Hiking poles can make the way down easier.
Camera: There are numerous photo opportunities you won’t want to miss.
This Guide: Print a copy of this guide to reference throughout the hike
OTHER CONSIDERATIONS
Wildlife: You will be hiking in bear country. It is always advisable to check in at the local Visitor Information Center to learn of any trail closures due to wildlife. Carry bear spray in an easily accessible location. Travel in groups of multiple hikers and make lots of noise to avoid an unexpected encounter.
Frank Slide Interpretive Center: We recommend stopping at the Frank Slide Interpretive Center before hiking up Turtle Mountain. The center provides a lot of information and interesting stories about the rock slide that took place over a hundred years ago. You get the chance to see the slide from a different angle and you can even walk through the rubble on designated trails. It is located 1.5km off Hwy 3 and is well marked with signs on the highway. (Route marker #1 on the map below).
Leave No Trace: It is important that we enjoy the outdoors responsibly and sustainably. Some key principles to consider when hiking to “Leave No Trace” are:
Plan ahead and prepare: Proper planning allows adventurers to hike safely while minimizing damage to the land.
Travel on durable surfaces: Stick to the trail when possible. If there is no trail, or you must travel off trail, stay on durable surfaces to reduce your impact.
Dispose of waste properly: Pack it in, pack it out.
Leave what you find: Leave rocks, plants, archaeological artifacts and other objects of interest as you find them.
Respect wildlife: Observe wildlife from a distance. Never feed wild animals.
Be considerate of other visitors: Be courteous to others to allow everyone to enjoy their outdoor experience.
Summary: This hike gets pretty sweaty, really quickly. The elevation gain starts at the trailhead and continues the entire hike. The trail follows the ridgeline to the north summit, then continues on to the south summit which is the true summit. Along the hike there are many opportunities to view the rockslide and get a sense of how massive and destructive this disaster was.
Image 1: Frank Slide Adventure Map
Step-By-Step Guide:
From the parking lot (Route marker #2 on the map), follow the gravel road/trail for a minute or two then continue on the trail as it veers to the right into the thicker forest. The elevation gain at the start is quite intense and it will continue for most of the hike. The trail through the trees is well trafficked and easy to follow.
Image 2: The beginning of the trail
Image 3: Following painted trail markers
About 1.5km into the hike there is a beautiful lookout with views of the town of Frank and the rock slide below. At about 2.6km you will reach the north summit (Route marker #3 on the map). If you didn’t do much research beforehand (like us) you will approach this summit thinking you have reached the top. Unfortunately, the true summit is the south summit (Route marker #4 on the map). To reach the south summit the trail weaves down to the right and you will lose some of that elevation you just gained. The hike from the north summit to the south summit is the most challenging section of the trail. The terrain changes to brittle shale rock and it’s a little too easy to slip and slide, so be careful.
Image 4: Making our way to the summit
Image 5: The north summit
The trail to the south summit is more difficult to follow, keep your eyes out for colored trail markers on rocks, and use your best judgement to choose an appropriate route. The south summit should be attempted by those with some scrambling abilities as there is lots of loose rock. After a final push of elevation gain you will have made it to the south summit. From there, you will see a wooden helipad (Route marker #5 on the map) a bit further along the ridge. It is a great spot to sit down, take a break and have a snack.
Image 6: The view from the south summit
Image 7: The helipad
After enjoying the view make your way back down the same way you came up. There are a few trails which can make the return trip a bit confusing but as long as you’re following the ridge and going down you should make it back to your car. Hope you have FUN!
WE WANT TO HEAR FROM YOU
Thank you for choosing Epic Trip Adventures as your guide. We are committed to continually updating our guides to be as relevant and accurate as possible. If you have feedback to improve this guide please leave it in the comments below.
We also want to hear about your Frank Slide adventures. If you have stories, pictures or even a link to your own adventure video please share them below!
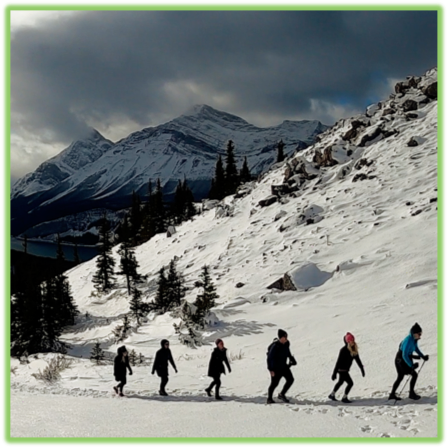
In the winter, Revelstoke is world renowned for its record snowfall and vast snowmobile terrain. Boulder Mountain specifically, has 50 kilometers of groomed trails and over 150 square kilometers of powdery bowls and steep hill climbs. With average yearly snowfall of 14-20 meters, Boulder Mountain’s terrain will satisfy all skill levels from beginner to expert. ADVENTURE STATISTICS Time Required: Full day activity Location: Revelstoke, BC Highest Elevation: ~1664m (Boulder Cabin) Season: November to June Additional Requirements: Snowmobile, Avalanche Gear DRIVING DIRECTIONS From Revelstoke: Head west on the Trans-Canada Hwy/BC-1. Take your first right after you cross the river onto Westside Rd and follow that road for 3.8km. There will be a parking lot and a “Revelstoke Snowmobiling Club” building on your left. Unload here and away you go. WHAT TO BRING Snowmobile Gear: Water resistant ski-pants, jacket, gloves and boots. Helmet, goggles, and balaclava if its cold out. Avalanche beacon, probe and shovel. Water: Snowmobiling is more work than you make think, stay hydrated. Snacks: Bring some of your favorite snacks to enjoy along the way. Some of our favorite snacks are trail mix, bananas, beef jerky and licorice. Weather appropriate clothing: Check the weather forecast and plan accordingly. Sunscreen: Also something to you wouldn’t think to consider but should. If it is sunny and you’re like Mattson, who easily burns, bring sunscreen! Camera: There are numerous photo opportunities you won’t want to miss. This Guide: Print a copy of this guide to reference throughout the hike OTHER CONSIDERATIONS Avalanche Safety: Avalanches are a real concern sledding in the mountains. Know your equipment, know how to use it and practice. Here is a short tutorial on how to use an avalanche beacon. https://www.youtube.com/watch?v=X90kUtxMd_Q Boonmaps: Boonmaps is an app for your phone that can track your
In the winter, Revelstoke is world renowned for its record snowfall and vast snowmobile terrain. Boulder Mountain specifically, has 50 kilometers of groomed trails and over 150 square kilometers of powdery bowls and steep hill climbs. With average yearly snowfall of 14-20 meters, Boulder Mountain’s terrain will satisfy all skill levels from beginner to expert.
From Revelstoke: Head west on the Trans-Canada Hwy/BC-1. Take your first right after you cross the river onto Westside Rd and follow that road for 3.8km. There will be a parking lot and a “Revelstoke Snowmobiling Club” building on your left. Unload here and away you go.
WHAT TO BRING
Snowmobile Gear: Water resistant ski-pants, jacket, gloves and boots. Helmet, goggles, and balaclava if its cold out. Avalanche beacon, probe and shovel.
Water: Snowmobiling is more work than you make think, stay hydrated.
Snacks: Bring some of your favorite snacks to enjoy along the way. Some of our favorite snacks are trail mix, bananas, beef jerky and licorice.
Weather appropriate clothing: Check the weather forecast and plan accordingly.
Sunscreen: Also something to you wouldn’t think to consider but should. If it is sunny and you’re like Mattson, who easily burns, bring sunscreen!
Camera: There are numerous photo opportunities you won’t want to miss.
This Guide: Print a copy of this guide to reference throughout the hike
OTHER CONSIDERATIONS
Avalanche Safety: Avalanches are a real concern sledding in the mountains. Know your equipment, know how to use it and practice. Here is a short tutorial on how to use an avalanche beacon.
Boonmaps: Boonmaps is an app for your phone that can track your location and where you’ve travelled even if you don’t have service. You will have to download the area beforehand if you want it to work offline. This app is very useful for newcomers to Boulder Mountain that aren’t familiar with the terrain. We used it and it worked great!
Sled Rental: There are a few sled rental places around Revelstoke including Stoked Mountain Adventures, Revelstoke Sled Rentals, Full Speed Rentals, and Sledrent.ca. We went with Sledrent.ca and they were great. They we friendly, easy to deal with, and provided pick up and drop off at Boulder Mountain staging area.
Leave No Trace: It is important that we enjoy the outdoors responsibly and sustainably. Some key principles to consider when hiking to “Leave No Trace” are:
Plan ahead and prepare: Proper planning allows adventurers to hike safely while minimizing damage to the land.
Travel on durable surfaces: Stick to the trail when possible. If there is no trail, or you must travel off trail, stay on durable surfaces to reduce your impact.
Dispose of waste properly: Pack it in, pack it out.
Leave what you find: Leave rocks, plants, archaeological artifacts and other objects of interest as you find them.
Respect wildlife: Observe wildlife from a distance. Never feed wild animals.
Be considerate of other visitors: Be courteous to others to allow everyone to enjoy their outdoor experience.
From the parking lot there are three main trails to head up before you reach Boulder Cabin. These trails are groomed and easy to follow. Note that there is a 25-dollar trail fee to use the groomed trails that must be paid daily (or you can get a yearly membership for 200 dollars). From Boulder Cabin, the choice is yours to dip into the trees or climb some wide-open powder bowls.
Hope this guide was useful in planning your adventure.! Stay safe and have fun!
Image 1: Sledding Boulder Mountain
WE WANT TO HEAR FROM YOU
Thank you for choosing Epic Trip Adventures as your guide. We are committed to continually updating our guides to be as relevant and accurate as possible. If you have feedback to improve this guide please leave it in the comments below.
We also want to hear about your Boulder Mountain Sledding adventures. If you have stories, pictures or even a link to your own adventure video please share them below!
For a downloadable PDF version of this guide West Wind Pass is a 4.7km hike off the Smith Dorrien Trail near Canmore. It’s a well trafficked hike with beautiful views of the Spray Lakes reservoir behind you, Rimwall Mountain to your left and Windtower to your right. If you can pick a nice calm day to do this hike that is ideal. It tends to be windy in the pass… as the name would indicate. ADVENTURE STATISTICS Time Required: 2-3 Hours Location: 25km drive South of Canmore Distance: 4.7km round trip Highest Elevation: 2083m Elevation Gain: 350m Difficulty: 5/10 – Family friendly, dog friendly Season: June to mid-October for summer conditions Additional Requirements: Crampons/spikes or snowshoes if hiking in the winter DRIVING DIRECTIONS From Canmore: Turn right off Three Sisters Dr onto Spray Lakes Rd/Three Sisters Pkwy and follow that road for roughly 20km. Park on the side of the road. Google Maps has West Wind Pass Trailhead marked. WHAT TO BRING Comfortable Footwear: Hiking shoes. Make sure your shoes are broken in prior to tackling this hike to prevent unexpected blisters. You could get away with running shoes but having extra grip on the rock surfaces will come in handy! Water: This hike has some elevation gain to reach the pass. Be sure to bring enough water for 2-3 hours of physical exertion. Snacks: Bring some of your favorite snacks to enjoy along the hike. Some of our favorite snacks are trail mix, bananas, beef jerky and licorice. Snowshoes/Spikes: If you are attempting this hike in the fall/winter months, bring spikes as it can be icy. There can be snow waist deep if you wander off the trail, so if that’s something you want to do pack snowshoes as well. Weather appropriate clothing:
For a downloadable PDF version of this guide CLICK HERE!
West Wind Pass is a 4.7km hike off the Smith Dorrien Trail near Canmore. It’s a well trafficked hike with beautiful views of the Spray Lakes reservoir behind you, Rimwall Mountain to your left and Windtower to your right. If you can pick a nice calm day to do this hike that is ideal. It tends to be windy in the pass… as the name would indicate.
ADVENTURE STATISTICS
Time Required: 2-3 Hours
Location: 25km drive South of Canmore
Distance: 4.7km round trip
Highest Elevation:2083m
Elevation Gain:350m
Difficulty:5/10 – Family friendly, dog friendly
Season: June to mid-October for summer conditions
Additional Requirements: Crampons/spikes or snowshoes if hiking in the winter
DRIVING DIRECTIONS
From Canmore: Turn right off Three Sisters Dr onto Spray Lakes Rd/Three Sisters Pkwy and follow that road for roughly 20km. Park on the side of the road. Google Maps has West Wind Pass Trailhead marked.
WHAT TO BRING
Comfortable Footwear: Hiking shoes. Make sure your shoes are broken in prior to tackling this hike to prevent unexpected blisters. You could get away with running shoes but having extra grip on the rock surfaces will come in handy!
Water: This hike has some elevation gain to reach the pass. Be sure to bring enough water for 2-3 hours of physical exertion.
Snacks: Bring some of your favorite snacks to enjoy along the hike. Some of our favorite snacks are trail mix, bananas, beef jerky and licorice.
Snowshoes/Spikes: If you are attempting this hike in the fall/winter months, bring spikes as it can be icy. There can be snow waist deep if you wander off the trail, so if that’s something you want to do pack snowshoes as well.
Weather appropriate clothing: You will be exposed to the elements throughout this hike. The pass is usually very windy, hence the name. Wear a wind breaker and have a chin strap so your hat doesn’t blow away. Check the weather forecast and plan accordingly.
Sunscreen: If it is sunny and you’re like Mattson, who easily burns, bring sunscreen!
Insect Repellent: Insect repellent can greatly improve your hiking experience.
Bear Spray: You are in bear country. Always hike with bear spray that is easily accessible.
Camera: There are numerous photo opportunities you won’t want to miss.
This Guide: Print a copy of this guide to reference throughout the hike
OTHER CONSIDERATIONS
Wildlife: You will be hiking in bear country. It is always advisable to check in at the local Visitor Information Center to learn of any trail closures due to wildlife. Carry bear spray in an easily accessible location. Travel in groups of multiple hikers and make lots of noise to avoid an unexpected encounter.
Leave No Trace: It is important that we enjoy the outdoors responsibly and sustainably. Some key principles to consider when hiking to “Leave No Trace” are:
Plan ahead and prepare: Proper planning allows adventurers to hike safely while minimizing damage to the land.
Travel on durable surfaces: Stick to the trail when possible. If there is no trail, or you must travel off trail, stay on durable surfaces to reduce your impact.
Dispose of waste properly: Pack it in, pack it out.
Leave what you find: Leave rocks, plants, archaeological artifacts and other objects of interest as you find them.
Respect wildlife: Observe wildlife from a distance. Never feed wild animals.
Be considerate of other visitors: Be courteous to others to allow everyone to enjoy their outdoor experience.
Summary: West Wind Pass is between Windtower and Rimwall Peak. The out and back hike is well trafficked and straight forward. There is only about 350m elevation gain which makes this a great trail for families, dogs, and beginner hikers.
Image 1: West Wind Pass Adventure Map
Step-By-Step Guide:
The trailhead is just off the road. Set your odometer at the turn off onto Spray Lakes Rd/Three Sisters Pkwy for 20km (Or use Google Maps). On a weekend or busy day, it will be obvious where to park as there will be other cars. The trailhead is on the north side of the road (Route marker #1 on the map).
Image 2: Parking on the side of the road
Image 3: West Wind Pass Trailhead
The beginning of the trail is well trafficked and easy to follow with some elevation gain. There is pink and orange flagging tied to trees to mark the trail. Along the way there are a couple signs to reassure you that you are on the West Wind Pass Trail.
Image 4: A small sign marks the trail
Image 5: Following the trail as it gains elevation
There are some rocky slab sections with cliffs to your right. If uncomfortable with that terrain, stay right wherever possible and the trail will be a little more friendly. The different trails join up to become one trail again later.
Image 7: Descending slippery snow-covered rocks
Image 8: Hiking along the gully ledge
Once you reach the top of the pass (Route marker #2 on the map) there is a beautiful meadow with a trail that’s easy to see and follow. There are stunning views of the Spray Lake Reservoir and surrounding peaks. The Windtower can be summited from West Wind Pass. To summit Rimwall, you start on the same trail be veer off left before reaching the pass. Neither should be summited in the winter if you are not an experienced winter climber. After taking in the views from the pass return to your vehicle the way you came.
Image 8: Hiking through the meadow
Image 9: Taking the view from the pass
Image 10: West Wind Pass
WE WANT TO HEAR FROM YOU
Thank you for choosing Epic Trip Adventures as your guide. We are committed to continually updating our guides to be as relevant and accurate as possible. If you have feedback to improve this guide please leave it in the comments below.
We also want to hear about your West Wind Pass adventures. If you have stories, pictures or even a link to your own adventure video please share them below!
One thing worth checking out on the Big Island for the adrenaline junkies out there… is jumping out of a plane!!! Big Island Gravity was such an awesome company to book a jump with. The customer service was fantastic and booking online was straightforward. Included in the price is GoPro footage of your jump, a scenic plane ride up and the rush of a lifetime! DRIVING DIRECTIONS From Kona: Get onto HI-19 and head north for 30 miles, turn left at the stop sign onto HI-270. After 1.5 miles at Kawaihae turn right to stay on HI-270. Keep heading north for 16.6 miles and you will see signs for Upolu Airport (turn left). Follow that road about 2 miles until it ends and park in the lot. From Hilo: Head north on HI-19/Hawaii Belt/Kamehameha Ave for 54 miles into the town of Waimea. In town, turn right onto Lindsay Rd which curves into Kawaihae Rd. Follow for 2 miles then turn left to stay on Kawaihae Rd/Hwy-19. Continue on this road until you reach Kawaihae. Turn right to stay on HI-270. Keep heading north for 16.6 miles and you will see signs for Upolu Airport (turn left). Follow that road about 2 miles until it ends and park in the lot. Book at: https://skydivebig.com/ or call 808-937-9258 WE WANT TO HEAR FROM YOU Thank you for choosing Epic Trip Adventures as your guide. We are committed to continually updating our guides to be as relevant and accurate as possible. If you have feedback to improve this guide please leave it in the comments below. We also want to hear about your Big Island Gravity Skydiving adventures. If you have stories, pictures or even a link to your own adventure video please share them below!
One thing worth checking out on the Big Island for the adrenaline junkies out there… is jumping out of a plane!!! Big Island Gravity was such an awesome company to book a jump with. The customer service was fantastic and booking online was straightforward. Included in the price is GoPro footage of your jump, a scenic plane ride up and the rush of a lifetime!
DRIVING DIRECTIONS
From Kona: Get onto HI-19 and head north for 30 miles, turn left at the stop sign onto HI-270. After 1.5 miles at Kawaihae turn right to stay on HI-270. Keep heading north for 16.6 miles and you will see signs for Upolu Airport (turn left). Follow that road about 2 miles until it ends and park in the lot.
From Hilo: Head north on HI-19/Hawaii Belt/Kamehameha Ave for 54 miles into the town of Waimea. In town, turn right onto Lindsay Rd which curves into Kawaihae Rd. Follow for 2 miles then turn left to stay on Kawaihae Rd/Hwy-19. Continue on this road until you reach Kawaihae. Turn right to stay on HI-270. Keep heading north for 16.6 miles and you will see signs for Upolu Airport (turn left). Follow that road about 2 miles until it ends and park in the lot.
Thank you for choosing Epic Trip Adventures as your guide. We are committed to continually updating our guides to be as relevant and accurate as possible. If you have feedback to improve this guide please leave it in the comments below.
We also want to hear about your Big Island Gravity Skydiving adventures. If you have stories, pictures or even a link to your own adventure video please share them below!