Kilauea is the youngest and most southeastern volcano on the island of Hawai’i. It is also one of the most active volcanoes in the world. The conditions of the eruption are ever changing but under the right circumstances, up close viewing of lava is a once in a lifetime opportunity. Due to the ever changing nature of Kilauea it is not possible to visit a surface flow all the time. To find out about the current conditions contact Hawaii Volcanoes National Park visitor information at (808) 985-6101 WE WANT TO HEAR FROM YOU Thank you for choosing Epic Trip Adventures as your guide. We are committed to continually updating our guides to be as relevant and accurate as possible. If you have feedback to improve this guide please leave it in the comments below. We also want to hear about your Lava Flow adventures. If you have stories, pictures or even a link to your own adventure video please share them below! Have fun out there! - ETA
Kilauea is the youngest and most southeastern volcano on the island of Hawai’i. It is also one of the most active volcanoes in the world. The conditions of the eruption are ever changing but under the right circumstances, up close viewing of lava is a once in a lifetime opportunity.
Due to the ever changing nature of Kilauea it is not possible to visit a surface flow all the time. To find out about the current conditions contact Hawaii Volcanoes National Park visitor information at (808) 985-6101
WE WANT TO HEAR FROM YOU
Thank you for choosing Epic Trip Adventures as your guide. We are committed to continually updating our guides to be as relevant and accurate as possible. If you have feedback to improve this guide please leave it in the comments below.
We also want to hear about your Lava Flow adventures. If you have stories, pictures or even a link to your own adventure video please share them below!
For a downloadable PDF version of this guide The Puna Coast Trail to Apua Point is a long and beautiful scenic trail over many different kinds of lava rock. Along the trail, there are ruins from ancient Hawaii, coastal cliffs and hardened lava flows from different eruptions over hundreds of years! ADVENTURE STATISTICS Time Required: 10 hours or an overnight trip Location: Southern Coast of Volcano National Park Distance: 10 mile (16km) round trip Highest Elevation: 150ft Elevation Gain: 150ft Difficulty: 7/10 – Black lava rock with uneven footing under the Hawaiian sun with no shade Season: Year round Additional Requirements: N/A DRIVING DIRECTIONS From Kailua-Kona: Head south on Highway 11 (Alii Hwy) out of the city for roughly 95 miles until you reach Crater Rim Drive in Hawaii Volcanoes National Park. Take a right onto Crater Rim Drive and follow it south through Hawaii Volcanoes National Park to Chain Of Craters Rd. Follow Chain Of Crater Rd roughly 16 miles to the Apua Point Trailhead. The Trailhead is not very well marked. There is a bit of a shoulder on the road to pull over at and a sign marking the start of the Puna Coast Trail. From Hilo: Just like from Kona, head south from Hilo on the Highway 11 for about 25 miles until you reach Crater Rim Drive in Hawaii Volcanoes National Park. Take a right onto Crater Rim Drive and follow it south through Hawaii Volcanoes National Park to Chain Of Craters Rd. Follow Chain Of Crater Rd roughly 16 miles to the Apua Point Trailhead. The Trailhead is not very well marked. There is a bit of a shoulder on the road to pull over at and a sign marking the start of the Puna Coast Trail. WHAT TO
For a downloadable PDF version of this guide CLICK HERE!
The Puna Coast Trail to Apua Point is a long and beautiful scenic trail over many different kinds of lava rock. Along the trail, there are ruins from ancient Hawaii, coastal cliffs and hardened lava flows from different eruptions over hundreds of years!
ADVENTURE STATISTICS
Time Required: 10 hours or an overnight trip
Location: Southern Coast of Volcano National Park
Distance: 10 mile (16km) round trip
Highest Elevation:150ft
Elevation Gain:150ft
Difficulty:7/10 – Black lava rock with uneven footing under the Hawaiian sun with no shade
Season: Year round
Additional Requirements: N/A
DRIVING DIRECTIONS
From Kailua-Kona: Head south on Highway 11 (Alii Hwy) out of the city for roughly 95 miles until you reach Crater Rim Drive in Hawaii Volcanoes National Park. Take a right onto Crater Rim Drive and follow it south through Hawaii Volcanoes National Park to Chain Of Craters Rd. Follow Chain Of Crater Rd roughly 16 miles to the Apua Point Trailhead. The Trailhead is not very well marked. There is a bit of a shoulder on the road to pull over at and a sign marking the start of the Puna Coast Trail.
From Hilo: Just like from Kona, head south from Hilo on the Highway 11 for about 25 miles until you reach Crater Rim Drive in Hawaii Volcanoes National Park. Take a right onto Crater Rim Drive and follow it south through Hawaii Volcanoes National Park to Chain Of Craters Rd. Follow Chain Of Crater Rd roughly 16 miles to the Apua Point Trailhead. The Trailhead is not very well marked. There is a bit of a shoulder on the road to pull over at and a sign marking the start of the Puna Coast Trail.
WHAT TO BRING
Comfortable Footwear: Hiking shoes.Make sure your shoes are broken in prior to tackling this hike to prevent unexpected blisters. You could get away with running shoes but having extra grip on the lava rock surfaces will definitely come in handy!
Water: This hike may not involve a lot of elevation gain, but it is long and hot! Be sure to bring enough water for 8-10 hours of physical exertion. 4 quarts/liters recommended.
Snacks: Bring some of your favorite snacks to enjoy along the hike as well. Try to avoid very salty snacks because they just make you thirstier. Some of our favorite snacks are trail mix, bananas, beef jerky and licorice. If you’re camping overnight, you will need to pack more than just snacks.
Weather appropriate clothing: Keep yourself shaded from the sun. Wear a hat, shirt, and shorts. If you plan on staying overnight at the bay, a hoody, windbreaker or a pair of sweats. It doesn’t rain often, but it’s nice to be prepared for these situations.
Sunscreen: It will most likely be sunny so if you’re like Mattson, who easily burns, bring sunscreen!
Insect Repellent: Insect repellent can greatly improve your hiking experience.
Camera: There are numerous photo opportunities you won’t want to miss.
First Aid Kit: Lava rock is incredibly sharp and will cause cuts if you stumble and fall. Be safe and stay on your feet!
Sleeping Gear: For the overnight hikers, sleeping bag, hammock, or tent.
Headlamp/flashlight: If you are camping you will want a light for when it gets dark.
This Guide: Print a copy of this guide to reference throughout the hike
OTHER CONSIDERATIONS
Wildlife: Scorpions, back widows and centipedes can be found in shaded cracks and under rocks. They don’t bite often, but give your clothes and shoes a shake before putting them on in the morning.
Turtles: Endangered Hawksbill sea turtles nest at Apua Point. This is also a resting place for Green sea turtles. DO NOT camp in areas posted as turtle nesting areas.
Permit: All overnight backcountry camping requires a permit. Permits are 10 dollars and must be obtained from the backcountry office no more than 24 hours in advance (They can be reserved up to a week in advance). The backcountry office is located just off of Crater Rim Drive and is open from 8am-4pm daily.
Facilities: There is an outhouse at Apua Point as well as a water catchment tank. Check with a ranger at the permit house for information on the level of water in the catchment tanks.
Volcanic Area: The volcano is active and conditions are always changing. Stop into the Visitor’s Center to check for any trail closures or hazards.
Leave No Trace: It is important that we enjoy the outdoors responsibly and sustainably. Some key principles to consider when hiking to “Leave No Trace” are:
Plan ahead and prepare: Proper planning allows adventurers to hike safely while minimizing damage to the land.
Travel on durable surfaces: Stick to the trail when possible. If there is no trail, or you must travel off trail, stay on durable surfaces to reduce your impact.
Dispose of waste properly: Pack it in, pack it out.
Leave what you find: Leave rocks, plants, archaeological artifacts and other objects of interest as you find them.
Respect wildlife: Observe wildlife from a distance. Never feed wild animals.
Be considerate of other visitors: Be courteous to others to allow everyone to enjoy their outdoor experience.
Summary: The hike to Apua point is a hot, exposed trek over ancient lava flows. The trail can be difficult to follow at times, but as long as you keep the coast to your left, you will eventually reach Apua Point.
Image 1: Hiking To Apua Point Adventure Map
Step-By-Step Guide:
The hike to Apua point starts on the side of Chain Of Crater Rd (Route marker #1 on the map). A sign marks the beginning of the Puna Coast Trail which will take you to Apua Point. Follow the trail over the lava rock west with the coast on your left.
Image 2: Anderson at the Trailhead
The Puna Coast Trail is not very well defined! The only way to be sure that you are still on the trail is to keep following the rock cairns. Rock cairns are basically just big piles of black lava rock, and they’re spaced out every few hundred feet. As long as you keep passing them, you’re on the trial.
Image 3: Cairns Mark the Trail
Image 4: Following the Lava Rock Trail
After a few miles, far off in the distance, you will see about a dozen palm trees swaying in the wind. These palm trees mark Apua Point! If you keep following the rock cairns, they will eventually take you right to the coast.
Image 5: Anderson Checking Out The Coast
Image 6: Waves Crashing Against The Coastal Cliff
Not too long after walking beside the coast, you’ll come to an ancient goat corral. These rock walls are the remains of an ancient fishing village destroyed by a tsunami after the 1868 Hawaiian earthquake. These rock walls might be your only chance for a little shade for the day.
Image 7: The Lava Goat Corral
Image 8: Lava Rock Wall Rubble
From the fishing village remains the hike to Apua point is about 2 miles. The green palm trees should be fully in view so follow the trail as best you can to the point. When you make it, take some time to explore or relax on the beach and enjoy the sunset.
Image 9: Hammocking at Apua Point
WE WANT TO HEAR FROM YOU
Thank you for choosing Epic Trip Adventures as your guide. We are committed to continually updating our guides to be as relevant and accurate as possible. If you have feedback to improve this guide please leave it in the comments below.
We also want to hear about your Apua Point adventures. If you have stories, pictures or even a link to your own adventure video please share them below!
For a downloadable PDF version of this guide Most people that experience the Blue Hole don’t actually step foot in it, but view it from the window of a helicopter. The Blue Hole is surrounded by miles of thick rainforest, mountains, and rivers, which makes it one of the most remote places on Kauai. It is also one of the most difficult places to reach by foot. Seeing the Blue Hole’s 3000ft high wall of waterfalls, sprinkling life into the canyon makes the struggle getting there worth the time and effort. Also, helicopters are expensive! ADVENTURE STATISTICS Time Required: 8-10 Hours Location: 8 miles west of Wailua Distance: 7.5 miles (12km) round trip from the dam Highest Elevation: 1950ft (633m) Elevation Gain: 1500ft (450m) Difficulty: 10/10 – Difficult route finding, boulder hopping, wet slippery trail. Season: Year Round Additional Requirements: N/A DRIVING DIRECTIONS From Lihue: Take the HI-51 N, it will turn into HI-56 N, after about 4 miles you’ll come into Wailua. Take your very first left after the bridge in Wailua onto Hwy 580/Kuamoo Rd. Follow Hwy 580 west for 5.5 miles until you reach the Keahua Arboretum (Route marker #1 on the driving map). Beyond this, the road becomes unpaved, muddy and quite bumpy. Shortly after the Arboretum, the road continues up a small hill until you reach a Hunter’s Check Station/’Power Line Trailhead’ (Route marker #2 on the driving map). The road will fork here, take the left fork. Follow this road downhill and you will come to two stream crossings. The first stream has a concrete bottom and is safe for any vehicle, the second is not. We didn’t have a 4WD vehicle so we parked in-between the two streams and walked from there (Route marker #3 on the driving map). Continue on the road
For a downloadable PDF version of this guide CLICK HERE!
Most people that experience the Blue Hole don’t actually step foot in it, but view it from the window of a helicopter. The Blue Hole is surrounded by miles of thick rainforest, mountains, and rivers, which makes it one of the most remote places on Kauai. It is also one of the most difficult places to reach by foot. Seeing the Blue Hole’s 3000ft high wall of waterfalls, sprinkling life into the canyon makes the struggle getting there worth the time and effort. Also, helicopters are expensive!
ADVENTURE STATISTICS
Time Required: 8-10 Hours
Location: 8 miles west of Wailua
Distance: 7.5 miles (12km) round trip from the dam
From Lihue: Take the HI-51 N, it will turn into HI-56 N, after about 4 miles you’ll come into Wailua. Take your very first left after the bridge in Wailua onto Hwy 580/Kuamoo Rd. Follow Hwy 580 west for 5.5 miles until you reach the Keahua Arboretum (Route marker #1 on the driving map). Beyond this, the road becomes unpaved, muddy and quite bumpy. Shortly after the Arboretum, the road continues up a small hill until you reach a Hunter’s Check Station/’Power Line Trailhead’ (Route marker #2 on the driving map). The road will fork here, take the left fork. Follow this road downhill and you will come to two stream crossings. The first stream has a concrete bottom and is safe for any vehicle, the second is not. We didn’t have a 4WD vehicle so we parked in-between the two streams and walked from there (Route marker #3 on the driving map). Continue on the road and you’ll reach a T intersection (Route marker #4 on the driving map) where you should take a right. Follow this road until you reach another stream. This stream might be impassable for a car and vehicles without 4WD. If you have a 4WD vehicle, continue across the stream, if not, this is where you will park and begin the hike.
Image 1: The Blue Hole Driving Map
WHAT TO BRING
Comfortable Footwear: Hiking shoes that can get wet! Make sure your shoes are broken in prior to tackling this hike to prevent unexpected blisters. You could get away with running shoes but having extra grip on the rock surfaces will definitely come in handy!
Water: This hike is long. Be sure to bring enough water for 8-10 hours of physical exertion. Bring water purification tablets if you want to refill in the streams.
Snacks: Bring some of your favorite snacks to enjoy along the hike as well as a light lunch for when you arrive at the Blue Hole. Some of our favorite snacks are trail mix, bananas, beef jerky and licorice.
Weather appropriate clothing: There is a very high chance it will rain. Bring a rain coat. Check the weather forecast and plan accordingly.
Sunscreen:If it is sunny and you’re like Mattson, who easily burns, bring sunscreen!
Insect Repellent: Insect repellent can greatly improve your hiking experience.
Camera: There are numerous photo opportunities you won’t want to miss.
Headlamp/Flashlight: This hike is long and the trail is difficult to follow. Make sure you bring a light in case you make a wrong turn and the hike takes longer than planned.
This Guide: Print a copy of this guide to reference throughout the hike
OTHER CONSIDERATIONS
Shoes: If you approach this hike with the thought that you will keep your shoes dry/clean, you are mistaken. The sooner you accept that your feet will get soaking wet and muddy, the sooner you can march up and down the river instead of prancing around the bushes to keep your feet dry.
Slippery Rocks:When rock hopping up and down the river, be aware that rocks are deceivingly slippery. Some rocks may look like they’re dry and have grip but they can fool you. This would be a very bad place to sprain an ankle.
Flash Floods:Heavy rains can cause flash floods in streams and rivers. If there is flooding and fast-moving water, attempting to cross streams and rivers can be very dangerous and potentially fatal.
Route Finding:This trail is very difficult to follow and it is easy to get lost. Always tell someone where you are going in case something goes wrong.
Leave No Trace: It is important that we enjoy the outdoors responsibly and sustainably. Some key principles to consider when hiking to “Leave No Trace” are:
Plan ahead and prepare: Proper planning allows adventurers to hike safely while minimizing damage to the land.
Travel on durable surfaces: Stick to the trail when possible. If there is no trail, or you must travel off trail, stay on durable surfaces to reduce your impact.
Dispose of waste properly: Pack it in, pack it out.
Leave what you find: Leave rocks, plants, archaeological artifacts and other objects of interest as you find them.
Respect wildlife: Observe wildlife from a distance. Never feed wild animals.
Be considerate of other visitors: Be courteous to others to allow everyone to enjoy their outdoor experience.
Summary:The overall idea of this hike is to follow the river as far as you can until you reach the base of Mount Waialeale. In order to accomplish this, you will have to rock hop along the river, climb up a waterfall, through a gate, down some ropes and then you’ll reach the Blue Hole.
Image 2: The Blue Hole Adventure Map
Step-By-Step Guide:
We were driving a Nissan Maxima and were unable to cross the final stream which left us walking from route marker #3 on the driving map to the trailhead. From where we parked you must hike to the T-intersection (Route marker #4 on the driving map) where you take a right and followed the muddy road to a yellow gate. Follow the road through the yellow gate and travel another 1.5 miles to the Jurassic Park gate (Route marker #5 on the driving map).
Image 3: The Yellow Gate
Image 4: Following the Muddy Road
This gate may look like two telephone poles, but it is a significant mile marker. A half mile past this and you’ll reach a dam/weir where the hike begins (Route marker #1 on the adventure map).
Image 5: Anderson at the Jurassic Park Gate
You may notice other vehicles parked here.If you have a 4WD vehicle, you can save a considerable amount of time by driving this portion.
Image 6: Arriving at the dam
Image 7: The dam
From the dam, make your way upstream on the right/north side of the riverbed. Trails will appear and disappear from the river side, take them when possible but don’t allow yourself to get so far into the jungle that you cannot see the river. Hunters use these trails and have diversions leading them away from the stream, so be careful not to get too far from the river. After 2600ft (800m) on the right side of the river, hop over to the left/south side of the river and follow that trail. You will cross a small stream to reach the right bank of another river where the river had forked. Don’t worry as these river forks will all meet up and converge into one river again. When in doubt, follow the fullest option upstream and that will keep you pointed in the right direction.
Image 8: Anderson following the “trail”
Image 9: At points the trail is well defined
2 miles from the dam you will come to a large waterfall (Route marker #2 on the adventure map). This is a great place to swim, cool off and clean yourself up (the “cleaning yourself up” might be more worthwhile to do on the way back). This pool is fed by three streams, a large one to your left, the middle stream that feeds the waterfall, and one off to the right. In order to remain on the trail to the Blue Hole, you want to make your way to the top of the waterfall and follow the middle stream (the one that feeds the main waterfall). There is a trail to the left of the waterfall that will take you up. It is not very noticeable.
Image 10: The Waterfall
After the waterfall, the trail will be marked with blue ribbon. At this point, these trail markers should be followed, and they will take you along the south (left) side of the middle stream to the Blue Hole. In 0.6 miles (1km) the stream forks, take the left fork. If there are no trail markers in sight, walk along the left/south side of the river bank until you see a trail marker. Eventually the stream will become impassable and the trail markers will be what lead you up and around these impassable parts.
Image 11: Blue trail markers
Image 12: Another trail marker
The trail will rise and take you along the gorge where you can look down at the stream below. Eventually you will come to a waterfall with pig fence across it. The pig fence has a gate (Route marker #3 on the adventure map), go through it.
Image 13: The Gate
From this point on you will be surrounded by large canyon walls. Follow the rough trail as it veers left deep into the canyon. Eventually you will hit the back wall, also known as the Blue Hole! Soak in the views as you are standing in one of the most beautiful places in the world. The return trip is just as challenging as the trek in, so be sure to leave yourself enough time to hike out before sundown.
Image 14: The Blue Hole
Image 15: The Blue Hole
WE WANT TO HEAR FROM YOU
Thank you for choosing Epic Trip Adventures as your guide. We are committed to continually updating our guides to be as relevant and accurate as possible. If you have feedback to improve this guide please leave it in the comments below.
We also want to hear about your Blue Hole adventures. If you have stories, pictures or even a link to your own adventure video please share them below!
For a downloadable PDF version of this guide The hike to Nanue Falls is very short and only 18 miles north of Hilo. Although this hike is short and doesn’t require much time, it is challenging as there is no trail and you must rock hop along slippery boulders up the creek. The waterfall is beautiful and worth the trek, but even the most sure-footed hikers are likely to take a slip and end up getting wet at some point. ADVENTURE STATISTICS Time Required: 1 Hour Location: 18 miles north of Hilo Distance: Less than a mile Highest Elevation: 300 ft Elevation Gain: Minimal Difficulty: 4/10 – Slippery boulder hopping necessary Season: Year round Additional Requirements: N/A DRIVING DIRECTIONS From Hilo: Take Hwy 19 north of Hilo for 18 miles and take your first left passed mile marker 18. (If you’re coming from the north, after mile marker 19, you will cross two bridges, after crossing the second bridge, take your first right) follow this road for 2.5 miles past the World Botanical Garden registration area. 75ft after crossing a small bridge there is an area on the right just passed a guard rail to pull over and park your car. WHAT TO BRING Comfortable Footwear you can get wet: Your shoes will very likely get wet. Water shoes would be a good option. Water: This hike is short but it is always smart to bring a little bit of water. Snacks: A snack might be necessary if you plan to stay at the falls for any length of time. Weather appropriate clothing: Check the weather forecast and plan accordingly. Sunscreen:If it is sunny and you’re like Mattson, who easily burns, bring sunscreen! Insect Repellent: Insect repellent can greatly improve your hiking experience. There were a lot of mosquitoes on this hike so definitely pack
For a downloadable PDF version of this guide CLICK HERE!
The hike to Nanue Falls is very short and only 18 miles north of Hilo. Although this hike is short and doesn’t require much time, it is challenging as there is no trail and you must rock hop along slippery boulders up the creek. The waterfall is beautiful and worth the trek, but even the most sure-footed hikers are likely to take a slip and end up getting wet at some point.
From Hilo: Take Hwy 19 north of Hilo for 18 miles and take your first left passed mile marker 18. (If you’re coming from the north, after mile marker 19, you will cross two bridges, after crossing the second bridge, take your first right) follow this road for 2.5 miles past the World Botanical Garden registration area. 75ft after crossing a small bridge there is an area on the right just passed a guard rail to pull over and park your car.
WHAT TO BRING
Comfortable Footwear you can get wet: Your shoes will very likely get wet. Water shoes would be a good option.
Water: This hike is short but it is always smart to bring a little bit of water.
Snacks: A snack might be necessary if you plan to stay at the falls for any length of time.
Weather appropriate clothing: Check the weather forecast and plan accordingly.
Sunscreen:If it is sunny and you’re like Mattson, who easily burns, bring sunscreen!
Insect Repellent: Insect repellent can greatly improve your hiking experience. There were a lot of mosquitoes on this hike so definitely pack some bug spray.
Camera: There are numerous photo opportunities you won’t want to miss.
This Guide: Print a copy of this guide to reference throughout the hike.
OTHER CONSIDERATIONS
Cliff Jumping: Always be cautious when jumping off cliffs into water. Know your limits and check the water below you thoroughly before jumping to make sure it is deep enough.
Flash Floods: This area of the Big Island receives over 100 inches of rain annually. Heavy rains can cause flash floods in streams and rivers. If there is flooding and fast moving water, attempting to cross streams and rivers can be very dangerous and potentially fatal.
Leave No Trace: It is important that we enjoy the outdoors responsibly and sustainably. Some key principles to consider when hiking to “Leave No Trace” are:
Plan ahead and prepare: Proper planning allows adventurers to hike safely while minimizing damage to the land.
Travel on durable surfaces: Stick to the trail when possible. If there is no trail, or you must travel off trail, stay on durable surfaces to reduce your impact.
Dispose of waste properly: Pack it in, pack it out.
Leave what you find: Leave rocks, plants, archaeological artifacts and other objects of interest as you find them.
Respect wildlife: Observe wildlife from a distance. Never feed wild animals.
Be considerate of other visitors: Be courteous to others to allow everyone to enjoy their outdoor experience.
Summary: The hike to Nanue Falls is short and straightforward. From the Nanue Bridge the hike follows the Nanue stream upstream to Nanue Falls.
Image 1: Nanue Falls Adventure Map
Step-By-Step Guide:
When you’ve passed the bridge, and found your spot to park beyond the guard rail (Route marker #1 on the map), take a walk back onto the bridge. This isn’t part of the hike, but the bridge is pretty neat. It was built in 1930 and has the word “Nanue” etched into the concrete. Running underneath this bridge is Nanue stream. Take a look upstream as that’s where you’ll be going.
Image 2: The Nanue Bridge
Over the guard rail you parked beside on the norht side of the road is a path through some thick overgrowth down to Nanue stream. Once you hit the stream, take a right and walk under the bridge. Be careful walking under the bridge as the ledges don’t have a lot of area to walk on. If you want to enbrace getting your shoes wet, jump in and just walk up the stream through the water. You’re bound to slip on a rock and get your shoes wet at some point, might as well embrace it early.
From the bridge, this hike is pretty straight forward, just head upstream until you reach the waterfall. Hop along the rocks whichever way you think is easiest or if you have already got your shoes wet, head straight up the creek. The rocks can be slippery so be a little extra wary as to where you plant your feet. Beware of spider webs, there are a lot of them.
Image 3: Mattson descending to the stream
Image 4: Anderson heading upstream
From the bridge to the falls is no more than 800 yards. After rounding a bend, you’ll be able to see the falls and a nice pool to swim in at the bottom (Route marker #2 on the map). Enjoy your time at the falls but be very careful if you choose to jump! We thoroughly checked the depth of the pool prior to cliff jumping but the depth of the water can change and newly fallen rocks can create unseen cliff jumping hazards.
Image 5: Nanue Falls
WE WANT TO HEAR FROM YOU
Thank you for choosing Epic Trip Adventures as your guide. We are committed to continually updating our guides to be as relevant and accurate as possible. If you have feedback to improve this guide please leave it in the comments below.
We also want to hear about your Nanue Falls adventures. If you have stories, pictures or even a link to your own adventure video please share them below!
For a downloadable PDF version of this guide Note: Despite our enthusiasm in the video it turns out we didn’t actually find Narnia. Guess we will have to plan a return trip to the Big Island to find the true location of Narnia. This guide will give you the details of our hike and where we went in our failed attempt. Hawaii is well known for many things, one of those being beautiful waterfalls. On our search for Narnia we stumbled across a swimming hole with spectacular waterfalls. It was somewhat off the beaten path and consisted of four 30ft high narrow waterfalls that all pour into the same pool. Even though it wasn’t Narnia, it was a relatively easy hike and would be worth checking out. ADVENTURE STATISTICS Time Required: 1 hour Location: East side of Big Island upstream of Rainbow Falls Distance: 2km round trip Elevation Gain: 50ft Difficulty: 5/10 – Route finding, Rapid elevation drop to base of falls. Season: Year Round Additional Requirements: N/A DRIVING DIRECTIONS From Hilo: If you have Google maps, try putting in Wailuku River Falls. This is the approximate location of the trailhead. If it doesn’t come up, follow Waianuenue Ave and you will come to a bridge. The bridge is about 1.8 miles (2.9km) passed the Hilo Medical Center. Pull over just passed the bridge and park safely off the road. The trailhead is nearby. WHAT TO BRING Comfortable Footwear: Hiking shoes. Water: Hawaii is hot and humid. It is easy to become dehydrated when hiking. Snacks: Bring some of your favorite snacks to enjoy along the hike. Some of our favorite snacks are trail mix, bananas, beef jerky and licorice. Weather appropriate clothing: Bring a swimsuit. On a
For a downloadable PDF version of this guide CLICK HERE!
Note: Despite our enthusiasm in the video it turns out we didn’t actually find Narnia. Guess we will have to plan a return trip to the Big Island to find the true location of Narnia. This guide will give you the details of our hike and where we went in our failed attempt.
Hawaii is well known for many things, one of those being beautiful waterfalls. On our search for Narnia we stumbled across a swimming hole with spectacular waterfalls. It was somewhat off the beaten path and consisted of four 30ft high narrow waterfalls that all pour into the same pool. Even though it wasn’t Narnia, it was a relatively easy hike and would be worth checking out.
ADVENTURE STATISTICS
Time Required: 1 hour
Location: East side of Big Island upstream of Rainbow Falls
Distance: 2km round trip
Elevation Gain:50ft
Difficulty:5/10 – Route finding, Rapid elevation drop to base of falls.
Season: Year Round
Additional Requirements: N/A
DRIVING DIRECTIONS
From Hilo: If you have Google maps, try putting in Wailuku River Falls. This is the approximate location of the trailhead. If it doesn’t come up, follow Waianuenue Ave and you will come to a bridge. The bridge is about 1.8 miles (2.9km) passed the Hilo Medical Center. Pull over just passed the bridge and park safely off the road. The trailhead is nearby.
WHAT TO BRING
Comfortable Footwear: Hiking shoes.
Water: Hawaii is hot and humid. It is easy to become dehydrated when hiking.
Snacks: Bring some of your favorite snacks to enjoy along the hike. Some of our favorite snacks are trail mix, bananas, beef jerky and licorice.
Weather appropriate clothing: Bring a swimsuit. On a nice day swimming in the pools makes the hike very worthwhile.
Sunscreen: If it is sunny and you’re like Mattson, who easily burns, bring sunscreen!
Insect Repellent: Insect repellent can greatly improve your hiking experience.
Camera: There are numerous photo opportunities you won’t want to miss.
This Guide: Print a copy of this guide to reference throughout the hike
OTHER CONSIDERATIONS
Flash Floods:This area of the Big Island receives over 100 inches of rain annually. Heavy rains can cause flash floods in streams and rivers. If there is flooding and fast-moving water, attempting to swim or cross streams and rivers can be very dangerous and potentially fatal.
Leave No Trace: It is important that we enjoy the outdoors responsibly and sustainably. Some key principles to consider when hiking to “Leave No Trace” are:
Plan ahead and prepare: Proper planning allows adventurers to hike safely while minimizing damage to the land.
Travel on durable surfaces: Stick to the trail when possible. If there is no trail, or you must travel off trail, stay on durable surfaces to reduce your impact.
Dispose of waste properly: Pack it in, pack it out.
Leave what you find: Leave rocks, plants, archaeological artifacts and other objects of interest as you find them.
Respect wildlife: Observe wildlife from a distance. Never feed wild animals.
Be considerate of other visitors: Be courteous to others to allow everyone to enjoy their outdoor experience.
Summary: On our search for Narnia we wanted to check out Rainbow Falls first. The trailheads for Narnia and Rainbow Falls are only about ten minutes apart (we think) so if you haven’t seen Rainbow Falls its worth stopping. Further up the road the waterfalls and swimming pool we reached were a short 1km hike in through dense bamboo forest. Once you reach the falls you will have to scurry your way down to the base of the falls which can be difficult.
Image 1: Searching For Narnia Adventure Map
Step-By-Step Guide:
We recommend checking out Rainbow Falls (Route marker #1 on the map) before making your way up. Rainbow Falls is a very well-known touristy attraction. Take the turn of onto Rainbow Dr. from Waianeuneu Ave. You will see a parking lot and a paved path with signs directing you where to go. It’s hard to miss.
Image 2: Rainbow Falls
Image 3: Rainbow Falls Lookout
Once you’ve seen enough of Rainbow Falls, get back in your vehicle and drive west down Waianuenue Ave for 2.1 miles (3.3km) until you cross a bridge. This bridge crosses the Wailuku River which feeds Pe’epe’e Falls and Rainbow Falls. Park your car on the shoulder just passed the bridge. Get out and enjoy the view of a beautiful waterfall upstream.
Image 4: View of the waterfalls from the bridge
Image 5: The trailhead to the falls
Now for the hike to Narnia (or so we thought)! If you are standing in the middle of the bridge facing upstream, the trail will enter the forest to your right, just past the bridge, and continue upstream along the ridge parallel with the Wailuku River. There will be a sign for where to enter. As you’re hiking along the trail towards the falls, you should keep the river to your left. Once you make it to the end of the trail you will be at the top of the large waterfall you could see from the bridge. To the right of that will be a pool with four waterfalls flowing into it (Route marker #3 on the map)! Take a look at the falls from the top to get an idea of how you will get down to the base.
Image 6: The large waterfall that could be seen from the bridge
Image 7: The swimming pool
To get down to the falls head back the same way you came, this time with the river on your right. About halfway back on that trail, keep your eyes open to the left and find a trail that leads down to a small creek that is the drainage from the waterfalls. Once you make your way to that creek, follow it up stream and feast your eyes upon some awesome waterfalls. Before getting in the water be aware of the flow rate. Water is powerful so unless you’re super confident, give the waterfalls some space.
Image 8: The four waterfalls
Image 9: Mattson at the waterfalls
WE WANT TO HEAR FROM YOU
Thank you for choosing Epic Trip Adventures as your guide. We are committed to continually updating our guides to be as relevant and accurate as possible. If you have feedback to improve this guide please leave it in the comments below.
We also want to hear about your Search for Narnia. If you have stories, pictures or even a link to your own adventure video please share them below!
For a downloadable PDF version of this guide Ha Ling is a peak at the western end of Mount Lawrence Grassi. Ha Ling is a very popular well-trafficked trail because of its convenient location just south of the city of Canmore. Ha Ling is a moderately difficult scramble with steep consistent elevation gain and spectacular views from the summit. ADVENTURE STATISTICS Time Required: 3-5 Hours Location: Just south of Canmore, AB Distance: 6km round trip Highest Elevation: 2450m Elevation Gain: 700m Difficulty: 6/10 – steep ascent Season: May to October for summer hiking conditions Additional Requirements: N/A DRIVING DIRECTIONS From Canmore: Take Three Sisters Drive up the hill and turn right on Three Sisters Pkwy (AB-742) towards the Nordic Centre. Keep on that windy road for 7.3km. On the right will be a large parking lot, you can’t miss it. From the parking lot it’s a quick walk to the trailhead. WHAT TO BRING Comfortable Footwear: Hiking shoes. Make sure your shoes are broken in prior to tackling this hike to prevent unexpected blisters. You could get away with running shoes but having extra grip on the rock surfaces will definitely come in handy! Water: This hike has lots of elevation gain to reach the summit. Be sure to bring lots of water. Snacks: Bring some of your favorite snacks to enjoy along the hike and at the summit. Some of our favorite snacks are trail mix, bananas, beef jerky and licorice. Weather appropriate clothing: You will be exposed to the elements throughout this hike. You could get snow, rain, or sun on any day of the year. Check the weather forecast and plan accordingly. Sunscreen: If it is sunny and you’re like Mattson, who easily burns, bring sunscreen! Insect Repellent: Insect repellent can greatly
For a downloadable PDF version of this guide CLICK HERE!
Ha Ling is a peak at the western end of Mount Lawrence Grassi. Ha Ling is a very popular well-trafficked trail because of its convenient location just south of the city of Canmore. Ha Ling is a moderately difficult scramble with steep consistent elevation gain and spectacular views from the summit.
ADVENTURE STATISTICS
Time Required: 3-5 Hours
Location:Just south of Canmore, AB
Distance: 6km round trip
Highest Elevation: 2450m
Elevation Gain:700m
Difficulty:6/10 – steep ascent
Season:May to October for summer hiking conditions
Additional Requirements: N/A
DRIVING DIRECTIONS
From Canmore: Take Three Sisters Drive up the hill and turn right on Three Sisters Pkwy (AB-742) towards the Nordic Centre. Keep on that windy road for 7.3km. On the right will be a large parking lot, you can’t miss it. From the parking lot it’s a quick walk to the trailhead.
WHAT TO BRING
Comfortable Footwear: Hiking shoes. Make sure your shoes are broken in prior to tackling this hike to prevent unexpected blisters. You could get away with running shoes but having extra grip on the rock surfaces will definitely come in handy!
Water: This hike has lots of elevation gain to reach the summit. Be sure to bring lots of water.
Snacks: Bring some of your favorite snacks to enjoy along the hike and at the summit. Some of our favorite snacks are trail mix, bananas, beef jerky and licorice.
Weather appropriate clothing: You will be exposed to the elements throughout this hike. You could get snow, rain, or sun on any day of the year. Check the weather forecast and plan accordingly.
Sunscreen: If it is sunny and you’re like Mattson, who easily burns, bring sunscreen!
Insect Repellent: Insect repellent can greatly improve your hiking experience.
Bear Spray: You are in bear country. Always hike with bear spray that is easily accessible.
Camera: There are numerous photo opportunities you won’t want to miss.
This Guide: Print a copy of this guide to reference throughout the hike
OTHER CONSIDERATIONS
Wildlife: You will be hiking in bear country. It is always advisable to check in at the local Visitor Information Center to learn of any trail closures due to wildlife. Carry bear spray in an easily accessible location. Travel in groups of multiple hikers and make lots of noise to avoid an unexpected encounter.
Leave No Trace: It is important that we enjoy the outdoors responsibly and sustainably. Some key principles to consider when hiking to “Leave No Trace” are:
Plan ahead and prepare: Proper planning allows adventurers to hike safely while minimizing damage to the land.
Travel on durable surfaces: Stick to the trail when possible. If there is no trail, or you must travel off trail, stay on durable surfaces to reduce your impact.
Dispose of waste properly: Pack it in, pack it out.
Leave what you find: Leave rocks, plants, archaeological artifacts and other objects of interest as you find them.
Respect wildlife: Observe wildlife from a distance. Never feed wild animals.
Be considerate of other visitors: Be courteous to others to allow everyone to enjoy their outdoor experience.
Summary: The hike begins at the Goat Creek Day use area. West of the parking lot is the trailhead and the hike quickly ascends through the trees. From start to finish, the elevation gain remains constant. Eventually you will rise above the tree line and have a final push over some scree to the summit.
Image 1: Ha Ling Peak Adventure Map
Step-By-Step Guide:
Starting from the parking lot (Route marker #1 on the map), make your way back up to the road. If you’re facing south, you should be able to see a ramp that veers off to the left. Follow that road up the hill where you’ll come to concrete bridge. Cross this bridge, and make your way to the tree line.
Image 2: The ramp to the trailhead
Image 3: Continue across the bridge
Past the bridge near the tree line, you’ll see a couple of power poles. The trailhead to Ha Ling is right there, you can miss it. The first leg of your journey will be on a wide, root ridden trail with a consistently difficult elevation gain. The trail is very well travelled.
Image 4: Ha Ling Peak trailhead
Follow the trail up the mountain. As you gain elevation the trees will become sparser and you will get more opportunities to enjoy the views you’ve worked so hard for. When you rise above the tree line, you will see the summit of Miner’s Peak and Three Humps on the east side of the saddle, Ha Ling Peak is the steep summit to the west.
Image 5: The well-defined trail through the trees
Image 6: The trail to the summit
The last leg of this hike is an easy scramble. Keep the summit in your sights, and take whichever path you think is easiest for you. We recommend trying to stay on the areas of slab and avoiding the scree. The rock slabs will provide better footing and a safer, more comfortable ascent. It’s common for it to be quite windy at the top of Ha Ling Peak. Bring a jacket to stay warm and most importantly, be careful! Once you reach the top (Route marker #2 on the map), take a break and enjoy the Rocky Mountain views and Canmore down below!
Image 7: Anderson at the summit
WE WANT TO HEAR FROM YOU
Thank you for choosing Epic Trip Adventures as your guide. We are committed to continually updating our guides to be as relevant and accurate as possible. If you have feedback to improve this guide please leave it in the comments below.
We also want to hear about your Ha Ling Peak adventures. If you have stories, pictures or even a link to your own adventure video please share them below!
For a downloadable PDF version of this guide Ice Box Canyon is a great hike for a hot summer day. The narrow walls of the canyon stand hundreds of feet high and provide shade that keeps the canyon cooler than the surrounding desert. Depending on the season, Ice Box Canyon can contain beautiful streams and waterfalls flowing down the back of the canyon. The view looking through the canyon back toward Red Rock Conservation Area is unique and really highlights the distant red colored rock of the Calico Hills. As you hike through the canyon, there is boulder hopping and scrambling opportunities that make this hike both challenging and enjoyable. ADVENTURE STATISTICS Time Required: 2-4 Hours Location: 27km (17 miles) west of the Las Vegas Strip in Red Rock Canyon Conservation Area Distance: 5km (2.5 miles) round trip Highest Elevation: 1532m (5026ft) Elevation Gain: 352m (1154ft) Difficulty: 6+/10 – Boulder hopping and scrambling are required to get to the pools. Very advanced technical scrambling is required to climb higher in the Canyon. Season: Year round (December to March for best views of waterfall) Additional Requirements: N/A DRIVING DIRECTIONS From Las Vegas: Take Nevada State Route 159 5.5 miles west from the Las Vegas city limits and turn right onto Red Rock Canyon Scenic Loop Dr. The fee to enter the Red Rock Canyon Conservation Area is $7 dollar per vehicle. Once you have entered the Conservation Area, the Visitor’s Center is on your left. Drive along Scenic Loop Dr. approximately 4 miles and park at the Sandstone Quarry parking lot. WHAT TO BRING Comfortable Footwear: Hiking shoes. Make sure your shoes are broken in prior to tackling this hike to prevent unexpected blisters. You could get away with runners but having extra grip on the rock surfaces will definitely come in handy! Water: Bring
For a downloadable PDF version of this guide CLICK HERE!
Ice Box Canyon is a great hike for a hot summer day. The narrow walls of the canyon stand hundreds of feet high and provide shade that keeps the canyon cooler than the surrounding desert. Depending on the season, Ice Box Canyon can contain beautiful streams and waterfalls flowing down the back of the canyon. The view looking through the canyon back toward Red Rock Conservation Area is unique and really highlights the distant red colored rock of the Calico Hills. As you hike through the canyon, there is boulder hopping and scrambling opportunities that make this hike both challenging and enjoyable.
ADVENTURE STATISTICS
Time Required: 2-4 Hours
Location: 27km (17 miles) west of the Las Vegas Strip in Red Rock Canyon Conservation Area
Distance: 5km (2.5 miles) round trip
Highest Elevation:1532m (5026ft)
Elevation Gain:352m (1154ft)
Difficulty:6+/10 – Boulder hopping and scrambling are required to get to the pools. Very advanced technical scrambling is required to climb higher in the Canyon.
Season: Year round (December to March for best views of waterfall)
Additional Requirements: N/A
DRIVING DIRECTIONS
From Las Vegas: Take Nevada State Route 159 5.5 miles west from the Las Vegas city limits and turn right onto Red Rock Canyon Scenic Loop Dr. The fee to enter the Red Rock Canyon Conservation Area is $7 dollar per vehicle. Once you have entered the Conservation Area, the Visitor’s Center is on your left. Drive along Scenic Loop Dr. approximately 4 miles and park at the Sandstone Quarry parking lot.
WHAT TO BRING
Comfortable Footwear: Hiking shoes. Make sure your shoes are broken in prior to tackling this hike to prevent unexpected blisters. You could get away with runners but having extra grip on the rock surfaces will definitely come in handy!
Water: Bring two bottles of water per person to stay hydrated while you explore the canyon.
Snacks: Bring some of your favorite snacks to enjoy along the hike. Some of our favorite snacks are trail mix, bananas, beef jerky and licorice.
Weather appropriate clothing :Temperatures can get up to 40 degrees Celsius (104 Fahrenheit) in the summertime. Shorts, a breathable long sleeve shirt, and a hat can help protect you from the sun and heat. In the winter, the temperature can drop below freezing and it is possible there will be snow. Check the weather forecast and plan accordingly.
Sunscreen: If it is sunny, and you’re like Mattson, who easily burns, bring sunscreen!
Camera: There are numerous photo opportunities you won’t want to miss along the way.
This Guide: Print a copy of this guide to reference throughout the hike.
OTHER CONSIDERATIONS
Wildlife: Watch where you put your hands and feet! Rattlesnakes, scorpions and venomous spiders may be taking shelter under rocks and shrubs where you can’t see. Never try to touch, collect or kill these animals.
Heat and Dehydration: In Red Rock Canyon there is little shade and the days can be very hot. Limit sun exposure during the hottest parts of the day. Appropriate clothing such as a hat and long sleeve shirt can protect your skin from the sun as well as reduce the risk of dehydration. The hot weather increases your need for fluid intake. Ensure you are hydrating throughout the day, don’t wait until you’re thirsty to start drinking.
Flash Floods: Avoid hiking in canyons during rainstorms and move to higher ground. Due to the topography of the area, flash flooding can occur very quickly. Do not attempt to drive or walk through water flowing across a road or trail.
Scrambling: Walking or climbing up steep terrain that requires the use of ones hands is considered scrambling. Scrambling does not require the use of specific climbing equipment such as ropes or harnesses and for this reason exposed scrambling can be very dangerous. Stay within your limits when scrambling, and always keep in mind that it is often easier to scramble up a rock face then climb back down it.
Leave No Trace: It is important that we enjoy the outdoors responsibly and sustainably. Some key principles to consider when hiking to “Leave No Trace” are:
Plan ahead and prepare: Proper planning allows adventurers to hike safely while minimizing damage to the land.
Travel on durable surfaces: Stick to the trail when possible. If there is no trail, or you must travel off trail, stay on durable surfaces to reduce your impact.
Dispose of waste properly: Pack it in, pack it out.
Leave what you find: Leave rocks, plants, archaeological artifacts and other objects of interest as you find them.
Respect wildlife: Observe wildlife from a distance. Never feed wild animals.
Be considerate of other visitors: Be courteous to others to allow everyone to enjoy their outdoor experience.
Summary: The starting point for this hike is at the Ice Box Canyon Parking Lot. From there a well-travelled trail heads west across the desert to the mouth of the canyon. Once inside the canyon, the trail gets a little more difficult to follow. You will have to climb over large boulders and crouch under some low hanging tree branches as you head deeper into the canyon. At the far end of the Canyon, depending on season, you will come to a series of waterfalls and pools. From here there is the ability to scramble higher up in the Canyon to get an extraordinary view looking back toward where you came from.
Image 1: Ice Box Canyon Adventure Map
Step-By-Step Guide:
The trail begins at mile 8 on the 13-Mile Scenic Drive at the Ice Box Canyon Parking Lot (Route marker #1 on the map). From the lot follow the well-traveled trail that heads west towards the mountains. It’s best to start this hike early in the day as you are exposed to the hot sun until you enter the canyon.
Image 2: The Ice Box Canyon Trailhead
Image 3: The trail heading towards the canyon
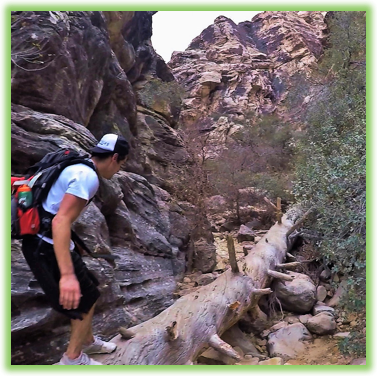
Once in the canyon, the trail gets more difficult to follow and there is some tricky rock hopping required. The trail isn’t well marked but if you stay in the wash weaving your way around boulders west into the canyon, you’re headed the right direction. A large fallen Ponderosa Pine is a landmark (Route marker #2 on the map) along the trial that will let you know you’re headed the right way.
Image 4: Anderson scrambling over a large boulder
Image 5: Anderson crossing the Ponderosa Pine
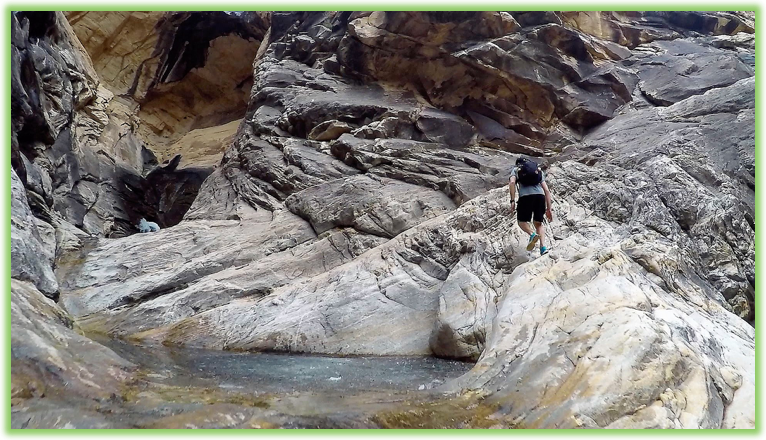
From the Ponderosa Pine the canyon forks left (south) and right (north). Stay left on the trail and after about a 5-minute walk you will reach a small pool of water. The rocks around the pool have been polished by water for hundreds of year and are very slippery so watch your footing.
Image 6: Mattson walking around the lower pool
Continue around the first pool as there is another pool and waterfall a short scramble above (Route marker #3 on the map). At this point the trail hits a dead end but it is a scenic spot to enjoy a snack, take a break and enjoy the view looking back at the canyon.
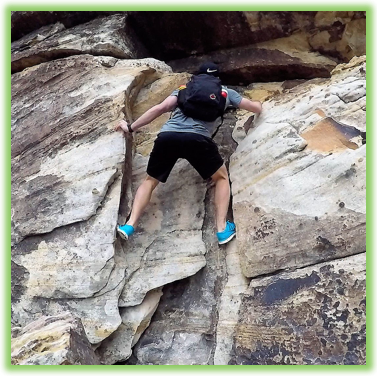
If you are extra adventurous and an experienced scrambler, you can trace your way back to the Ponderose Pine and head north. Not far from the Ponderosa Pine on the north side of the canyon there are some ropes anchored in place (Route marker #4 on the map). These can be of assistance on the way down if you choose to continue climbing up the canyon wall.
From here on there is no marked route higher up the canyon wall. If you enjoy free climbing, there is the ability to get above the waterfall at the pools visited earlier, but it requires some very technical climbing. DO NOT climb higher than what you feel comfortable with and keep in mind that it is often easier to climb up something than back down it.
Image 7: Mattson scrambling higher up the canyon wall
Image 8: Anderson using the ropes to descend
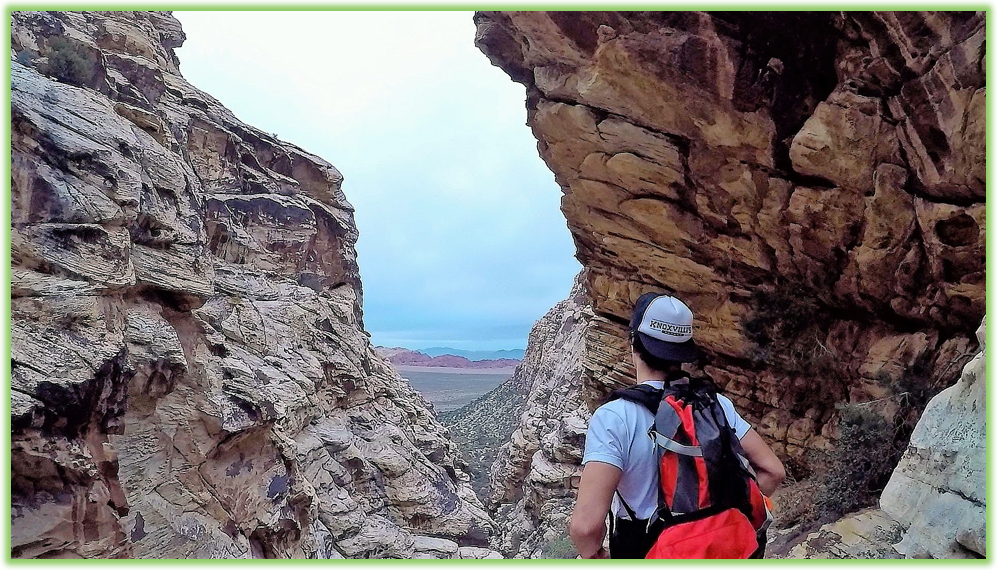
After some intense climbing up the canyon wall the view looking back from the canyon to Red Rock Canyon is stunning and an awesome reward for the hard work required to get to this point. Be extra cautious on the return journey as climbing down the canyon wall can be as difficult if not more difficult than the climb up.
Image 9: Anderson checking out the view looking back into the canyon
WE WANT TO HEAR FROM YOU
Thank you for choosing Epic Trip Adventures as your guide. We are committed to continually updating our guides to be as relevant and accurate as possible. If you have feedback to improve this guide please leave it in the comments below.
We also want to hear about your Ice Box Canyon adventures. If you have stories, pictures or even a link to your own adventure video please share them below!
For a downloadable PDF version of this guide Turtlehead Peak Trail is an 8km (5 mile) round trip hike in Red Rock Canyon National Conservation Area. This steep, well-travelled trail is one of the most difficult day hikes in Red Rock Canyon. The climb can be quite strenuous, but the beautiful view from the peak is well worth it. Intermediate level scrambling and loose rocks along the trail add to the difficulty of this hike. Red Rock Canyon is just a short drive from Las Vegas and this hike is a great option for those wanting to get away from Sin City for a day of adventure. ADVENTURE STATISTICS Time Required: 3-4 Hours Location: 27km (17 miles) west of the Las Vegas Strip in Red Rock Canyon Conservation Area Distance: 8km (5 miles) round trip Highest Elevation: 1932m (6300ft) Elevation Gain: 550m (1800ft) Difficulty: 6/10 – Rapid elevation gain Season: Year round Additional Requirements: N/A DRIVING DIRECTIONS From Las Vegas: Take Nevada State Route 159n5.5 miles west from the Las Vegas city limits and turn right onto Red Rock Canyon Scenic Loop Dr. The fee to enter the Red Rock Canyon Conservation Area is $7 dollar per vehicle. Once you have entered the Conservation Area, the Visitor’s Center is on your left. Drive along Scenic Loop Dr. approximately 4 miles and park at the Sandstone Quarry parking lot. WHAT TO BRING Comfortable Footwear: Hiking shoes. Make sure your shoes are broken in prior to tackling this hike to prevent unexpected blisters. You could get away with runners but having extra grip on the rock surfaces will definitely come in handy! Water: This hike includes lots of elevation gain and there is no shade from the sun. Bring at minimum a couple water bottles each to stay hydrated. Snacks: Bring some of your
For a downloadable PDF version of this guide CLICK HERE!
Turtlehead Peak Trail is an 8km (5 mile) round trip hike in Red Rock Canyon National Conservation Area. This steep, well-travelled trail is one of the most difficult day hikes in Red Rock Canyon. The climb can be quite strenuous, but the beautiful view from the peak is well worth it. Intermediate level scrambling and loose rocks along the trail add to the difficulty of this hike. Red Rock Canyon is just a short drive from Las Vegas and this hike is a great option for those wanting to get away from Sin City for a day of adventure.
ADVENTURE STATISTICS
Time Required: 3-4 Hours
Location: 27km (17 miles) west of the Las Vegas Strip in Red Rock Canyon Conservation Area
Distance: 8km (5 miles) round trip
Highest Elevation:1932m (6300ft)
Elevation Gain:550m (1800ft)
Difficulty:6/10 – Rapid elevation gain
Season: Year round
Additional Requirements: N/A
DRIVING DIRECTIONS
From Las Vegas: Take Nevada State Route 159n5.5 miles west from the Las Vegas city limits and turn right onto Red Rock Canyon Scenic Loop Dr. The fee to enter the Red Rock Canyon Conservation Area is $7 dollar per vehicle. Once you have entered the Conservation Area, the Visitor’s Center is on your left. Drive along Scenic Loop Dr. approximately 4 miles and park at the Sandstone Quarry parking lot.
WHAT TO BRING
Comfortable Footwear: Hiking shoes. Make sure your shoes are broken in prior to tackling this hike to prevent unexpected blisters. You could get away with runners but having extra grip on the rock surfaces will definitely come in handy!
Water: This hike includes lots of elevation gain and there is no shade from the sun. Bring at minimum a couple water bottles each to stay hydrated.
Snacks: Bring some of your favorite snacks to enjoy along the hike. Some of our favorite snacks are trail mix, bananas, beef jerky and licorice.
Weather appropriate clothing: Temperatures can get up to 40 degrees Celsius (104 Fahrenheit) in the summertime. Shorts, a breathable long sleeve shirt, and a hat can help protect you from the sun and heat. In the winter, the temperature can drop below freezing and it is possible there will be snow. Check the weather forecast and plan accordingly.
Sunscreen: If it is sunny, and you’re like Mattson, who easily burns, bring sunscreen!
Camera: There are numerous photo opportunities you won’t want to miss along the way.
This Guide: Print a copy of this guide to reference throughout the hike.
OTHER CONSIDERATIONS
Wildlife:Watch where you put your hands and feet! Rattlesnakes, scorpions and venomous spiders may be taking shelter under rocks and shrubs where you can’t see. Never try to touch, collect or kill these animals.
Heat and Dehydration: In Red Rock Canyon there is little shade and the days can be very hot. Limit sun exposure during the hottest parts of the day. Appropriate clothing such as a hat and long sleeve shirt can protect your skin from the sun as well as reduce the risk of dehydration. The hot weather increases your need for fluid intake. Ensure you are hydrating throughout the day, don’t wait until you’re thirsty to start drinking.
Flash Floods: Avoid hiking in canyons during rainstorms and move to higher ground. Due to the topography of the area, flash flooding can occur very quickly. Do not attempt to drive or walk through water flowing across a road or trail.
Leave No Trace: It is important that we enjoy the outdoors responsibly and sustainably. Some key principles to consider when hiking to “Leave No Trace” are:
Plan ahead and prepare: Proper planning allows adventurers to hike safely while minimizing damage to the land.
Travel on durable surfaces: Stick to the trail when possible. If there is no trail, or you must travel off trail, stay on durable surfaces to reduce your impact.
Dispose of waste properly: Pack it in, pack it out.
Leave what you find: Leave rocks, plants, archaeological artifacts and other objects of interest as you find them.
Respect wildlife: Observe wildlife from a distance. Never feed wild animals.
Be considerate of other visitors: Be courteous to others to allow everyone to enjoy their outdoor experience.
Summary: Turtlehead Peak Trail starts at the Sandstone Quarry parking lot. The trail heads north from the parking lot to a signed fork in the road. From the fork the Turtlehead Peak Trail heads north towards Turtlehead Mountain. The trail then climbs in elevation up the side of the mountain and eventually approaches the summit from the north. The peak offers an incredible panoramic view of the entire Red Rock Canyon Conservation Area.
Image 1: Hiking Turtlehead Peak Adventure Map
Step-By-Step Guide:
From the Sandstone Quarry Parking Lot (Route marker #1 on the map), follow the trail from the north side of the lot.
Image 2: Sandstone Quarry Parking Lot trailhead
Image 3: Hikes starting from Sandstone Quarry Parking Lot
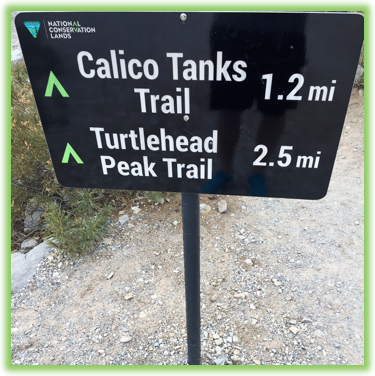
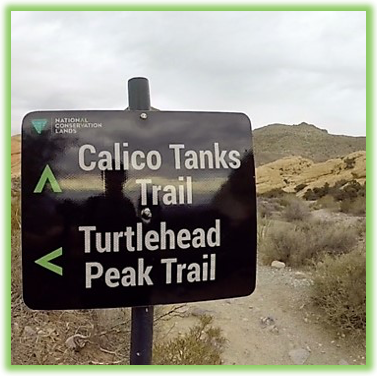
The trail is well signed. After about 2km (1.3 miles) there will be a fork in the trail splitting the Calico Tanks Trail from Turtlehead Peak (Route marker #2 on the map). Stay left and follow the Turtlehead Peak Trail north.
Image 4: The trail to Calico Tanks and Turtlehead Peak
Image 5: Calico Tanks and Turtlehead Peak Trail fork
As you gain elevationthe trail becomes less defined. Although the final destination at the top of Turtlehead Mountain is always within sight, there are various trails of different difficulties to reach the peak. Periodic blue paint markers will help guide you along the easiest and most well defined route to the peak. The blue markings begin once the trail starts to gain elevation (Route marker #3 on the map) and you follow them for the remainder of the hike.
Image 6: Blue trail markers
Image 7: Anderson following the marked trail
The trail will take you west of the summit and you will make your final approach to the north side of the peak from the east. From there, scramble up a short steep section south to reach the true summit. (Route marker #4 on the map).
Image 8: Mattson approaching the peak
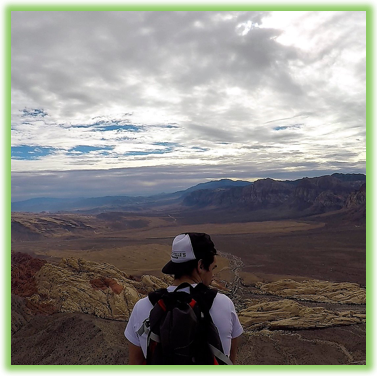
Once you reach the summit, take a well-earned break and enjoy the views. There is lots of room at the top to relax, eat lunch, sign the Summit Registry, hang your feet over the cliff edge and take in the view.
Image 9: Signing the summit registry
Image 10: Anderson taking in the view
When you are ready to begin the return journey follow the same trail back to Sandstone Quarry Parking Lot that you approached on.
WE WANT TO HEAR FROM YOU
Thank you for choosing Epic Trip Adventures as your guide. We are committed to continually updating our guides to be as relevant and accurate as possible. If you have feedback to improve this guide please leave it in the comments below.
We also want to hear about your Turtlehead Peak adventures. If you have stories, pictures or even a link to your own adventure video please share them below!
For a downloadable PDF version of this guide With easy access from Las Vegas, Calico Tanks is a great hike for families and hikers of all ages and abilities. This trail offers a short but interesting hike through the Calico Hills. Calico Tanks Trail includes some fun, and fairly easy scrambling over beautiful red sandstone formations. At the end of the trail, depending on the season, there may be water present in a Tinaja (natural water tank). There are great views from the tank but you can continue to scramble up to Calico Tanks Peak for an even better view of Red Rock Canyon. We hope you enjoy your adventure! ADVENTURE STATISTICS Time Required: 1-2 Hours Location: 27km (17 miles) west of the Las Vegas Strip in Red Rock Canyon Conservation Area Distance: 4km (2.5 miles) round trip Highest Elevation: 1500m (4921ft) Elevation Gain: 140m (450ft) Difficulty: 4/10 Season: Year round Additional Requirements: N/A DRIVING DIRECTIONS From Las Vegas: Take Nevada State Route 159 5.5 miles west from the Las Vegas city limits and turn right onto Red Rock Canyon Scenic Loop Dr. The fee to enter the Red Rock Canyon Conservation Area is $7 dollar per vehicle. Once you have entered the Conservation Area, the Visitor’s Center is on your left. Drive along Scenic Loop Dr. approximately 4 miles and park at the Sandstone Quarry parking lot. WHAT TO BRING Comfortable Footwear: A good comfortable pair of running shoes is all you need for this hike. Water: A couple bottles of water per hiker should suffice as this hike isn’t too long or strenuous. Snacks: Bring some of your favorite snacks to enjoy along the hike. Some of our favorite snacks are trail mix, bananas, beef jerky and licorice. Weather appropriate clothing: Temperatures can get up to 40 degrees Celsius (104 Fahrenheit) in
For a downloadable PDF version of this guide CLICK HERE!
With easy access from Las Vegas, Calico Tanks is a great hike for families and hikers of all ages and abilities. This trail offers a short but interesting hike through the Calico Hills. Calico Tanks Trail includes some fun, and fairly easy scrambling over beautiful red sandstone formations. At the end of the trail, depending on the season, there may be water present in a Tinaja (natural water tank). There are great views from the tank but you can continue to scramble up to Calico Tanks Peak for an even better view of Red Rock Canyon. We hope you enjoy your adventure!
ADVENTURE STATISTICS
Time Required: 1-2 Hours
Location: 27km (17 miles) west of the Las Vegas Strip in Red Rock Canyon Conservation Area
Distance: 4km (2.5 miles) round trip
Highest Elevation:1500m (4921ft)
Elevation Gain:140m (450ft)
Difficulty:4/10
Season: Year round
Additional Requirements: N/A
DRIVING DIRECTIONS
From Las Vegas: Take Nevada State Route 159 5.5 miles west from the Las Vegas city limits and turn right onto Red Rock Canyon Scenic Loop Dr. The fee to enter the Red Rock Canyon Conservation Area is $7 dollar per vehicle. Once you have entered the Conservation Area, the Visitor’s Center is on your left. Drive along Scenic Loop Dr. approximately 4 miles and park at the Sandstone Quarry parking lot.
WHAT TO BRING
Comfortable Footwear: A good comfortable pair of running shoes is all you need for this hike.
Water: A couple bottles of water per hiker should suffice as this hike isn’t too long or strenuous.
Snacks: Bring some of your favorite snacks to enjoy along the hike. Some of our favorite snacks are trail mix, bananas, beef jerky and licorice.
Weather appropriate clothing: Temperatures can get up to 40 degrees Celsius (104 Fahrenheit) in the summertime. Shorts, a breathable long sleeve shirt, and a hat can help protect you from the sun and heat. In the winter, the temperature can drop below freezing and it is possible there will be snow. Check the weather forecast and plan accordingly.
Sunscreen: If it is sunny, and you’re like Mattson, who easily burns, bring sunscreen!
Camera: There are numerous photo opportunities you won’t want to miss along the way.
This Guide: Print a copy of this guide to reference throughout the hike.
OTHER CONSIDERATIONS
Wildlife: Watch where you put your hands and feet! Rattlesnakes, scorpions and venomous spiders may be taking shelter under rocks and shrubs where you can’t see. Never try to touch, collect or kill these animals.
Heat and Dehydration: In Red Rock Canyon there is little shade and the days can be very hot. Limit sun exposure during the hottest parts of the day. Appropriate clothing such as a hat and long sleeve shirt can protect your skin from the sun as well as reduce the risk of dehydration. The hot weather increases your need for fluid intake. Ensure you are hydrating throughout the day, don’t wait until you’re thirsty to start drinking.
Flash Floods: Avoid hiking in canyons during rainstorms and move to higher ground. Due to the topography of the area, flash flooding can occur very quickly. Do not attempt to drive or walk through water flowing across a road or trail.
Leave No Trace: It is important that we enjoy the outdoors responsibly and sustainably. Some key principles to consider when hiking to “Leave No Trace” are:
Plan ahead and prepare: Proper planning allows adventurers to hike safely while minimizing damage to the land.
Travel on durable surfaces: Stick to the trail when possible. If there is no trail, or you must travel off trail, stay on durable surfaces to reduce your impact.
Dispose of waste properly: Pack it in, pack it out.
Leave what you find: Leave rocks, plants, archaeological artifacts and other objects of interest as you find them.
Respect wildlife: Observe wildlife from a distance. Never feed wild animals.
Be considerate of other visitors: Be courteous to others to allow everyone to enjoy their outdoor experience.
Summary: Calico Tanks Trail starts off at the Sandstone Quarry Parking Lot. The hike heads north from the parking lot to a signed fork in the trail. From the fork, the Calico Tanks Trail heads into the Calico Hills where it winds overtop and through unique sandstone formations. The official trail ends at an overlook of a large natural water tank but you can scramble from there to the summit of Calico Tanks Peak.
Image 1: Hiking Calico Tanks Adventure Map
Step-By-Step Guide:
From the Sandstone Quarry Parking Lot (Route marker #1 on the map), follow the trail from the north side of the lot.
Image 2: Sandstone Quarry Parking Lot trailhead
Image 3: Hikes starting from Sandstone Quarry Parking Lot
The trail is well signed. After about 2km (1.3 miles) there will be a fork in the trail splitting the Calico Tanks Trail from Turtlehead Peak (Route marker #2 on the map). Stay right and follow the Calico Tanks Trail east.
Image 4: The trail to Calico Tanks and Turtlehead Peak
Image 5: Calico Tanks and Turtlehead Peak trail fork
The trail becomes less defined as you make your way into the Calico Hills. There are a few sandstone ramps and stairs as you make your way along the intermittent trail. You will need to partake in some basic scrambling and climbing over rocks which adds to the enjoyment of this beautiful hike.
Image 6: Mattson hiking into the Calico Hills
After a bit of climbing, the Tinaja (natural water tank) will come into view (Route marker #3 on the map). The amount of water in the tank depends on the season, it can be dry in the summer months or frozen in the winter.
The tank is a great spot to take a break, have a snack, and enjoy the vantage point. The view looking back to the west (the direction you came from) is especially spectacular.
Image 7: The Tinaja (natural water tank)
The Tinaja is the end of the official Calico Tanks Trail. If you’re up for an additional challenge and some more adventuring you can scramble to the summit of Calico Tanks Peak. From the Tinaja, there is no marked trail to the summit. The easiest route is to head northeast around the tank and begin scrambling up the sandstone face.
An American Flag marks the summit (Route marker #4 on the map). At the flag, a box containing a “Sign In Registry” and a collection of items left by previous hikers await you. Sign in and enjoy the scenic vista before returning to Sandstone Quarry Parking Lot by retracing your steps back down the same trail.
Image 8: Anderson at the summit of Calico Tanks Peak
Image 9: The summit box at Calico Tanks Peak
WE WANT TO HEAR FROM YOU
Thank you for choosing Epic Trip Adventures as your guide. We are committed to continually updating our guides to be as relevant and accurate as possible. If you have feedback to improve this guide please leave it in the comments below.
We also want to hear about your Calico Tanks adventures. If you have stories, pictures or even a link to your own adventure video please share them below!
For a downloadable PDF version of this guide Rawson Lake is a beautiful, green, alpine lake with Mount Sarrail as the incredibly stunning backdrop. This is one of the most beautiful hikes in Kananaskis and reaching the lake is well worth the moderate climb. The trail to Rawson Lake begins at Upper Kananaskis Lake and offers great views of the surrounding mountains, Sarrail Falls and the lush forest. ADVENTURE STATISTICS Time Required: 2-3 Hours Location: 136km west of Calgary in Peter Lougheed Provincial Park Distance: 8km round trip Highest Elevation: 2100m Elevation Gain: 400m Difficulty: 5/10 – Well marked trail with moderate elevation gain. Season: June to mid-October Additional Requirements: N/A DRIVING DIRECTIONS From Calgary: Take the Trans-Canada (Hwy 1) west approximately 70 km to Kananaskis Trail (Hwy 40) and then follow that 50 km to Kananaskis Lakes Trail. Turn right onto Kananaskis Lakes Trail and follow it for 13 km. Take a left on Upper Lake Drive and park at the south end of the Upper Kananaskis Lake Day Use Area. From Canmore: Take the Trans-Canada(Hwy 1) east approximately 30 km to Kananaskis Trail (Hwy 40) and then follow that 50 km to Kananaskis Lakes Trail. Turn right onto Kananaskis Lakes Trail and follow it for 13 km. Take a left on Upper Lake Drive and park at the south end of the Upper Kananaskis Lake Day Use Area. WHAT TO BRING Comfortable Footwear: Hiking shoes.Make sure your shoes are broken in prior to tackling this hike to prevent unexpected blisters. You could get away with running shoes but having extra grip on the rock surfaces will definitely come in handy! Water: Two bottles of water per hiker should suffice as this hike isn’t too strenuous. Snacks: Bring some of your favorite snacks to enjoy along the hike as well as a light
For a downloadable PDF version of this guide CLICK HERE!
Rawson Lake is a beautiful, green, alpine lake with Mount Sarrail as the incredibly stunning backdrop. This is one of the most beautiful hikes in Kananaskis and reaching the lake is well worth the moderate climb. The trail to Rawson Lake begins at Upper Kananaskis Lake and offers great views of the surrounding mountains, Sarrail Falls and the lush forest.
ADVENTURE STATISTICS
Time Required: 2-3 Hours
Location: 136km west of Calgary in Peter Lougheed Provincial Park
Distance: 8km round trip
Highest Elevation:2100m
Elevation Gain:400m
Difficulty:5/10 – Well marked trail with moderate elevation gain.
Season: June to mid-October
Additional Requirements: N/A
DRIVING DIRECTIONS
From Calgary: Take the Trans-Canada (Hwy 1) west approximately 70 km to Kananaskis Trail (Hwy 40) and then follow that 50 km to Kananaskis Lakes Trail. Turn right onto Kananaskis Lakes Trail and follow it for 13 km. Take a left on Upper Lake Drive and park at the south end of the Upper Kananaskis Lake Day Use Area.
From Canmore: Take the Trans-Canada(Hwy 1) east approximately 30 km to Kananaskis Trail (Hwy 40) and then follow that 50 km to Kananaskis Lakes Trail. Turn right onto Kananaskis Lakes Trail and follow it for 13 km. Take a left on Upper Lake Drive and park at the south end of the Upper Kananaskis Lake Day Use Area.
WHAT TO BRING
Comfortable Footwear: Hiking shoes.Make sure your shoes are broken in prior to tackling this hike to prevent unexpected blisters. You could get away with running shoes but having extra grip on the rock surfaces will definitely come in handy!
Water: Two bottles of water per hiker should suffice as this hike isn’t too strenuous.
Snacks: Bring some of your favorite snacks to enjoy along the hike as well as a light lunch for when you arrive at the lake. Some of our favorites snacks are trail mix, bananas, beef jerky and licorice.
Weather appropriate clothing: You will be exposed to the elements throughout this hike. Check the weather forecast and plan accordingly.
Sunscreen: If it is sunny and you’re like Mattson, who easily burns, bring sunscreen!
Insect Repellent: Insect repellent can greatly improve your hiking experience.
Bear Spray: You are in bear country. Always hike with bear spray that is easily accessible.
Camera: There are numerous photo opportunities you won’t want to miss along the way.
This Guide: Print a copy of this guide to reference throughout the hike
OTHER CONSIDERATIONS
Wildlife: You will be hiking in bear country. It is always advisable to check in at the local Visitor Information Center to learn of any trail closures due to wildlife. Carry bear spray in an easily accessible location. Travel in groups of multiple hikers and make lots of noise to avoid an unexpected encounter.
Leave No Trace: It is important that we enjoy the outdoors responsibly and sustainably. Some key principles to consider when hiking to “Leave No Trace” are:
Plan ahead and prepare: Proper planning allows adventurers to hike safely while minimizing damage to the land.
Travel on durable surfaces: Stick to the trail when possible. If there is no trail, or you must travel off trail, stay on durable surfaces to reduce your impact.
Dispose of waste properly: Pack it in, pack it out.
Leave what you find: Leave rocks, plants, archaeological artifacts and other objects of interest as you find them.
Respect wildlife: Observe wildlife from a distance. Never feed wild animals.
Be considerate of other visitors: Be courteous to others to allow everyone to enjoy their outdoor experience.
Summary: Rawson Lake is a scenic trail walk starting from the Upper Kananaskis Lake Day Use Area. The trail follows Upper Kananaskis Lake Trail clockwise until it branches off to the south and begins gaining elevation to Rawson Lake. The official trail ends at the North East side of Rawson Lake. There is a less maintained rocky trail that can be followed around the lake to the far west side for a different view of the lake.
Image 1: Rawson Lake Adventure Map
Step-By-Step Guide:
From the Upper Lake Parking lot (Route marker #1 on the map), follow the trail from the south side of the lot heading clockwise around Upper Kananaskis Lake.
Image 2: The trailhead to Rawson Lake
As you follow the trail, you will cross Sarrail Creek at Sarrail Falls (Route marker #2 on the map).
Image 3: Sarrail Falls
1.2 km into the hike (approx. 100m after crossing Sarrail Creek) you will come to a T-junction (Route marker #3 on the map). Take the left trail with the sign indicating the route to Rawson Lake.
Image 4: The trail fork to Rawson Lake
Follow the trail as it begins climbing upward through the moderately steep switch backs. The trail will level off and after kilometer 3, you will arrive at Rawson Lake (Route marker #4 on the map).
Image 5: Mattson following the trail to Rawson Lake
This is the most scenic view of the Rawson Lake with Mount Sarrail as a backdrop. You can continue around the south side of the lake to the west end (Approx. 1km to the far side). The official trail ends part of the way around the lake, but there is a rocky trail that can be followed all the way to the west end.
Image 7: Rawson Lake and Mount Sarrail
Enjoy the beautiful scenery at Rawson Lake before returning to the Upper Lake Parking lot following the same trail in reverse.
WE WANT TO HEAR FROM YOU
Thank you for choosing Epic Trip Adventures as your guide. We are committed to continually updating our guides to be as relevant and accurate as possible. If you have feedback to improve this guide please leave it in the comments below.
We also want to hear about your Rawson Lake adventures. If you have stories, pictures or even a link to your own adventure video please share them below!