For a downloadable PDF version of this guide Note: Despite our enthusiasm in the video it turns out we didn’t actually find Narnia. Guess we will have to plan a return trip to the Big Island to find the true location of Narnia. This guide will give you the details of our hike and where we went in our failed attempt. Hawaii is well known for many things, one of those being beautiful waterfalls. On our search for Narnia we stumbled across a swimming hole with spectacular waterfalls. It was somewhat off the beaten path and consisted of four 30ft high narrow waterfalls that all pour into the same pool. Even though it wasn’t Narnia, it was a relatively easy hike and would be worth checking out. ADVENTURE STATISTICS Time Required: 1 hour Location: East side of Big Island upstream of Rainbow Falls Distance: 2km round trip Elevation Gain: 50ft Difficulty: 5/10 – Route finding, Rapid elevation drop to base of falls. Season: Year Round Additional Requirements: N/A DRIVING DIRECTIONS From Hilo: If you have Google maps, try putting in Wailuku River Falls. This is the approximate location of the trailhead. If it doesn’t come up, follow Waianuenue Ave and you will come to a bridge. The bridge is about 1.8 miles (2.9km) passed the Hilo Medical Center. Pull over just passed the bridge and park safely off the road. The trailhead is nearby. WHAT TO BRING Comfortable Footwear: Hiking shoes. Water: Hawaii is hot and humid. It is easy to become dehydrated when hiking. Snacks: Bring some of your favorite snacks to enjoy along the hike. Some of our favorite snacks are trail mix, bananas, beef jerky and licorice. Weather appropriate clothing: Bring a swimsuit. On a
For a downloadable PDF version of this guide CLICK HERE!
Note: Despite our enthusiasm in the video it turns out we didn’t actually find Narnia. Guess we will have to plan a return trip to the Big Island to find the true location of Narnia. This guide will give you the details of our hike and where we went in our failed attempt.
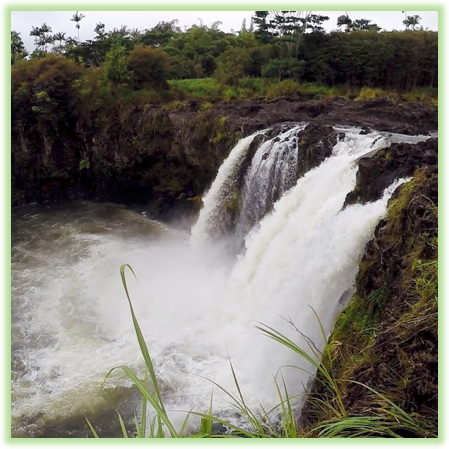
Hawaii is well known for many things, one of those being beautiful waterfalls. On our search for Narnia we stumbled across a swimming hole with spectacular waterfalls. It was somewhat off the beaten path and consisted of four 30ft high narrow waterfalls that all pour into the same pool. Even though it wasn’t Narnia, it was a relatively easy hike and would be worth checking out.
ADVENTURE STATISTICS
Time Required: 1 hour
Location: East side of Big Island upstream of Rainbow Falls
Distance: 2km round trip
Elevation Gain:50ft
Difficulty:5/10 – Route finding, Rapid elevation drop to base of falls.
Season: Year Round
Additional Requirements: N/A
DRIVING DIRECTIONS
From Hilo: If you have Google maps, try putting in Wailuku River Falls. This is the approximate location of the trailhead. If it doesn’t come up, follow Waianuenue Ave and you will come to a bridge. The bridge is about 1.8 miles (2.9km) passed the Hilo Medical Center. Pull over just passed the bridge and park safely off the road. The trailhead is nearby.
WHAT TO BRING
Comfortable Footwear: Hiking shoes.
Water: Hawaii is hot and humid. It is easy to become dehydrated when hiking.
Snacks: Bring some of your favorite snacks to enjoy along the hike. Some of our favorite snacks are trail mix, bananas, beef jerky and licorice.
Weather appropriate clothing: Bring a swimsuit. On a nice day swimming in the pools makes the hike very worthwhile.
Sunscreen: If it is sunny and you’re like Mattson, who easily burns, bring sunscreen!
Insect Repellent: Insect repellent can greatly improve your hiking experience.
Camera: There are numerous photo opportunities you won’t want to miss.
This Guide: Print a copy of this guide to reference throughout the hike
OTHER CONSIDERATIONS
Flash Floods:This area of the Big Island receives over 100 inches of rain annually. Heavy rains can cause flash floods in streams and rivers. If there is flooding and fast-moving water, attempting to swim or cross streams and rivers can be very dangerous and potentially fatal.
Leave No Trace: It is important that we enjoy the outdoors responsibly and sustainably. Some key principles to consider when hiking to “Leave No Trace” are:
Plan ahead and prepare: Proper planning allows adventurers to hike safely while minimizing damage to the land.
Travel on durable surfaces: Stick to the trail when possible. If there is no trail, or you must travel off trail, stay on durable surfaces to reduce your impact.
Dispose of waste properly: Pack it in, pack it out.
Leave what you find: Leave rocks, plants, archaeological artifacts and other objects of interest as you find them.
Respect wildlife: Observe wildlife from a distance. Never feed wild animals.
Be considerate of other visitors: Be courteous to others to allow everyone to enjoy their outdoor experience.
Summary: On our search for Narnia we wanted to check out Rainbow Falls first. The trailheads for Narnia and Rainbow Falls are only about ten minutes apart (we think) so if you haven’t seen Rainbow Falls its worth stopping. Further up the road the waterfalls and swimming pool we reached were a short 1km hike in through dense bamboo forest. Once you reach the falls you will have to scurry your way down to the base of the falls which can be difficult.
Image 1: Searching For Narnia Adventure Map
Step-By-Step Guide:
We recommend checking out Rainbow Falls (Route marker #1 on the map) before making your way up. Rainbow Falls is a very well-known touristy attraction. Take the turn of onto Rainbow Dr. from Waianeuneu Ave. You will see a parking lot and a paved path with signs directing you where to go. It’s hard to miss.
Image 2: Rainbow Falls
Image 3: Rainbow Falls Lookout
Once you’ve seen enough of Rainbow Falls, get back in your vehicle and drive west down Waianuenue Ave for 2.1 miles (3.3km) until you cross a bridge. This bridge crosses the Wailuku River which feeds Pe’epe’e Falls and Rainbow Falls. Park your car on the shoulder just passed the bridge. Get out and enjoy the view of a beautiful waterfall upstream.
Image 4: View of the waterfalls from the bridge
Image 5: The trailhead to the falls
Now for the hike to Narnia (or so we thought)! If you are standing in the middle of the bridge facing upstream, the trail will enter the forest to your right, just past the bridge, and continue upstream along the ridge parallel with the Wailuku River. There will be a sign for where to enter. As you’re hiking along the trail towards the falls, you should keep the river to your left. Once you make it to the end of the trail you will be at the top of the large waterfall you could see from the bridge. To the right of that will be a pool with four waterfalls flowing into it (Route marker #3 on the map)! Take a look at the falls from the top to get an idea of how you will get down to the base.
Image 6: The large waterfall that could be seen from the bridge
Image 7: The swimming pool
To get down to the falls head back the same way you came, this time with the river on your right. About halfway back on that trail, keep your eyes open to the left and find a trail that leads down to a small creek that is the drainage from the waterfalls. Once you make your way to that creek, follow it up stream and feast your eyes upon some awesome waterfalls. Before getting in the water be aware of the flow rate. Water is powerful so unless you’re super confident, give the waterfalls some space.
Image 8: The four waterfalls
Image 9: Mattson at the waterfalls
WE WANT TO HEAR FROM YOU
Thank you for choosing Epic Trip Adventures as your guide. We are committed to continually updating our guides to be as relevant and accurate as possible. If you have feedback to improve this guide please leave it in the comments below.
We also want to hear about your Search for Narnia. If you have stories, pictures or even a link to your own adventure video please share them below!
For a downloadable PDF version of this guide The hike into Waimanu Valley is nothing less than exhilarating and is by far the most challenging hike we have done on the Big Island. Waimanu Valley is incredibly lush with waterfalls cascading down its green slopes and ocean waves crashing on the rocky shore. Sleeping in Waimanu is a camping experience well worth the grueling hike to get there! ADVENTURE STATISTICS Time Required: 2 days+ Location: Kohala Forest Reserve, 50 miles northwest of Hilo Distance: 19 miles (30.5km) round trip Highest Elevation: 1394ft (425m) Elevation Gain: 5250ft (1600m) round trip Difficulty: 9/10 – Rapid elevation gain, long and exhausting, can be very slippery if wet. Season: Year Round Additional Requirements: DLNR Camping Permit DRIVING DIRECTIONS From Kailua-Kona: Take the Hawaii Belt Rd North for 53 miles to the town of Honokaa. Turn left onto Plumeria St, follow it for 0.7 miles and then turn left onto HI-240/Honokaa-Waipio Rd. This road will take you to the parking lot at Waipio Lookout. From Hilo: Take the Hawaii Belt Rd North 39 miles to HI-240/Honokaa-Waipio Rd. Take a right onto the 240 and follow it to the parking lot at Waipio Lookout. WHAT TO BRING Comfortable Footwear: Hiking shoes.Make sure your shoes are broken in prior to tackling this hike to prevent unexpected blisters. You could get away with running shoes but this trail can become very slippery with the slightest rain so some hefty hikers might be your best bet. Pack an extra pair of light shoes or sandals for when you arrive at your campsite as you will want to get out of your hikers and walk around a bit. You may also want to consider bringing water shoes/sandals. There are two large streams that must be crossed by foot. You can
For a downloadable PDF version of this guide CLICK HERE!
The hike into Waimanu Valley is nothing less than exhilarating and is by far the most challenging hike we have done on the Big Island. Waimanu Valley is incredibly lush with waterfalls cascading down its green slopes and ocean waves crashing on the rocky shore. Sleeping in Waimanu is a camping experience well worth the grueling hike to get there!
ADVENTURE STATISTICS
Time Required: 2 days+
Location: Kohala Forest Reserve, 50 miles northwest of Hilo
Distance: 19 miles (30.5km) round trip
Highest Elevation: 1394ft (425m)
Elevation Gain:5250ft (1600m) round trip
Difficulty:9/10 – Rapid elevation gain, long and exhausting, can be very slippery if wet.
Season: Year Round
Additional Requirements: DLNR Camping Permit
DRIVING DIRECTIONS
From Kailua-Kona: Take the Hawaii Belt Rd North for 53 miles to the town of Honokaa. Turn left onto Plumeria St, follow it for 0.7 miles and then turn left onto HI-240/Honokaa-Waipio Rd. This road will take you to the parking lot at Waipio Lookout.
From Hilo: Take the Hawaii Belt Rd North 39 miles to HI-240/Honokaa-Waipio Rd. Take a right onto the 240 and follow it to the parking lot at Waipio Lookout.
WHAT TO BRING
Comfortable Footwear: Hiking shoes.Make sure your shoes are broken in prior to tackling this hike to prevent unexpected blisters. You could get away with running shoes but this trail can become very slippery with the slightest rain so some hefty hikers might be your best bet. Pack an extra pair of light shoes or sandals for when you arrive at your campsite as you will want to get out of your hikers and walk around a bit. You may also want to consider bringing water shoes/sandals. There are two large streams that must be crossed by foot. You can either remove your shoes and go barefoot, or pack some water shoes/sandals. Be aware that the streams are full of slippery rocks and it can be hard on your feet if you choose to go barefoot.
Water: This hike is long with intervals of very intense elevation gain. If the sun is out, you will sweat a lot so bring plenty of water. It is also important to bring water purification tablets or a water filter pump. There are plenty of places to refill water along the trail and there is a freshwater stream near the campsites but you MUST purify the water!
Food: Plan your meals based on the amount of days you will stay in Waimanu Valley. There are campfires at each campsite or you can bring a camping stove to cook your food. Don’t forget to bring snacks to enjoy along the hike as well. Some of our favorite snacks are trail mix, bananas, beef jerky and licorice.
Weather appropriate clothing: You will be exposed to the elements throughout this hike. Waimanu is in the rainforest so there is a good chance you will be rained on at some point. Bring tarps, rain coats, and possibly a few changes of clothes. If you get a sunny day, light breathable clothing is your best bet as it is Hawaii and it can get pretty hot. Check the weather forecast and plan accordingly.
Games/Entertainment: Bring playing cards or other small compact games for entertainment at the campsite in the evening.
Lighter/matches: If you want to have a campfire make sure you remember to bring a lighter or some matches.
Sunscreen:If it is sunny and you’re like Mattson, who easily burns, bring sunscreen!
Insect Repellent: Insect repellent can greatly improve your hiking experience.
Headlamp/Flashlight: Once the sun goes down in the valley it gets very dark! be sure you have a flashlight or headlamp to find your way around.
Toilet paper: Overnight trip… enough said
Camera: There are numerous photo opportunities you won’t want to miss.
This Guide: Print a copy of this guide to reference throughout the hike
OTHER CONSIDERATIONS
Flash Floods: This area of the Big Island receives over 100 inches of rain annually. Heavy rains can cause flash floods in streams and rivers. If there is flooding and fast moving water, attempting to cross streams and rivers can be very dangerous and potentially fatal.
Parking: Cars parked at the Waipio Valley Lookout for more than 24 hours may be towed. Parking is available at Waipio Valley Artworks for $20 a day. Call them ahead of time at 808-775-0958.
Permits: All campers must register for and purchase a camping permit to stay in Waimanu Valley. Permits can be reserved up to a month in advance and cost 18$/night for up to 6 people (12$/night for Hawaii residents). There are nine campsites to choose from. They are labelled 1-9 running east to west. We would recommend campsites 6-9 as they are closer to the sandy section of the beach and are more private.
Purchase a permit at the Department of Land and Natural Resources camping permit website (https://camping.ehawaii.gov/camping/all,details,31720.html).
Leave No Trace: It is important that we enjoy the outdoors responsibly and sustainably. Some key principles to consider when hiking to “Leave No Trace” are:
Plan ahead and prepare: Proper planning allows adventurers to hike safely while minimizing damage to the land.
Travel on durable surfaces: Stick to the trail when possible. If there is no trail, or you must travel off trail, stay on durable surfaces to reduce your impact.
Dispose of waste properly: Pack it in, pack it out.
Leave what you find: Leave rocks, plants, archaeological artifacts and other objects of interest as you find them.
Respect wildlife: Observe wildlife from a distance. Never feed wild animals.
Be considerate of other visitors: Be courteous to others to allow everyone to enjoy their outdoor experience.
Summary: The 19-mile round trip hike to Waimanu Valley begins at the Waipio Valley lookout and starts with a steep, short walk down into the valley. The trail to Waimanu Valley, also known as the Muliwai Trail, begins across the black sand beach at the west wall of Waipio Valley. The Muliwai trail ascends the steep west wall of the valley and then traverses 13 gullies before descending into Waimanu Valley. Waimanu Valley has 9 designated camping spots that are just off the beach. Once in Waimanu you can take a bonus side trip into the heart of the valley to check out Wai’ilikahi Falls.
Image 1: Waimanu Valley Adventure Map
Step-By-Step Guide:
Take a couple of minutes to soak in the views at the Waipio Valley Lookout (Route marker #1 on the map) before you begin your trek down the paved road into the valley. The road down is very steep and walking down it can be hard on the legs. Stick your thumb out as you descend and maybe if you’re lucky someone will let you jump in the back of their pickup. Once you get to the bottom of the valley turn right and follow the dirt road to the beach.
Image 2: Waipio Valley
Image 3: The descent into Waipio
Once you reach the beach, head west across the valley. You will have to cross a large stream blocking your path as you head west. We recommend taking your shoes off to keep them dry, or switching to water shoes if you have them. Be careful as there are large, slippery rocks in the water that make the footing difficult. After you cross the river, the warm sand on your feet feels nice as you walk along the beach to the west wall of the valley.
Image 4: Anderson crossing the river
From the beach you can see the large Z pattern cut out of the west side of the valley in front of you. That is the first part of Muliwai Trail (they call this part the Z-trail) that takes you out of Waipio Valley. There is a trail just south of the beach that runs parallel to the ocean that will take you to the start of the Muliwai Trail.
Image 5: The west wall of Waipio Valley
Image 6: The trail parallel to the ocean
Walk on the trail behind the beach until you reach a sign and gate. Do not go through the gate. To the right of the gate is a sign and the trailhead for then Muliwai Trail (Route marker #2 on the map).
The first section of the Muliwai trail is the most challenging part of the entire hike. You will ascend about 1200 feet of elevation up long steep switchbacks. Take your time as you ascend and enjoy the spectacular views. On a clear day, you can see deep into the heart of Waipio Valley and catch a glimpse of a massive waterfall called Hi’ilawe Falls.
Image 7: The beginning of the Muliwai Trail
Image 8: View from the top of the switchbacks
Once you’re at the top of the Z-trail and out of Waipio Valley the hike gets much easier. It is about 5-miles to Waimanu Valley from here and along the way there will be boulder hopping, stream crossings, and gully dipping. There are 13 gullies that you will dip in and out of. Some are big, some small, some have waterfalls, and some are dry. Gully number seven is our personal favorite because it has a nice spot to stop for a refreshing swim. Try to keep count of the gullies so you know approximately how much futher you have to go. There are also some State of Hawaii mile markers along the trail.
Image 9: A waterfall along the trail
After 5 miles you will reach the final descent into Waimanu Valley. Take extra care on this section of the hike as the trail is narrow and can be VERY slippery! Once you reach the valley floor you will have one final stream to cross before you reach the camping area (Route marker #3 on the map). There is a rope running perpendicular to the river that can be used for guidance and stability. Once again, be careful when crossing the river as the rocks are slippery.
Camping:
The campsites are labelled 1-9 from east to west. There are also two outhouses that you can use. If you need to refill water the trail continues past campsite 9 to a small waterfall on the west wall of Waimanu Valley. Be sure to purify this water before drinking it!
Image 10: Waimanu Valley Camping Map
Image 11: Setting up our campsite
Image 12: The water source
Wai’ilikahi Falls:
If you’re eager for more adventure and have time to spend in the valley, you can hike to Wai’ilikahi Falls (Route marker #4 on the map).This hike is about an hour each way but isn’t very well marked or maintained. There is a lot of bush whacking and trail finding necessary, plus you will be walking through tons of spider webs.
The trail to Wai’ilikahi Falls heads from campsite 9 inland along the west wall of the valley. Follow the trail to the small water source near the campsites and then keep going. There are colored markers tied to the trees marking the best way to the falls but they can be difficult to find. If you get lost, the valley wall should be on your right and if you follow that wall long enough you will eventually reach Wai’ilikahi Falls. When you’re about ten minutes from the falls you will come to a stream on your left. Keep it on your left and follow it upstream to the falls.
Image 13: Markers showing the best path to the falls
Image 14: Wai’ilikahi Falls
After enjoying your stay in Waimanu Valley it is time for the challenging hike back to the Waipio Valley Lookout. Follow the Muliwai Trail back to Waipio Valley the same way you came. Be sure to leave some extra energy in the tank because the hike up the east wall of Waipio Valley is brutal!
WE WANT TO HEAR FROM YOU
Thank you for choosing Epic Trip Adventures as your guide. We are committed to continually updating our guides to be as relevant and accurate as possible. If you have feedback to improve this guide please leave it in the comments below.
We also want to hear about your Waimanu Valley adventures. If you have stories, pictures or even a link to your own adventure video please share them below!
For a downloadable PDF version of this guide The stunning visuals provided by Akaka Falls, one of the tallest waterfalls in Hawaii, are well worth the short hike to get there. The paved concrete path has easy to manage stairs with hand rails, and can be accomplished by children and adults of all ages. ADVENTURE STATISTICS Time Required: 45 Minutes Location: 17 miles (27km) north of Hilo Distance: 0.4 mile (0.7km) loop Highest Elevation: 800ft (300m) Elevation Gain: not noteworthy Difficulty: 2/10 – Paved path Season: Year round Additional Requirements: N/A DRIVING DIRECTIONS From Hilo: Take the HI-19 (Hawaii Belt Rd) 11 miles north of Hilo. You’ll come to a small town called Honomu and take a left onto Honomu Rd just passed mile marker 13.5. Very shortly after that, take another left onto State Hwy 220. Turn right to stay on State Hwy 220. Follow that road for 3.3 miles until you reach the Akaka Falls State Park. WHAT TO BRING Comfortable Footwear:Hikers or runners will do just fine. You could probably get away with wearing sandals on this one. Water:This is a short hike, but it is always smart to bring water. It is hot in Hawaii and you don’t want to get dehydrated. Sunscreen:If it is sunny and you’re like Mattson, who easily burns, bring sunscreen! Insect Repellent:Insect repellent can greatly improve your hiking experience. Camera:There are numerous photo opportunities you won’t want to miss. This Guide:Print a copy of this guide to reference throughout the hike OTHER CONSIDERATIONS Fees: The parking lot near the falls charges $5.00 per vehicle but if you wanted to park just outside the parking lot, it’s free and will only add another 200ft to your hike. There is also a $1.00 per person admission fee to enter the
For a downloadable PDF version of this guide CLICK HERE!
The stunning visuals provided by Akaka Falls, one of the tallest waterfalls in Hawaii, are well worth the short hike to get there. The paved concrete path has easy to manage stairs with hand rails, and can be accomplished by children and adults of all ages.
ADVENTURE STATISTICS
Time Required: 45 Minutes
Location: 17 miles (27km) north of Hilo
Distance: 0.4 mile (0.7km) loop
Highest Elevation:800ft (300m)
Elevation Gain:not noteworthy
Difficulty:2/10 – Paved path
Season: Year round
Additional Requirements: N/A
DRIVING DIRECTIONS
From Hilo: Take the HI-19 (Hawaii Belt Rd) 11 miles north of Hilo. You’ll come to a small town called Honomu and take a left onto Honomu Rd just passed mile marker 13.5. Very shortly after that, take another left onto State Hwy 220. Turn right to stay on State Hwy 220. Follow that road for 3.3 miles until you reach the Akaka Falls State Park.
WHAT TO BRING
Comfortable Footwear:Hikers or runners will do just fine. You could probably get away with wearing sandals on this one.
Water:This is a short hike, but it is always smart to bring water. It is hot in Hawaii and you don’t want to get dehydrated.
Sunscreen:If it is sunny and you’re like Mattson, who easily burns, bring sunscreen!
Insect Repellent:Insect repellent can greatly improve your hiking experience.
Camera:There are numerous photo opportunities you won’t want to miss.
This Guide:Print a copy of this guide to reference throughout the hike
OTHER CONSIDERATIONS
Fees: The parking lot near the falls charges $5.00 per vehicle but if you wanted to park just outside the parking lot, it’s free and will only add another 200ft to your hike. There is also a $1.00 per person admission fee to enter the trail.
Time of day: The view of the falls is a little bit brighter in the morning hours when the sun is in the east. The falls are beautiful at any time of the day but there is more direct sunlight on the falls in the morning making this the best time to visit.
Leave No Trace: It is important that we enjoy the outdoors responsibly and sustainably. Some key principles to consider when hiking to “Leave No Trace” are:
Plan ahead and prepare: Proper planning allows adventurers to hike safely while minimizing damage to the land.
Travel on durable surfaces: Stick to the trail when possible. If there is no trail, or you must travel off trail, stay on durable surfaces to reduce your impact.
Dispose of waste properly: Pack it in, pack it out.
Leave what you find: Leave rocks, plants, archaeological artifacts and other objects of interest as you find them.
Respect wildlife: Observe wildlife from a distance. Never feed wild animals.
Be considerate of other visitors: Be courteous to others to allow everyone to enjoy their outdoor experience.
Summary: The starting point for this hike is at the parking lot just off Hwy 220. The trail is a large loop that will take you to view points of both Kahuna Falls and Akaka Falls. We recommend travelling counterclockwise around the loop as Akaka Falls are far superior to Kahuna Falls and make for a better climax to the hike.
Image 1: Akaka Falls Adventure Map
Step-By-Step Guide:
The trailhead (Route marker #1 on the map) is on the west side of the parking lot and the washrooms at the north end. There is usually someone at the trailhead collecting the $1.00 per hiker fee. Follow the trail down a short set of stairs down until you reach a fork. There will be signs marking left to Akaka Falls and right to Kahuna Falls. This is a looped trail so you will see both, but we recommend heading right to Kahuna Falls first.
Image 2: The Akaka Falls Trailhead
Follow the path to the right through beautiful lush green ferns and orchid trees. The elevation is very minimal. This is a very nice trail for the families.
Continue following the loop until you reach the Kahuna Falls lookout point (Route marker #2 on the map). Although Kahuna Falls is nearly the same size as Akaka Falls, it doesn’t receive the same fame and attention as it is more difficult to view. Kahuna Falls can only be viewed from the side so it can be difficult to see with the lush vegetation growing around it. On a day when the water is high and flowing fast, Kahuna can shoot out passed the trees and be very pretty to look at. Although the view of Kahuna falls isn’t spectacular, it is a nice walk through the bamboo trees and a good pre-cursor to the spectacular Akaka Falls.
Image 3: Kahuna Falls
After continuing around the loop from Kahuna Falls the trail leads to the more famous and spectacular Akaka Falls (Route marker #3 on the map). The immense 442ft waterfall pours into a stream-eroded gorge. Akaka falls is one of the most famous waterfalls on the Big Island.
Image 4: The Akaka Falls viewpoint
Enjoy the view of the spectacular falls before continuing along the trail counterclockwise to return to the parking lot where you left your vehicle.
WE WANT TO HEAR FROM YOU
Thank you for choosing Epic Trip Adventures as your guide. We are committed to continually updating our guides to be as relevant and accurate as possible. If you have feedback to improve this guide please leave it in the comments below.
We also want to hear about your Akaka Falls adventures. If you have stories, pictures or even a link to your own adventure video please share them below!
For a downloadable PDF version of this guide Mauna Kea is one of two major volcanos on the Big Island of Hawaii. Standing 13,800 ft above sea level makes Mauna Kea the highest peak in all of Hawaii. The neighboring volcano, Mona Loa, is just south of Mauna Kea and can be seen from the peak. Mauna Kea hosts the world’s largest astronomical observatory, with telescopes operated from many countries. The lack of light pollution on the Big Island makes this location ideal for observing the faintest galaxies at the edge of the observable universe. For casual star gazers like us, it is an awesome spot to try and find our favorite constellations. Summiting Mauna Kea is an experience you cannot pass up while in Hawaii. ADVENTURE STATISTICS Time Required: 5 Hours Location: 63 miles inland from Kona Distance: 8.7 miles from Visitor Station to the summit. Highest Elevation: 13,800ft (4200m) Elevation Gain: 4600ft from the Visitor Station Difficulty: 1/10 Season: Year Round Additional Requirements: 4WD Vehicle DRIVING DIRECTIONS From Kailua-Kona: Take Highway 190 north from Kona. At Mile Marker 14 turn east onto the new Daniel K. Inouye Highway (Hwy 200). Follow this until Mile Marker 28 and then turn left onto Mauna Kea Access Road. The Visitor Station is about 6 miles up the road on the right side. From Kona, the drive to the Visitor Station takes about 1-1/2 hours. From Hilo: Take the Puainako Extension (Hwy 2000) east and merge onto Saddle Road (Hwy 200). At Mile Marker 8 Highway 200 transitions seamlessly into the Daniel K. Inouye Highway (Hwy 200). Just before Mile Marker 28, turn right onto Mauna Kea Access Road. The Visitor Station is about 6 miles up the road on the right side. The drive from Hilo to the Visitor
For a downloadable PDF version of this guide CLICK HERE!
Mauna Kea is one of two major volcanos on the Big Island of Hawaii. Standing 13,800 ft above sea level makes Mauna Kea the highest peak in all of Hawaii. The neighboring volcano, Mona Loa, is just south of Mauna Kea and can be seen from the peak. Mauna Kea hosts the world’s largest astronomical observatory, with telescopes operated from many countries. The lack of light pollution on the Big Island makes this location ideal for observing the faintest galaxies at the edge of the observable universe. For casual star gazers like us, it is an awesome spot to try and find our favorite constellations. Summiting Mauna Kea is an experience you cannot pass up while in Hawaii.
ADVENTURE STATISTICS
Time Required: 5 Hours
Location: 63 miles inland from Kona
Distance: 8.7 miles from Visitor Station to the summit.
Highest Elevation:13,800ft (4200m)
Elevation Gain:4600ft from the Visitor Station
Difficulty:1/10
Season: Year Round
Additional Requirements: 4WD Vehicle
Image 1: Mauna Kea Summit
DRIVING DIRECTIONS
From Kailua-Kona: Take Highway 190 north from Kona. At Mile Marker 14 turn east onto the new Daniel K. Inouye Highway (Hwy 200). Follow this until Mile Marker 28 and then turn left onto Mauna Kea Access Road. The Visitor Station is about 6 miles up the road on the right side. From Kona, the drive to the Visitor Station takes about 1-1/2 hours.
From Hilo: Take the Puainako Extension (Hwy 2000) east and merge onto Saddle Road (Hwy 200). At Mile Marker 8 Highway 200 transitions seamlessly into the Daniel K. Inouye Highway (Hwy 200). Just before Mile Marker 28, turn right onto Mauna Kea Access Road. The Visitor Station is about 6 miles up the road on the right side. The drive from Hilo to the Visitor Station takes approximately 1 hour.
WHAT TO BRING
Comfortable Footwear:Bring runners so you can walk around once you reach the summit. There won’t be a lot of places to go, but it’s always nice to have comfy feet.
Water:Always important to bring water
Snacks: Bring some of your favorite snacks to enjoy at the summit. Some of our favorite snacks are trail mix, bananas, beef jerky and licorice.
Weather appropriate clothing:Bring warm clothes! Even though you can’t imagine being cold while in Hawaii it is usually only a few degrees above freezing at the summit. High winds are very common as well which makes it feel that much colder. Check the weather forecast and plan accordingly.
Camera:There are numerous photo opportunities you won’t want to miss.
This Guide:Print a copy of this guide to reference throughout the hike
OTHER CONSIDERATIONS
Altitude: Be mindful that there is some serious elevation gain to reach the summit. At the top of Mauna Kea there is 40 percent less oxygen than at sea level. Even the smallest amount of physical exertion will leave you gasping for air and potentially feeling a little dizzy or nauseous. If you feel out of breath or dizzy, sit down and take a break. Do not plan on summiting Mauna Kea within 24 hours after a scuba diving adventure.
Time of Day: We recommend arriving at the summit shortly before sunset. It is very cold at the top so you will not want to spend too much time there. Arriving just before sunset allows you to see the views during the day, enjoy the sunset and then check out the incredible stars from the Visitor Station after driving down from the summit.
Leave No Trace: It is important that we enjoy the outdoors responsibly and sustainably. Some key principles to consider when hiking to “Leave No Trace” are:
Plan ahead and prepare: Proper planning allows adventurers to hike safely while minimizing damage to the land.
Travel on durable surfaces: Stick to the trail when possible. If there is no trail, or you must travel off trail, stay on durable surfaces to reduce your impact.
Dispose of waste properly: Pack it in, pack it out.
Leave what you find: Leave rocks, plants, archaeological artifacts and other objects of interest as you find them.
Respect wildlife: Observe wildlife from a distance. Never feed wild animals.
Be considerate of other visitors: Be courteous to others to allow everyone to enjoy their outdoor experience.
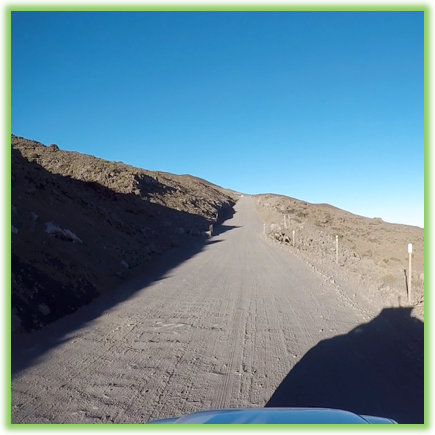
200 yards past the Visitor Station the paved road ends. From the end of the paved road follow the gravel road as it gains elevation. After 5 miles on the gravel road the final 3.5 miles of the road to the summit are paved.
Image 2: Driving to the summit
Image 3: Driving to the summit
If you don’t have a 4WD vehicle, you should not attempt to drive to the top. If you do have a 4WD vehicle, be sure to use your low gears on the way down.
There are companies that will pick you up, drive you to the top for sunset, and then drive you back down. If you don’t want to pay for a ride up, and don’t have a 4WD vehicle there may be friendly people willing to let you hop in with them and hitchhike a ride to the top.
Once you arrive at the summit take some time to walk around before finding a good spot to watch the sunset.
After enjoying the sunset begin the drive back down to the Visitor Station. The Visitor Station is a great place to make a pit stop on the way down to check out the stars. There is also a free star gazing program on Tuesday, Wednesday, Friday and Saturday from 6:00pm – 10:00pm.
Image 4: Mauna Kea Summit
WE WANT TO HEAR FROM YOU
Thank you for choosing Epic Trip Adventures as your guide. We are committed to continually updating our guides to be as relevant and accurate as possible. If you have feedback to improve this guide please leave it in the comments below.
We also want to hear about your Mauna Kea adventures. If you have stories, pictures or even a link to your own adventure video please share them below!
For a downloadable PDF version of this guide If you’ve made the trip all the way to Hawaii, South Point and Green Sand Beach have to be on your list of places to go. Green Sand Beach is a small bay surrounded by cliffs with beautiful green and black sand to relax on. It is fairly secluded, not usually that busy and has very clear blue water. For the thrill seekers, South Point is just down the road from Green Sand Beach and has a sheer 30ft cliff to jump off. The water below is unbelievably clear on a calm day. ADVENTURE STATISTICS Time Required: 4-5 hour if hiking in. Location: 1.5 hours south of Kailua-Kona Distance: 8km round trip Difficulty: 5/10 – If hiking. Otherwise it’s a simple ride in your 4WD vehicle. Season: Year round Additional Requirements: 4WD Vehicle DRIVING DIRECTIONS From Kailua-Kona: Head south on Highway 11 (Ali’i Hwy) for roughly 53 miles until you reach South Point Road (South Point Road is between the 69 and 70 mile markers). Take a right and follow that road another 10.8 miles to the Greensand Beach trailhead. To get to South Point, head back the way you came on South Point Road and take your first left after about 0.2 miles. Follow this road to South Point. From Hilo: Head south from Hilo on the Highway 11 for about 62 miles until you reach South Point Road (South Point Road is between the 69 and 70 mile markers). Take a left and follow that road another 10.8 miles to the Greensand Beach trailhead. To get to South Point, head back the way you came on South Point Road and take your first left after about 0.2 miles. Follow this road to South Point. WHAT TO BRING Comfortable Footwear: Hiking shoes if
For a downloadable PDF version of this guide CLICK HERE!
If you’ve made the trip all the way to Hawaii, South Point and Green Sand Beach have to be on your list of places to go. Green Sand Beach is a small bay surrounded by cliffs with beautiful green and black sand to relax on. It is fairly secluded, not usually that busy and has very clear blue water. For the thrill seekers, South Point is just down the road from Green Sand Beach and has a sheer 30ft cliff to jump off. The water below is unbelievably clear on a calm day.
ADVENTURE STATISTICS
Time Required: 4-5 hour if hiking in.
Location: 1.5 hours south of Kailua-Kona
Distance: 8km round trip
Difficulty:5/10 – If hiking. Otherwise it’s a simple ride in your 4WD vehicle.
Season: Year round
Additional Requirements: 4WD Vehicle
DRIVING DIRECTIONS
From Kailua-Kona: Head south on Highway 11 (Ali’i Hwy) for roughly 53 miles until you reach South Point Road (South Point Road is between the 69 and 70 mile markers). Take a right and follow that road another 10.8 miles to the Greensand Beach trailhead. To get to South Point, head back the way you came on South Point Road and take your first left after about 0.2 miles. Follow this road to South Point.
From Hilo: Head south from Hilo on the Highway 11 for about 62 miles until you reach South Point Road (South Point Road is between the 69 and 70 mile markers). Take a left and follow that road another 10.8 miles to the Greensand Beach trailhead. To get to South Point, head back the way you came on South Point Road and take your first left after about 0.2 miles. Follow this road to South Point.
WHAT TO BRING
Comfortable Footwear: Hiking shoes if you’re walking to Green Sand Beach. Water shoes are also nice to have because they are easy to wash off in the water when they get sandy. They also might help protect your feet from slapping the water if you cliff jump at South Point.
Water: If you’re hiking to Green Sand Beach, it will be very hot so it’s important to stay hydrated.
Snacks: Bring some of your favorite snacks to enjoy along the hike as well as a light lunch. Some of our favorite snacks are trail mix, bananas, beef jerky and licorice.
Sunscreen: If it is sunny and you’re like Mattson, who easily burns, bring sunscreen!
Swimming Suit: Both Green Sand Beach and South Point are excellent places to cool off in the water. Don’t forget your trunks.
4WD Vehicle: The hike to Green Sand is long, flat, and hot! It’s a lot more fun in a vehicle. Unfortunately, the road is pretty rough so if you don’t have 4WD you won’t be able to drive in.
Snorkel Gear: The water is beautifully clear at Green Sand Beach, if you enjoy snorkeling and watching the fish, bring your goggles.
Camera: There are numerous photo opportunities you won’t want to miss.
This Guide: Print a copy of this guide to reference throughout the hike
OTHER CONSIDERATIONS
Currents: If you choose to jump off the cliffs at South Point, keep in mind that the area surrounding the cliffs has a reputation for having very strong currents. Don’t jump if you aren’t a strong swimmer, or the water looks rough.
Wind: You will probably notice many large windmills as you drive in. The south point of the Big Island is very windy and generates a lot of natural power for the people of Hawaii. Be careful when walking near any cliff edges as an unexpected gust of wind could throw you off balance.
Cliff Jumping: Cliff Jumping can be a lot of fun, but it can also be very dangerous. Be sensible and make educated decisions when deciding whether or not to cliff jump. Never jump without inspecting the water below. Know your limits. Do not try flips if you are not confident in your special awareness and acrobatics. Always land feet first.
4WD Tips: Drive slow and smart. Approach all hills as straight and head on as possible. The best way to not get stuck is to drive slow but not stop.
Leave No Trace: It is important that we enjoy the outdoors responsibly and sustainably. Some key principles to consider when hiking to “Leave No Trace” are:
Plan ahead and prepare: Proper planning allows adventurers to hike safely while minimizing damage to the land.
Travel on durable surfaces: Stick to the trail when possible. If there is no trail, or you must travel off trail, stay on durable surfaces to reduce your impact.
Dispose of waste properly: Pack it in, pack it out.
Leave what you find: Leave rocks, plants, archaeological artifacts and other objects of interest as you find them.
Respect wildlife: Observe wildlife from a distance. Never feed wild animals.
Be considerate of other visitors: Be courteous to others to allow everyone to enjoy their outdoor experience.
Summary: A day trip to South Point is a must do when on the Big Island. Green Sand Beach is one of the most unique beaches on the big island and if you are a daredevil South Point has the best cliff jumping on the island.
Image 1: Green Sand Beach And South Point Adventure Map
Step-By-Step Guide:
Green Sand Beach is just past the turn for South Point on South Point Road. If you are hiking to the beach, find parking in the parking area (Route marker #1 on the map). From the parking area either 4WD or hike east along the coastline with the ocean on your right side. There is a bumpy dirt road that will take you 2.5 miles to the beach (Route marker #2 on the map). It isn’t hard to find the beach, just a long grueling hike. If you are lucky, maybe someone with a pickup might stop and offer a ride.
Image 2: Driving to Green Sand Beach
Once you reach Green Sand Beach there is a railing with stairs that take you down to the water. The beach here gets its name from the unique green tinted sand. The cliffs on the east side of the bay are also very interesting to explore.
We do not recommend jumping off any cliffs here. The water is shallow and there aren’t many safe places for jumping.
Image 3: Green Sand Beach
Image 4: Exploring the cliffs at Green Sand Beach
To get to South Point head back to South Point Road and take your first left. The road will take you to a parking area at South Point (Route marker #3 on the map). When you arrive at South Point, you’ll see old hoist assemblies that were once used to raise and lower small boats into the water. There is a metal ladder hanging from the cliff that you can use to climb up after jumping into the water. Be mindful of ocean currents. The waters around South Point are a remarkable demonstration of the ocean’s power. Only jump where the hoist is. This area is protected by land from the strong currents coming westward.
Also note that the area where the hoist is located isn’t actually “the southern most part in the United States”. The actual southernmost point is a few hundred yards further south than the cliff jumping area.
Image 5: Anderson cliff jumping at South Point
WE WANT TO HEAR FROM YOU
Thank you for choosing Epic Trip Adventures as your guide. We are committed to continually updating our guides to be as relevant and accurate as possible. If you have feedback to improve this guide please leave it in the comments below.
We also want to hear about your Green Sand Beach and South Point adventures. If you have stories, pictures or even a link to your own adventure video please share them below!